ChatGPT stands out as one of the most robust language models available today. It’s capable of generating texts that closely resemble human-like conversation and can perform tasks such as translation and summarization, among other functionalities. This makes ChatGPT a preferred choice among developers and businesses seeking to enhance their AI capabilities.
That’s why we’re here to guide you on integrating some of the most popular AI models into your Spring Boot application. Get ready to maximize the potential of ChatGPT for your project.
Step 1
First, we will visit https://start.spring.io/ and generate our project.
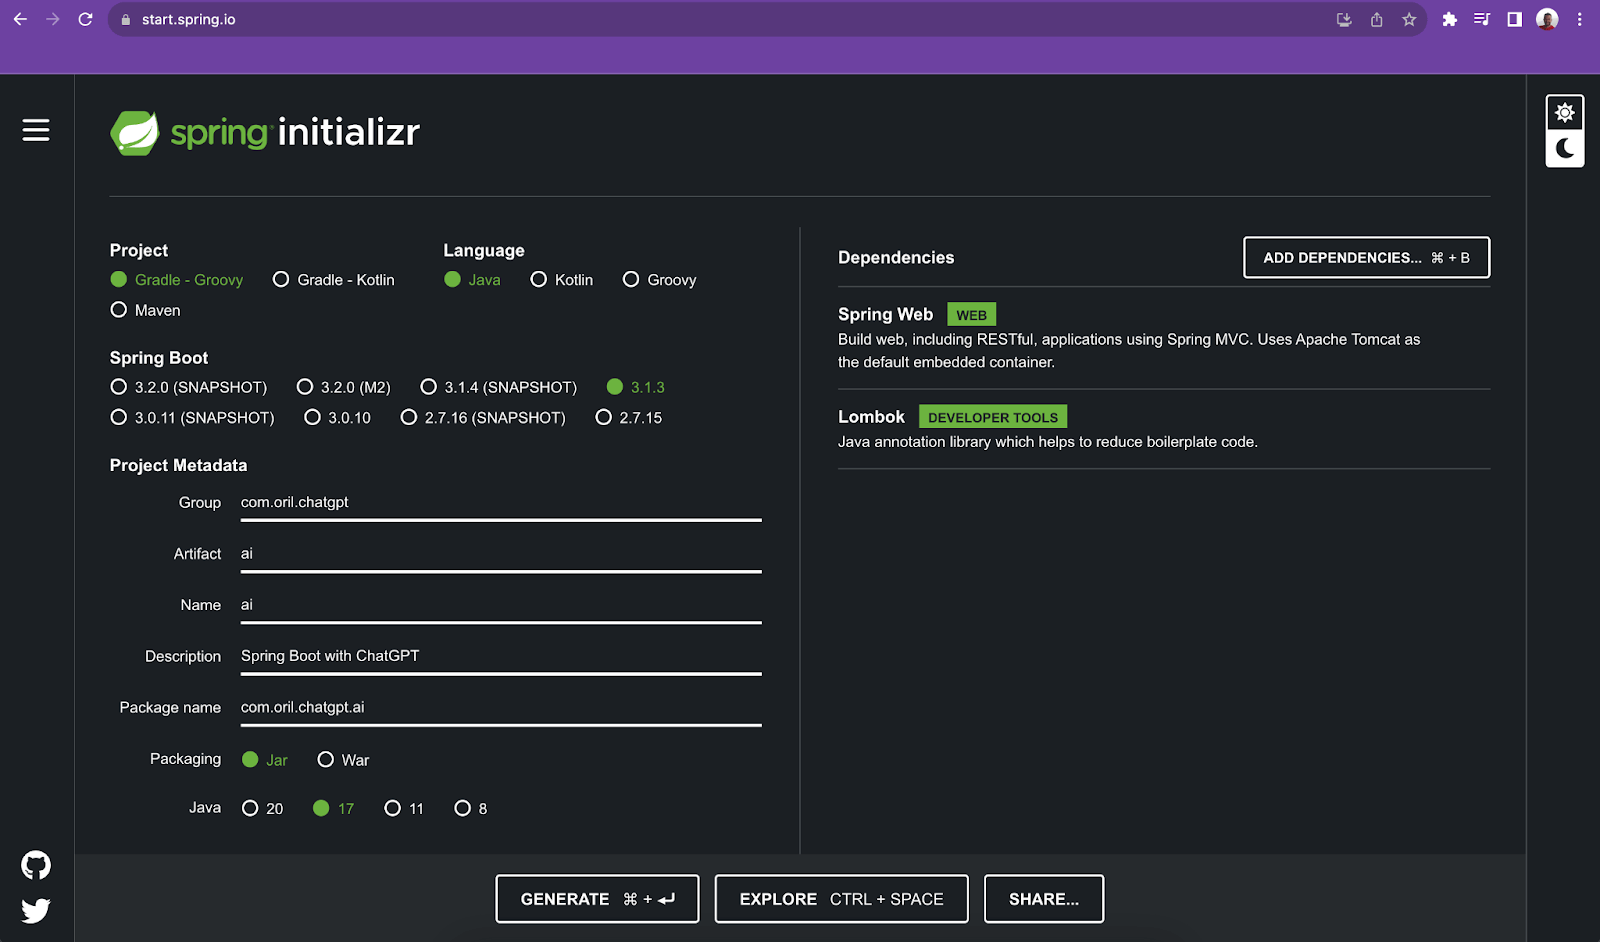
For this project, we have to include just two dependencies:
- Spring Web
- Lombok
Now, you need to generate an API key to use the capabilities of ChatGPT within your application.
Go to https://platform.openai.com/account/api-keys and click Create new secret key. Give it a name, then copy it to the clipboard after it’s created. Now go to your IDE and open up a recently generated project.
Step 2
Go to the resources folder and open the application.yml file. By default, it generates a project with application.properties. You can use or change it to application.yml, as I have done.
We need to add two properties: one for the API secret and the other for the API URL:
Ai:
  secret: sk-8uWrcoGNAXRIMEXIhzQXT3BlbkFJeNHgdsfuTuYPtF69YPvTy
  url: https://api.openai.com/v1/chat/completions
Next, we can create a controller that will accept requests. Name it ApiController. Here how the content looks:
@RequestMapping(value = "/api/v1")
@RestController
@AllArgsConstructor
public class ApiController {


   private final AiRequestProcessor aiProcessor;


    @PostMapping(value = "/ai/request")
    public ResponseEntity<ApiResponse> get(@RequestBody ApiRequest request) {
 return ResponseEntity.ok(aiProcessor.process(request));
 }
}
We’ve added an AiRequestProcessor that will handle all the logic of our requests. We can also see that the request body accepts the ApiRequest class. Let’s add it:
@Data
@AllArgsConstructor
@NoArgsConstructor
public class ApiRequest {
private String message;
}
Step 3
We need to create an AiRequestProcessor class that will handle requests and send them to ChatGPT:
@Service
@Log4j2
@AllArgsConstructor
public class AiRequestProcessor {


  private final GptRequestBuilder gpt;


  public ApiResponse process(ApiRequest request) {
log.info("### -> Incoming request: {}", request.getMessage());
ChatGptResponse response = gpt.executeRequest(request);
log.info("### -> ChatGPT response: {}", response);
return new ApiResponse(response);
 }
}
Here it works like an intermediate processor. We also used loggers to view the output of a request and response. But the actual job is done inside the GptRequestBuilder class, and we will add it now:
@Service
public class GptRequestBuilder {


  private final RestTemplate rest;
  private final String URL;
  private final String SECRET;


 public GptRequestBuilder(@Value("${ai.secret}") String secret,
                    @Value("${ai.url}") String url) {
this.URL = url;
this.SECRET = secret;
this.rest = new RestTemplate();
}


 public ChatGptResponse executeRequest(ApiRequest request) {
HttpHeaders headers = new HttpHeaders();
headers.set("Authorization", "Bearer " + SECRET);


HttpEntity<ChatGptRequest> httpEntity = new HttpEntity<>(new      ChatGptRequest(request), headers);


ResponseEntity<ChatGptResponse> responseEntity = rest.postForEntity(URL, httpEntity, ChatGptResponse.class);
return responseEntity.getBody();
}
}
We used config properties from application.yml and added RestTemplate.
We have also created an executeRequest method that accepts ApiRequest objects. We need to convert our ApiRequest to the specific data type format ChatGPT accepts as a parameter in their API.
Look at how it’s done:
HttpEntity<ChatGptRequest> httpEntity =
new HttpEntity<>(new ChatGptRequest(request), headers);
Step 4
Let’s create ChatGptRequest class and see its structure:
@Data
@AllArgsConstructor
@NoArgsConstructor
public class ChatGptRequest {


  private String model;
  private List<ChatGptRequestMessage> messages;


  public ChatGptRequest(ApiRequest request) {
this.model = "gpt-3.5-turbo-16k-0613";
this.messages = List.of(new ChatGptRequestMessage(request));
}


}
Following this, we have another POJO to implement, which is ChatGptRequestMessage:
@Data
@AllArgsConstructor
@NoArgsConstructor
public class ChatGptRequestMessage {


  private String role;
  private String content;


  public ChatGptRequestMessage(ApiRequest request) {
this.role = "user";
this.content = request.getMessage();
  }
}
The latest classes we want to create are ChatGptResponse, Choice, and Messages. They will hold a response from ChatGPT API:
@Data
@AllArgsConstructor
@NoArgsConstructor
@JsonIgnoreProperties(ignoreUnknown = true)
public class ChatGptResponse {


  private String id;
  private List<Choice> choices;


}
Here is the Choice class:
@Data
@AllArgsConstructor
@NoArgsConstructor
@JsonIgnoreProperties(ignoreUnknown = true)
public class Choice {


  private int index;
  private Message message;


}
And the Message class:
@Data
@AllArgsConstructor
@NoArgsConstructor
public class Message {


  private String role;
  private String content;
}
And that’s basically what we need for request objects. We are all set to start the project and execute our first request.
Step 5
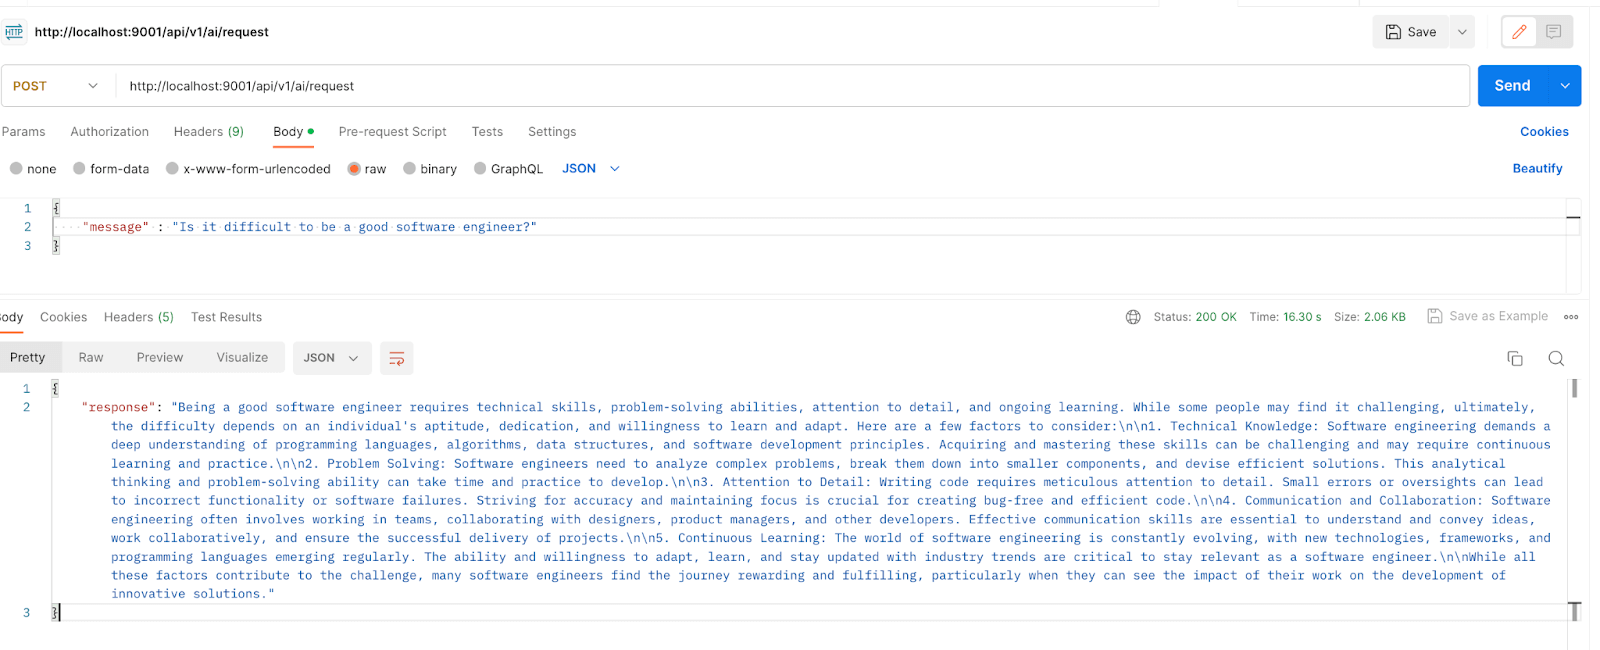
Let’s start the project and test our endpoint. We use Postman for this task:
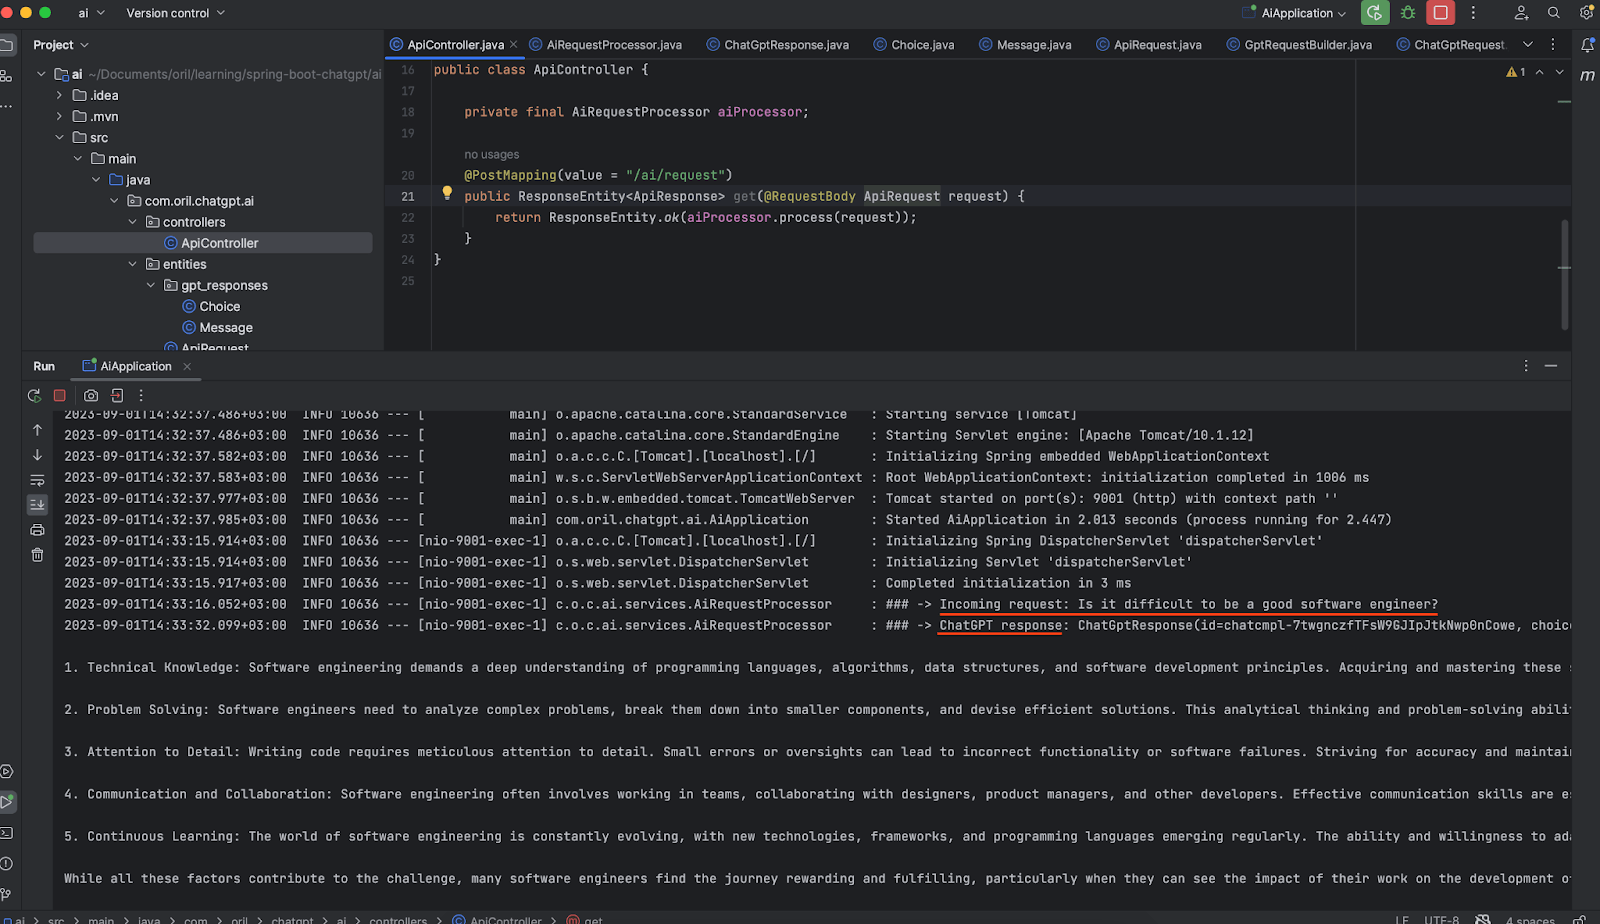
In the server, you can find the same answer from ChatGPT:
To Sum Up
As you see, you can effortlessly incorporate ChatGPT’s capabilities into your project by following these steps. Whether you want to improve customer support, develop interactive chatbots, create engaging content, or explore other possible applications, ChatGPT provides a flexible solution.
Follow us on Github to access more valuable resources.