Snapshot testing has recently become widely popular in front-end development. And for a good reason.
As an instrument, snapshot allows running the app through rigorous testing, increasing the test coverage, automating manual processes when writing scripts, and more.
So, today we’ll detail the snapshot technology and explain how it works in simple words.
First Things First – What Is Snapshot Testing
Snapshot testing was born due to the need to simplify the process of writing tests for react components. If you’ve ever written detailed and thorough tests, you probably know that it is a time-consuming process. So, snapshot testing serves a critical mission – to help developers quickly and efficiently generate tests.
In a nutshell, snapshot testing is a process of taking “an image” of the system and rendering the components into text (a snapshot). Once the components are snapped, this technology will compare the recorded snapshots during future executions.
Unlike many other UI testing methods, this method never asserts the correct behavior of the application functionality. Instead, it carries output comparison. In other words, this technology ensures your output behaves the way it is supposed to, without any ‘surprises’ rather than showing whether the code works.
Snapshot Testing of the Demo Project Based on Angular and Jest
Let’s see how Snapshot Testing works through an example – our Angular demo project tested with the Jest framework. You can find more details in the project repository.
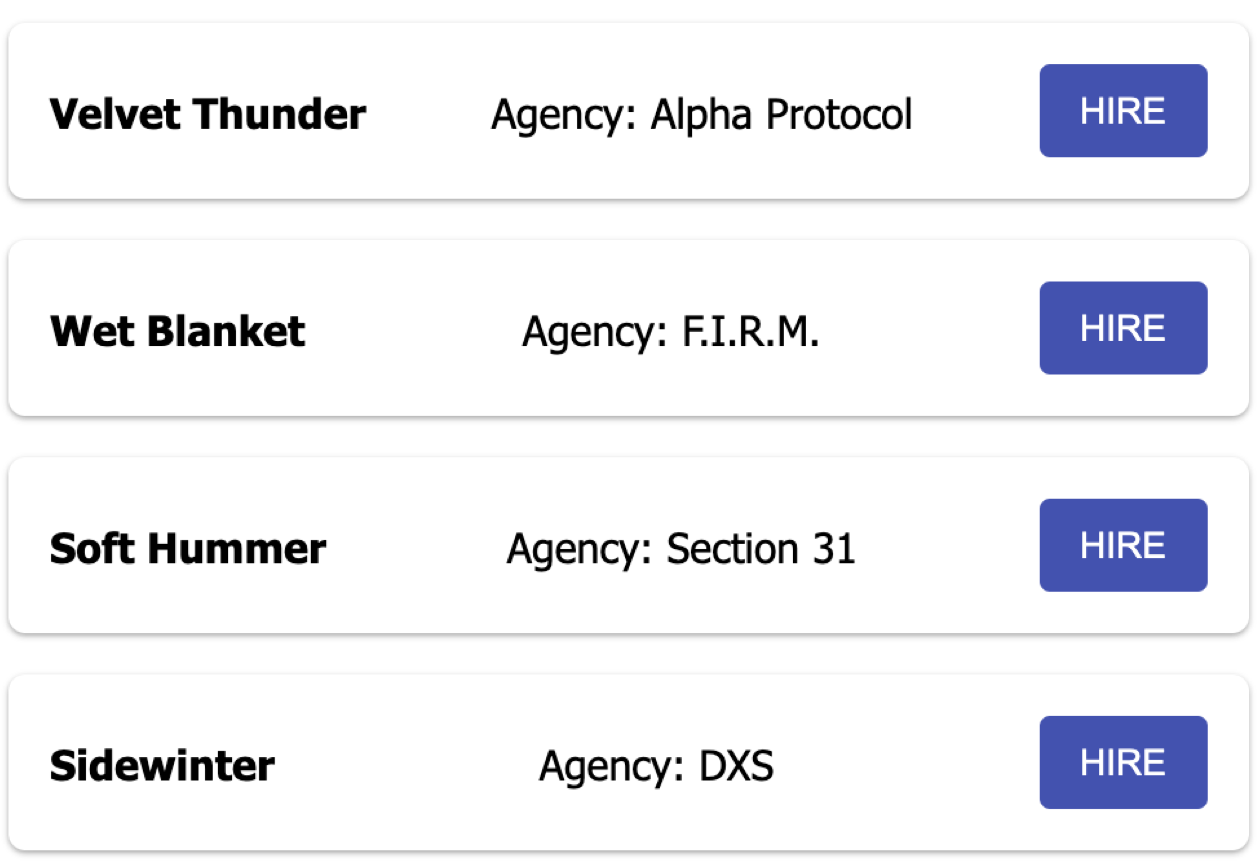
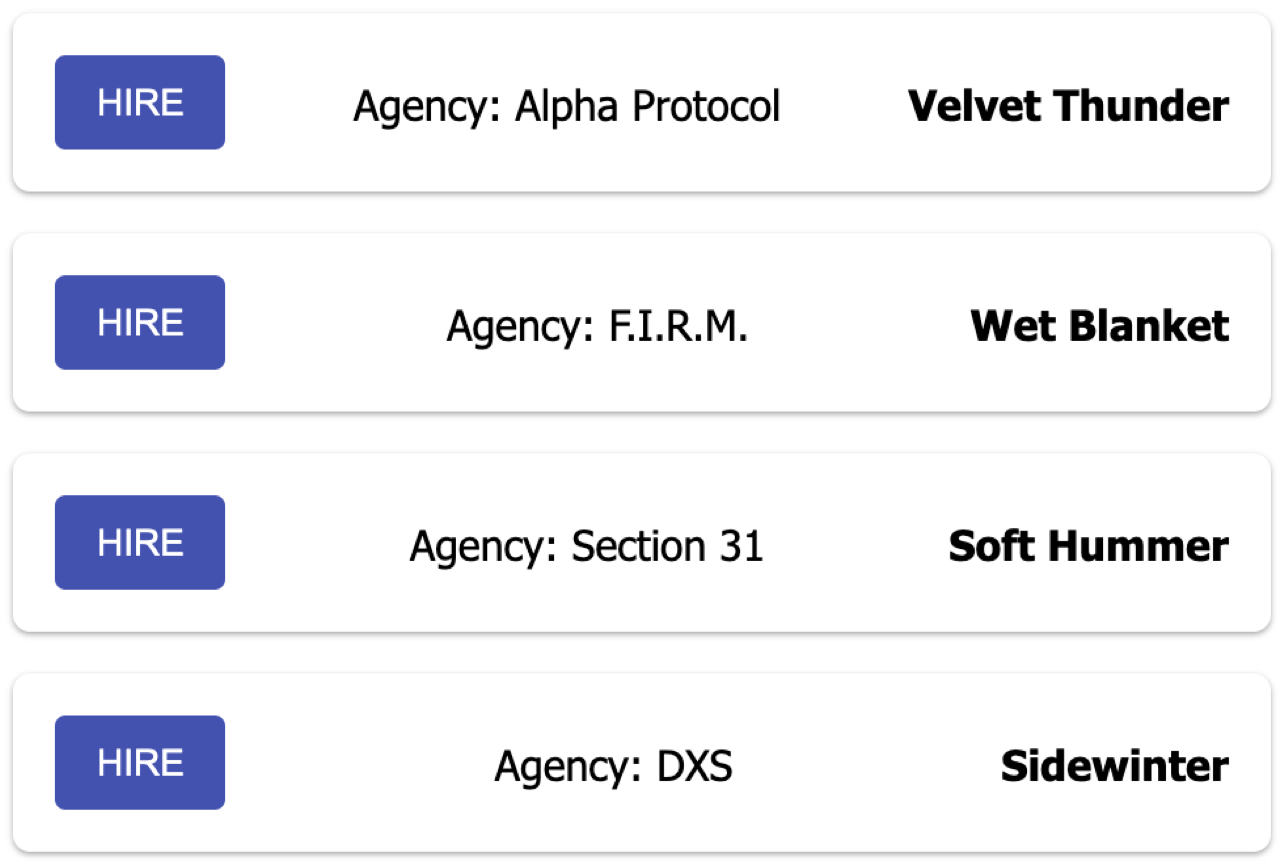
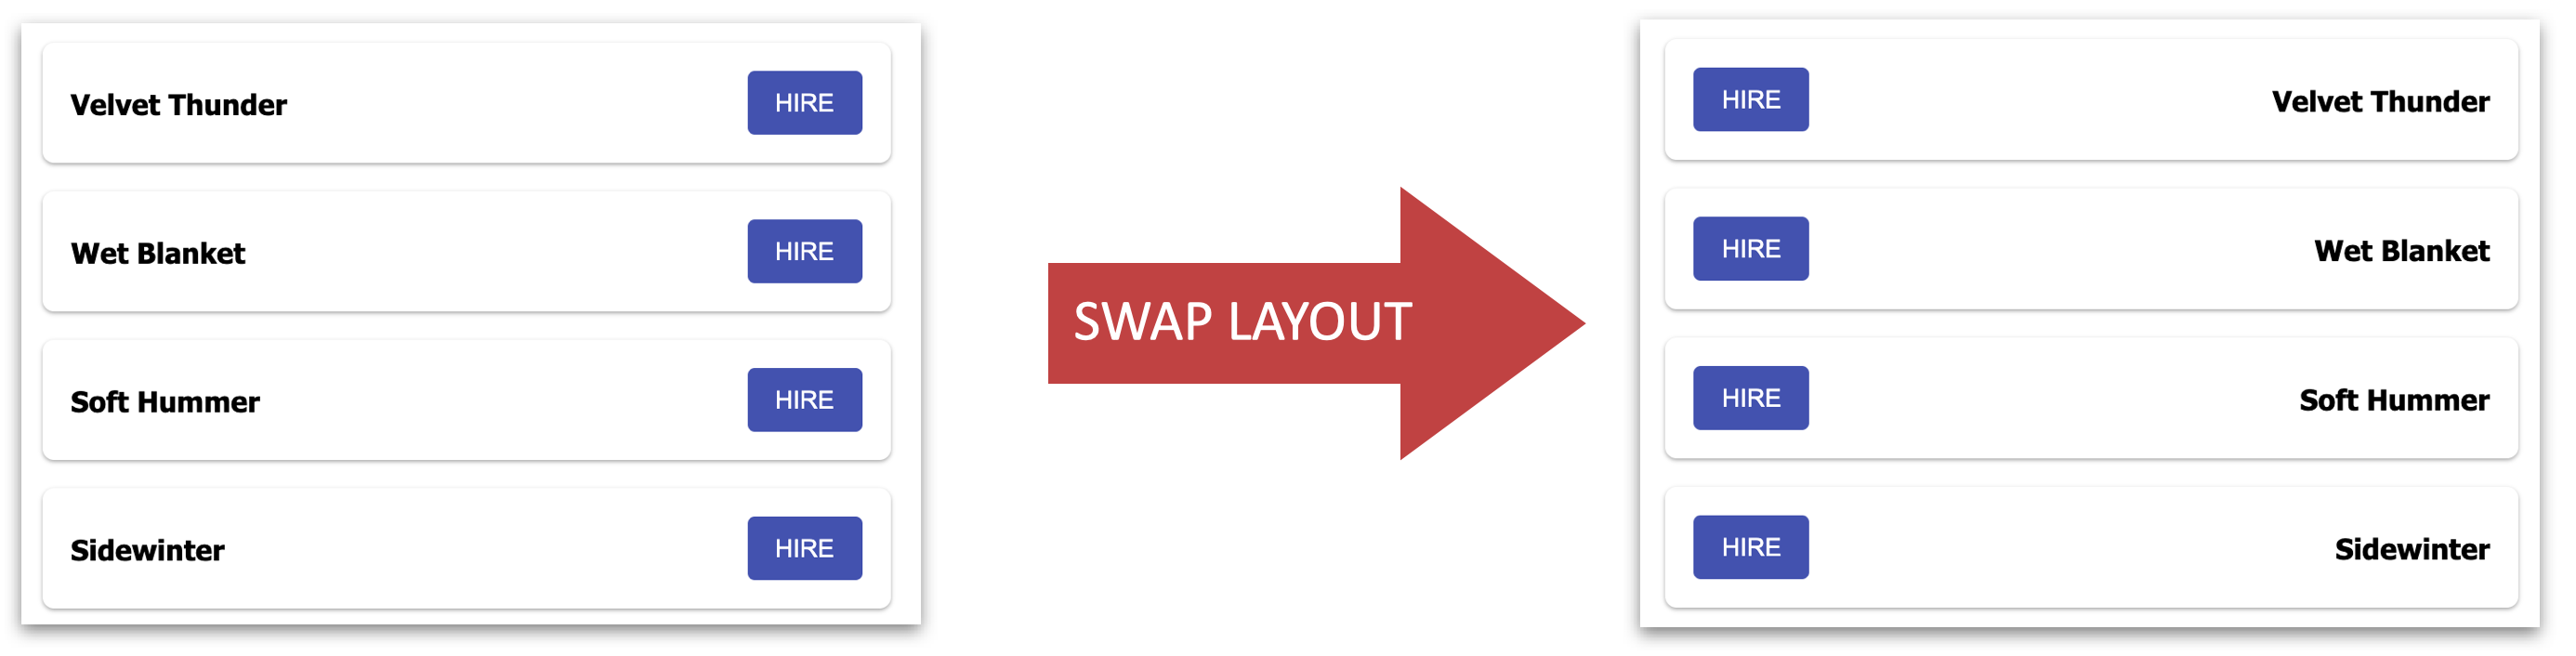
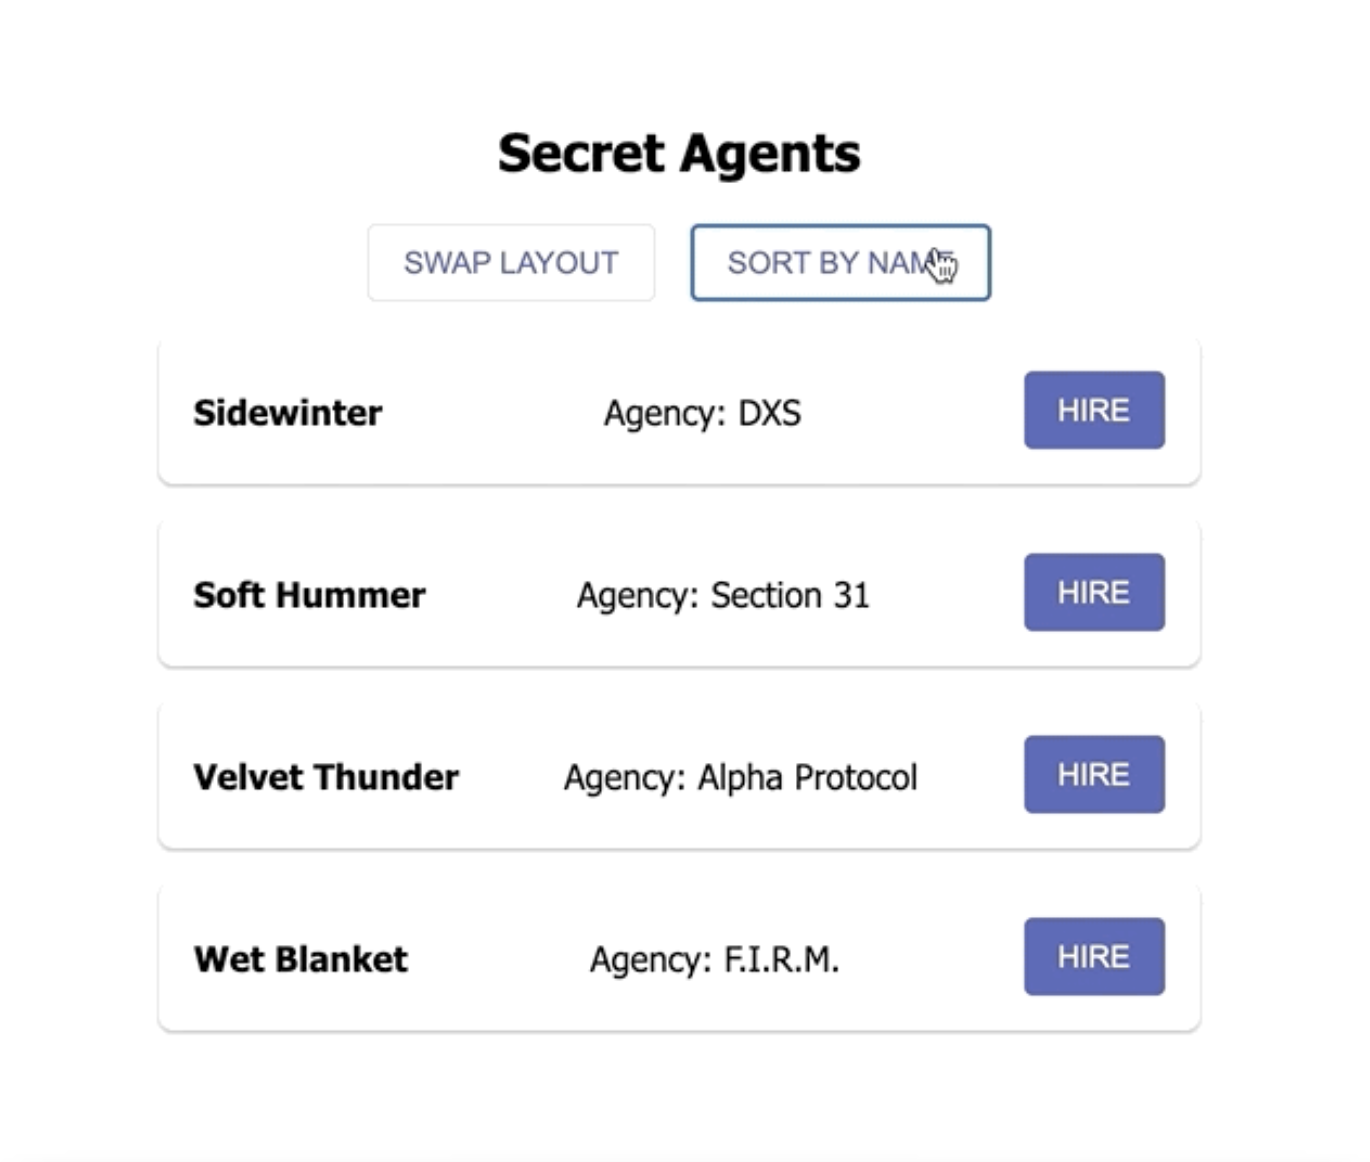
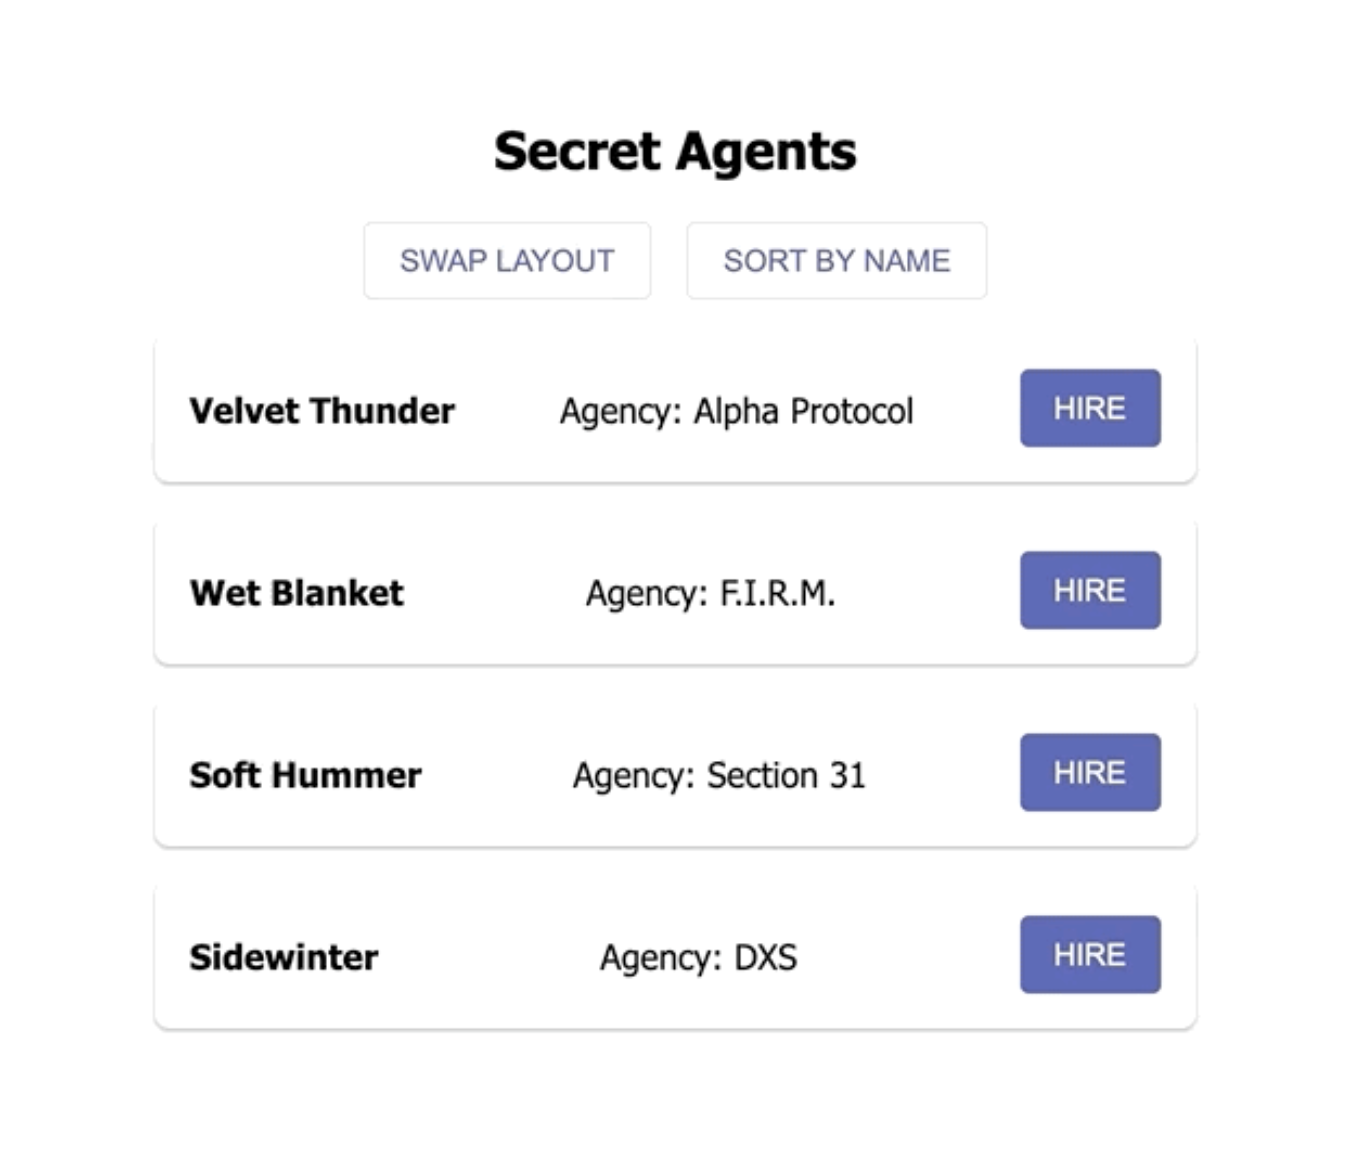
We created a simple app that contains a list of Secret Agents. You can see their names and hire them. The app allows you to swap the layout from right to left and left to right and sort the agents by name.
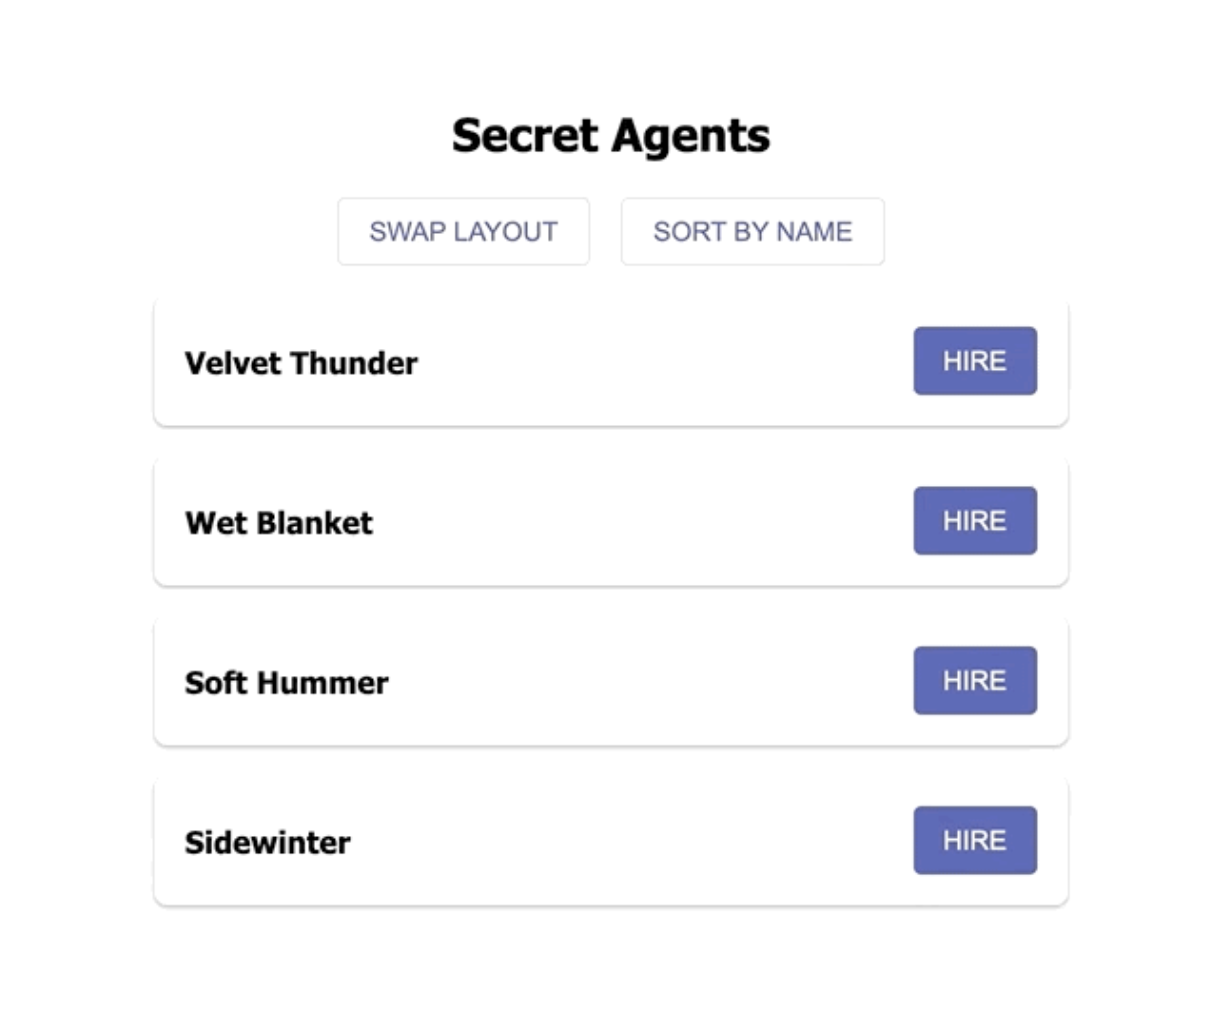
There are two components in the app:
1.A container with the title, two buttons (SWAP LAYOUT and SORT BY NAME), looping through a cycle for our Secret Agents, and component (map) rendering.
2.Cards for every Secret Agent.
HTML Code Testing the Hard Way
Want to know the difference between snapshot testing and traditional testing methods? We’ll show you its perks by testing the card component. And first, let’s see how traditional testing will cope with the task.
So, every time we apply SWAP LAYOUT, our card layout has to change. Literally, the title and the button switch their positions.
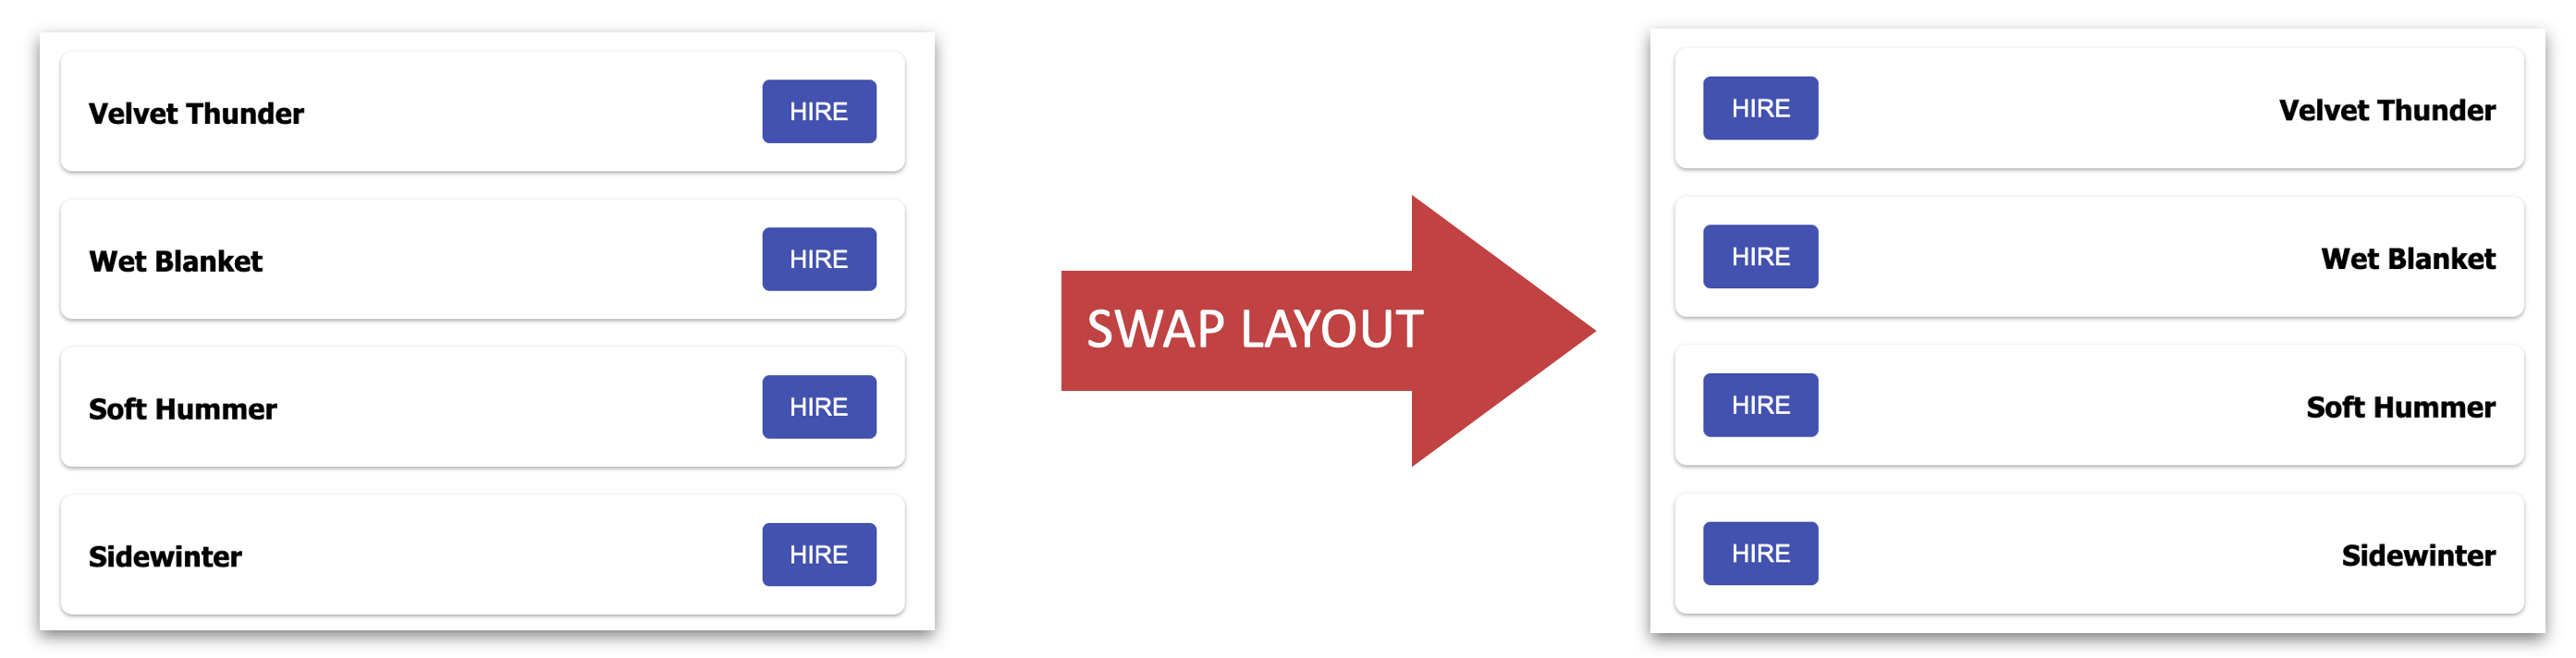
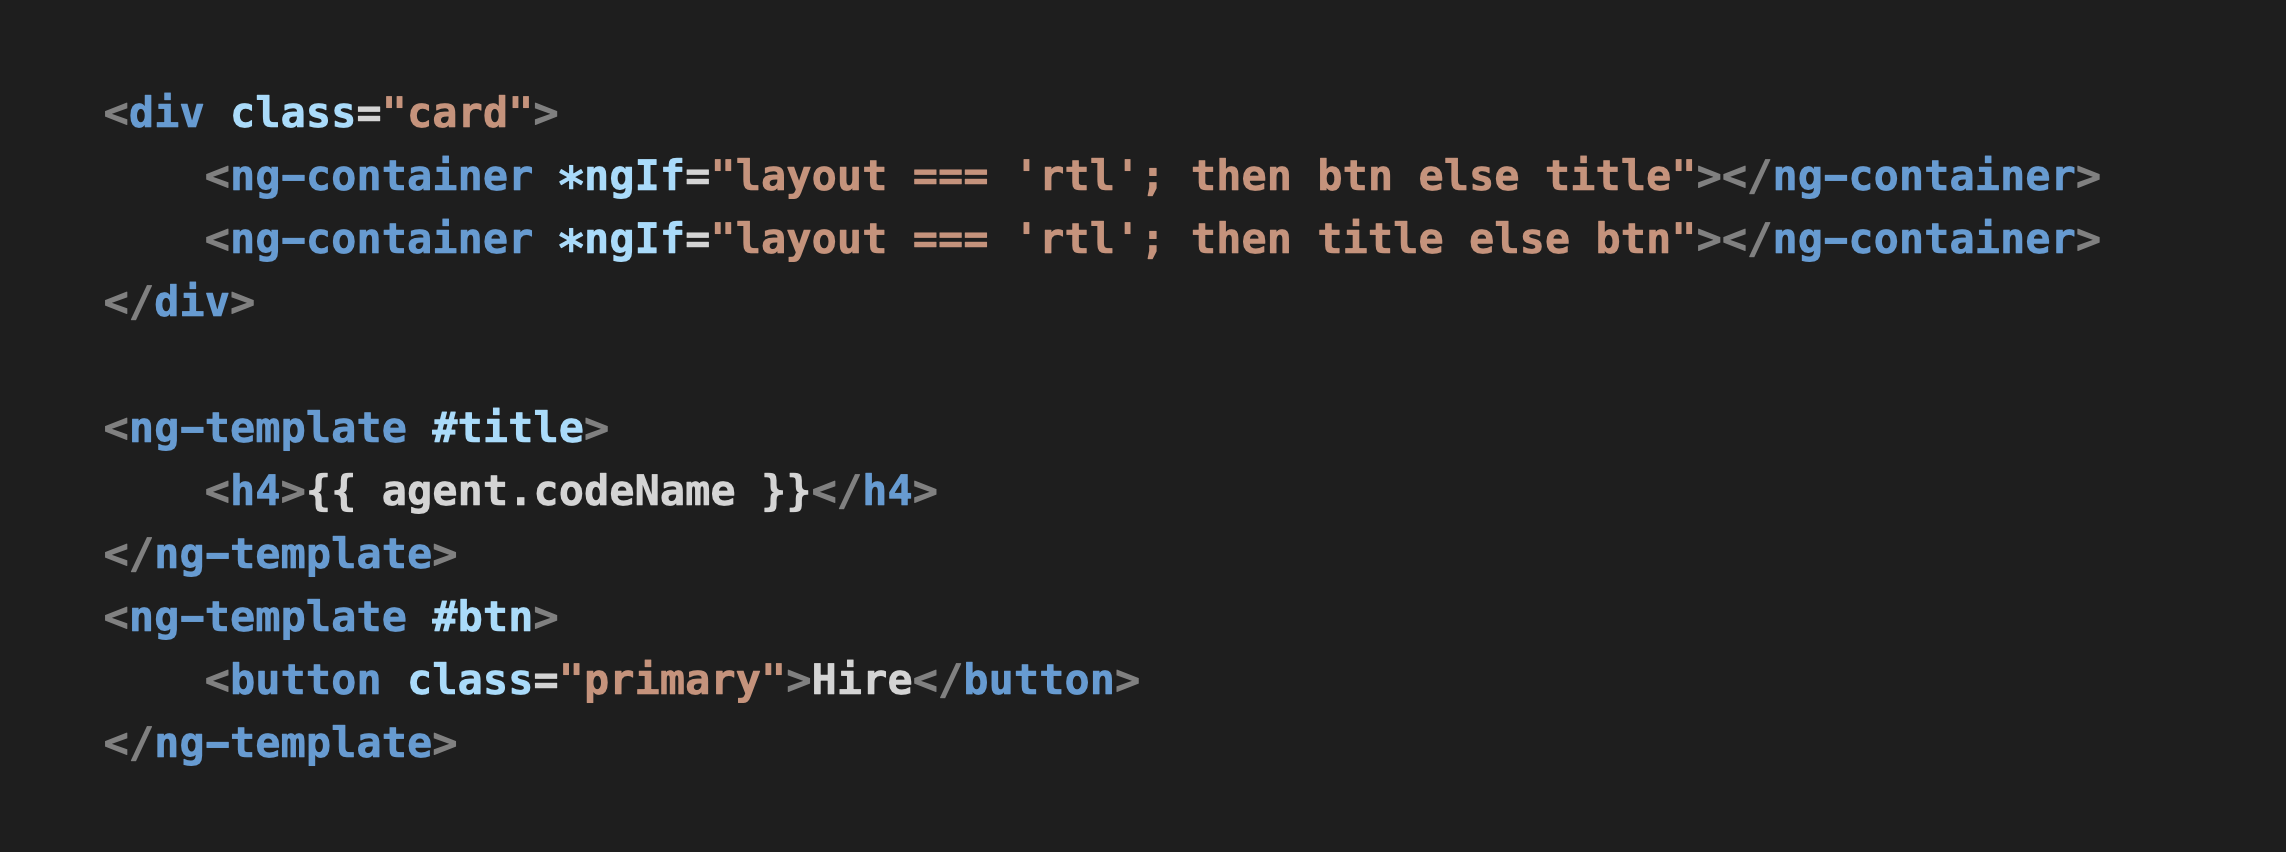
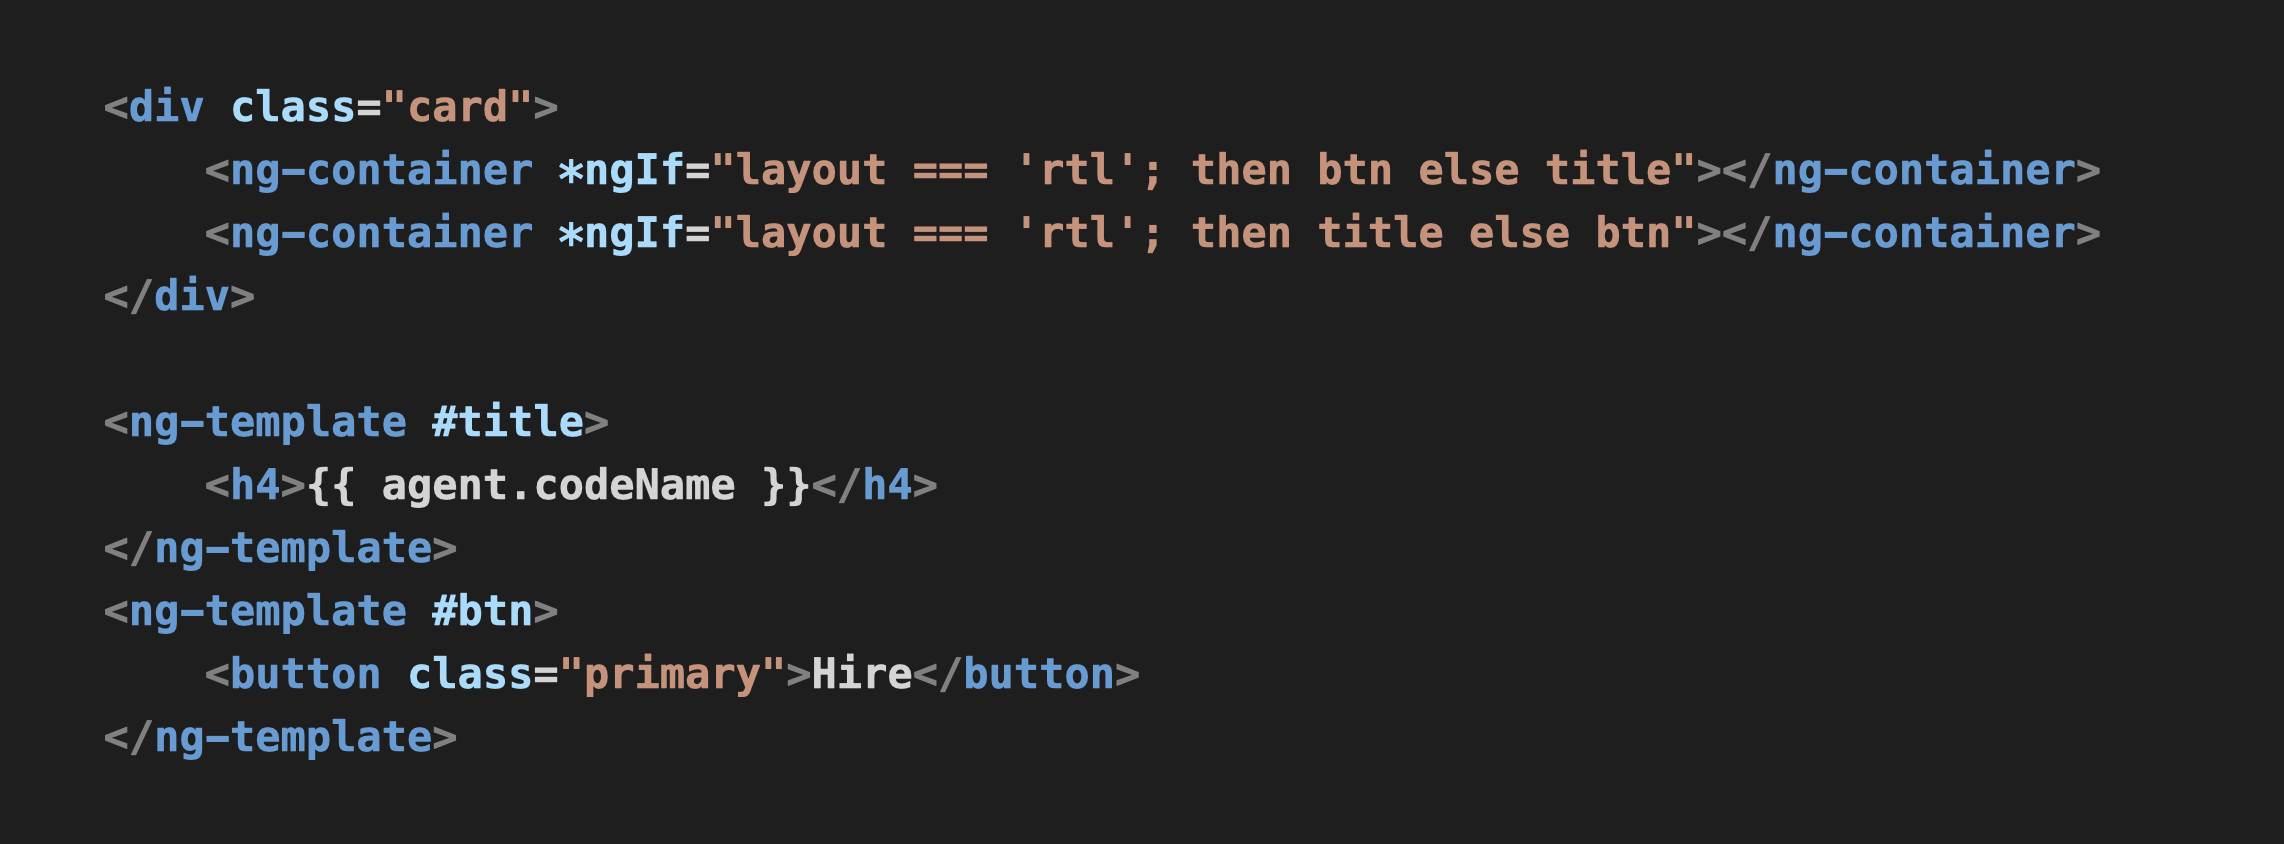
The code snippet you’ll find below allows you to perform those actions. As you see, it has the Secret Agent card and two containers. Depending on the condition, this or that template will be rendered.
Left-to-right layout test
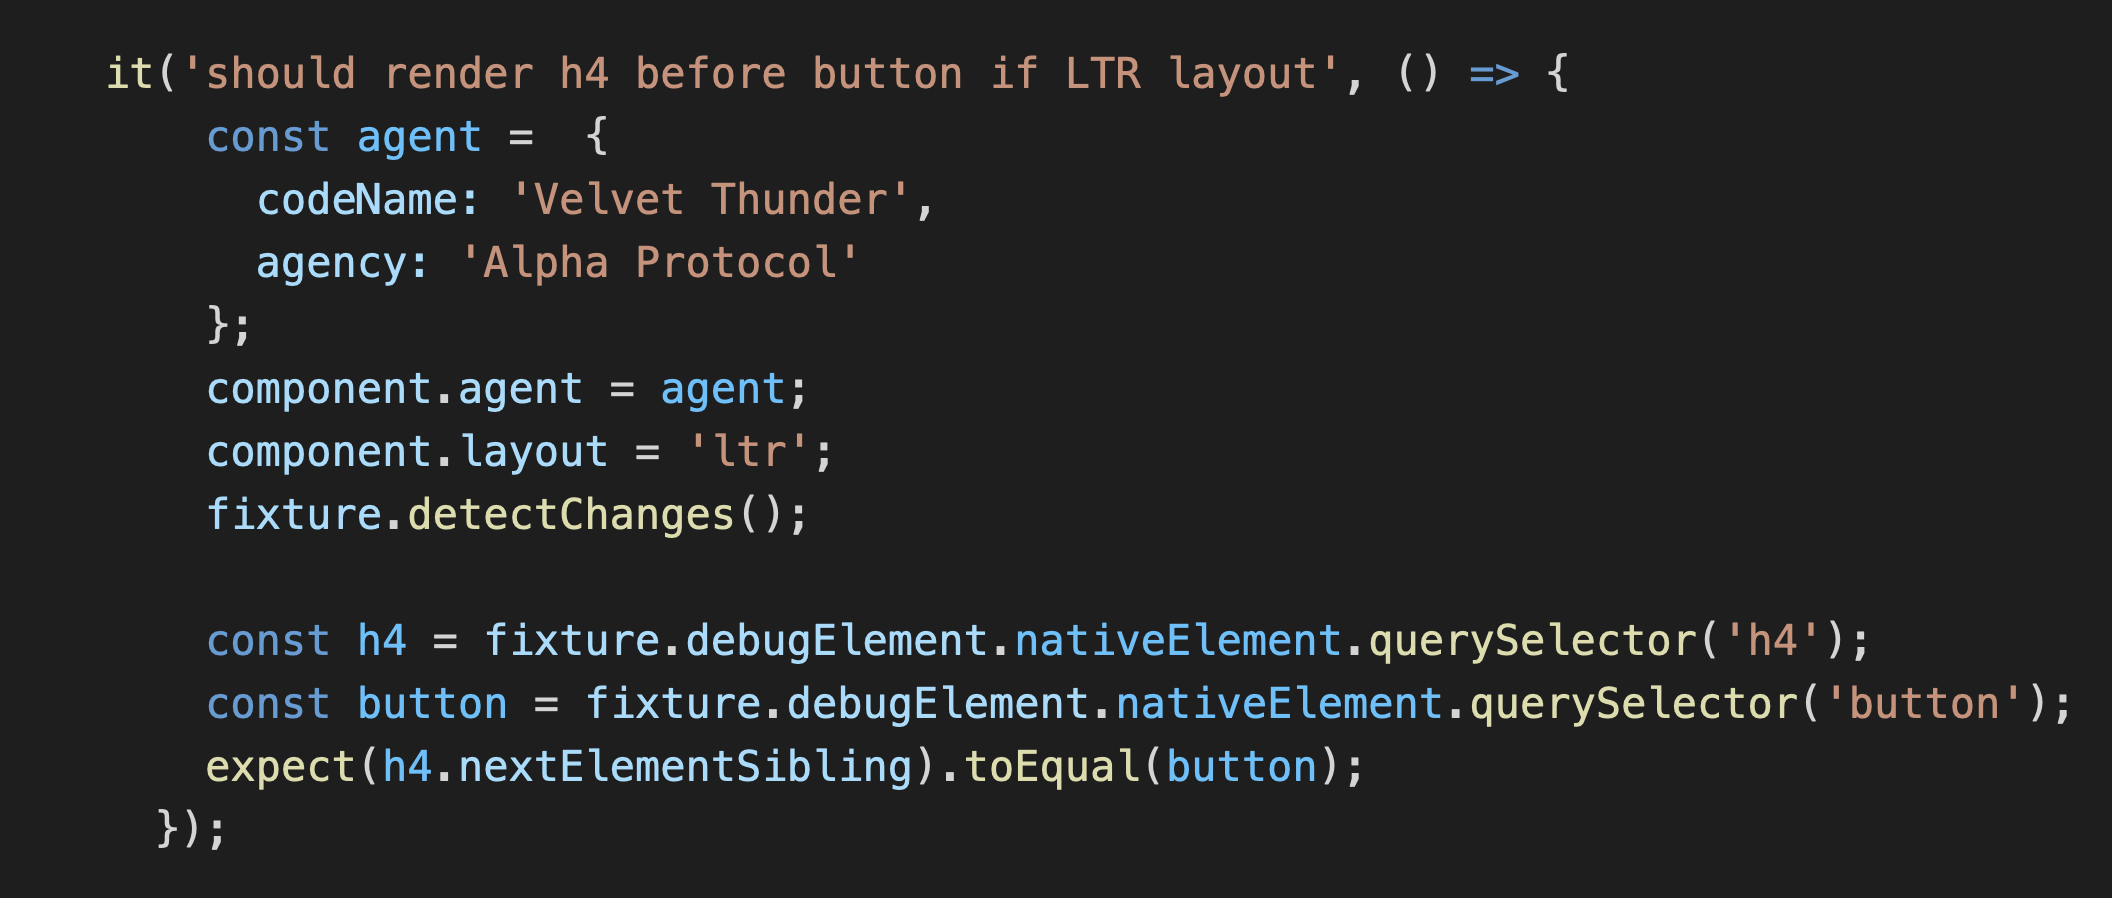
So, let’s write the first test for the left-to-right layout. In this way, we’ll check whether the title is located before the button. So, we expect H4-tag to be next to the button, which we’ve selected earlier.
Take a look at the code below, and you’ll find the it() function, which has two parameters. The first parameter is the title that explains the purpose of the test. The second parameter is the predicate, where we mock our Secret Agent and the layout. Then, we re-render the component to get the required DOM and get the title and layout using .querySelector.
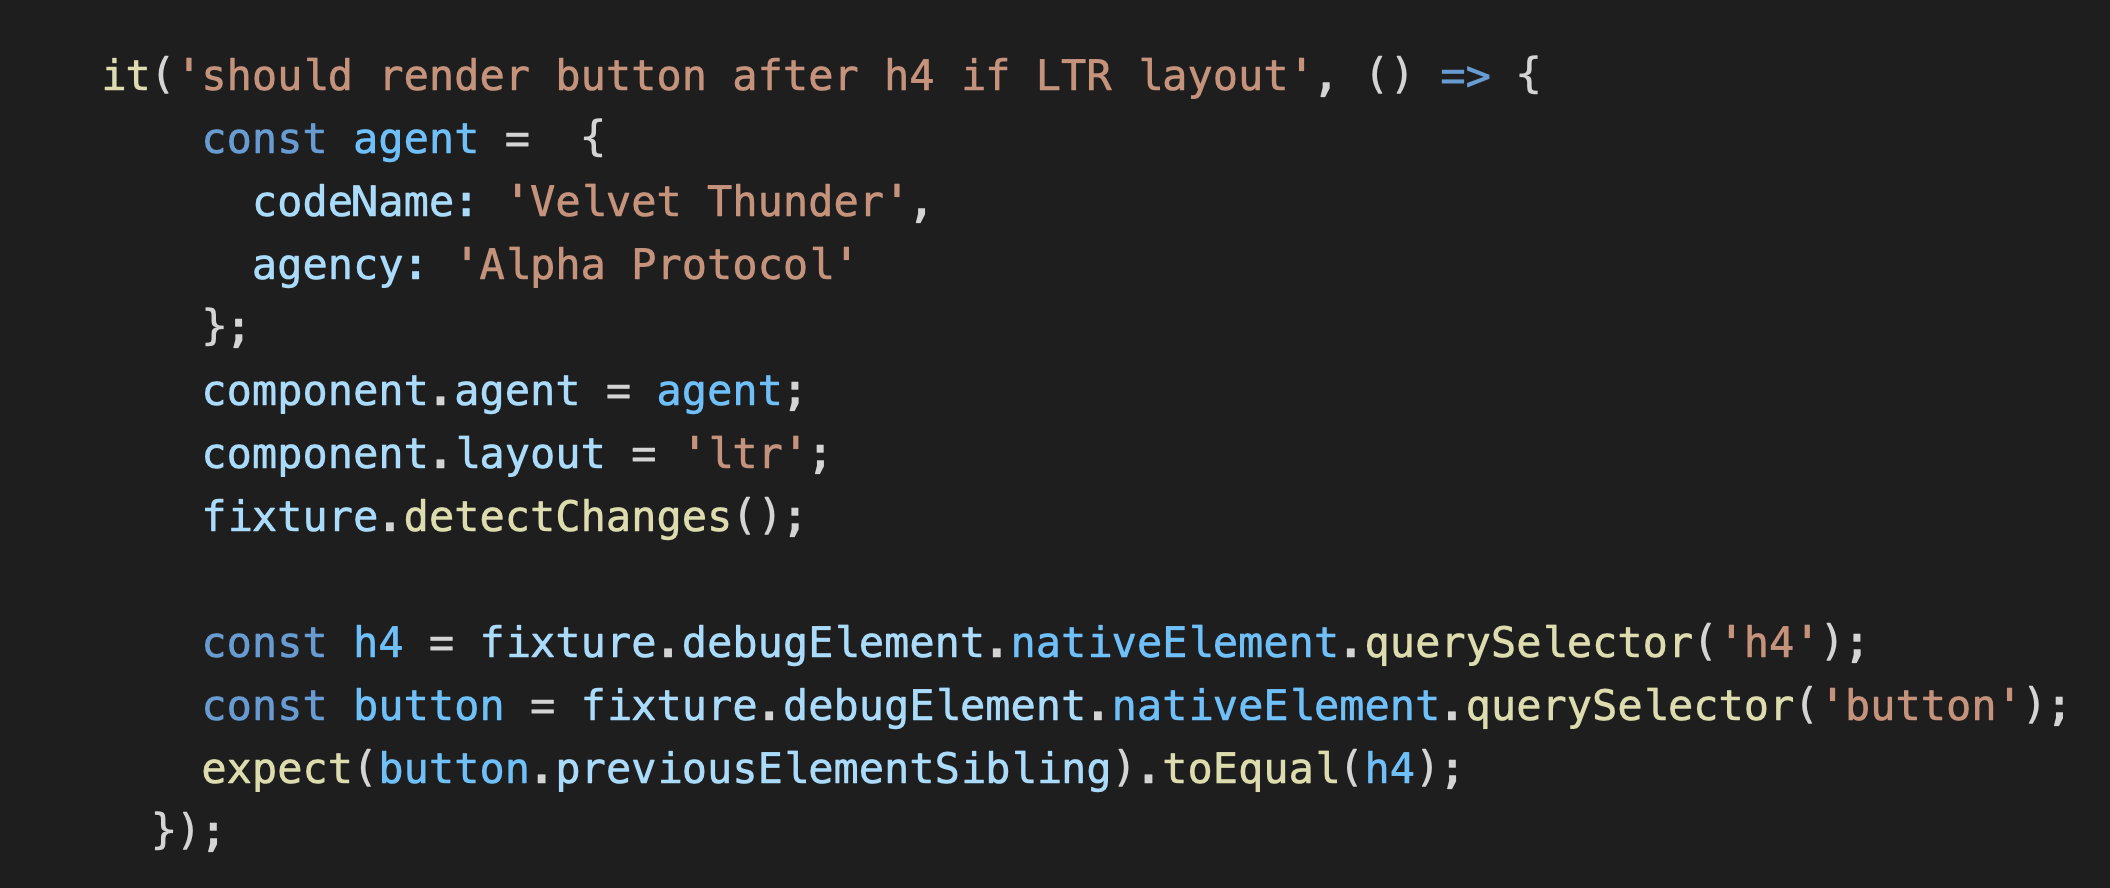
We’ll write the same test to check if the button is located on the left.
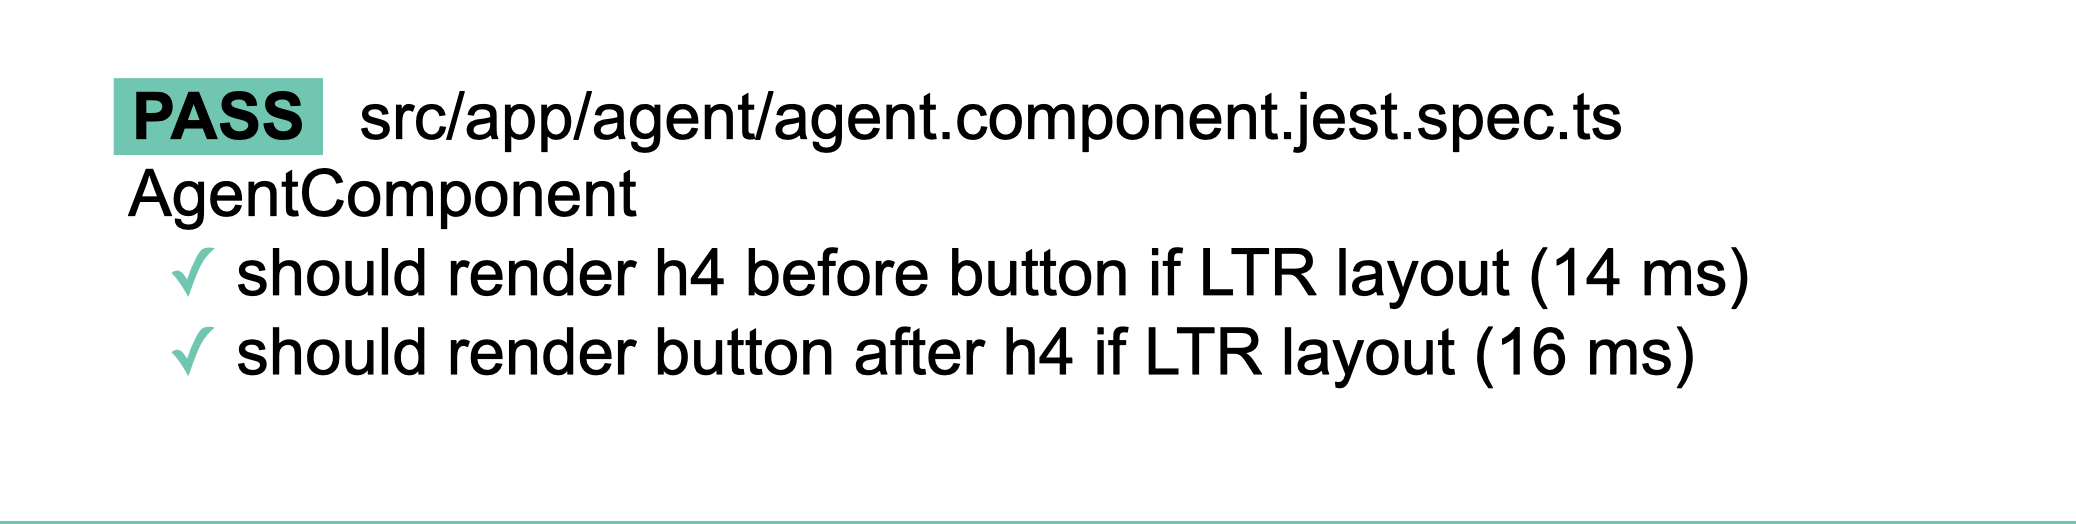
As you run these tests, you’ll see the results.
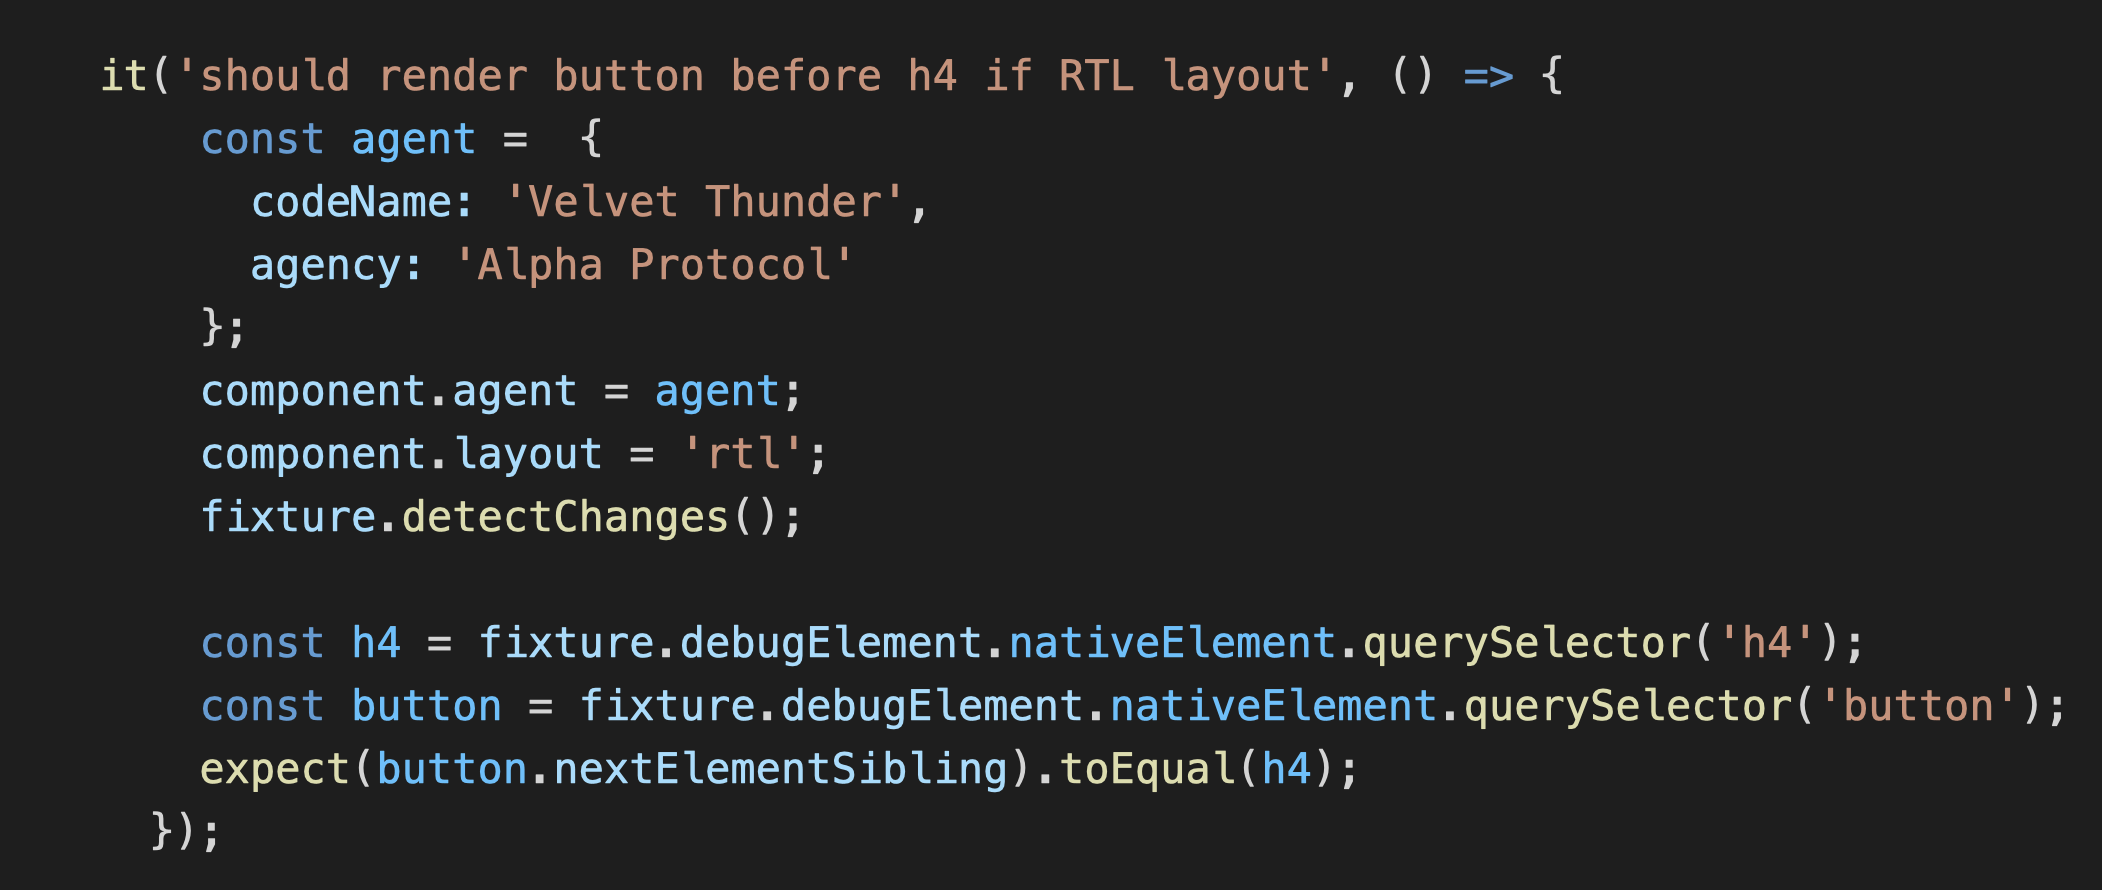
Right-to-left layout test
Let’s write the same test for the right-to-left layout. The syntax is the same, but we’ve changed the component layout into right-to-left and the validation that our title should be after the button.
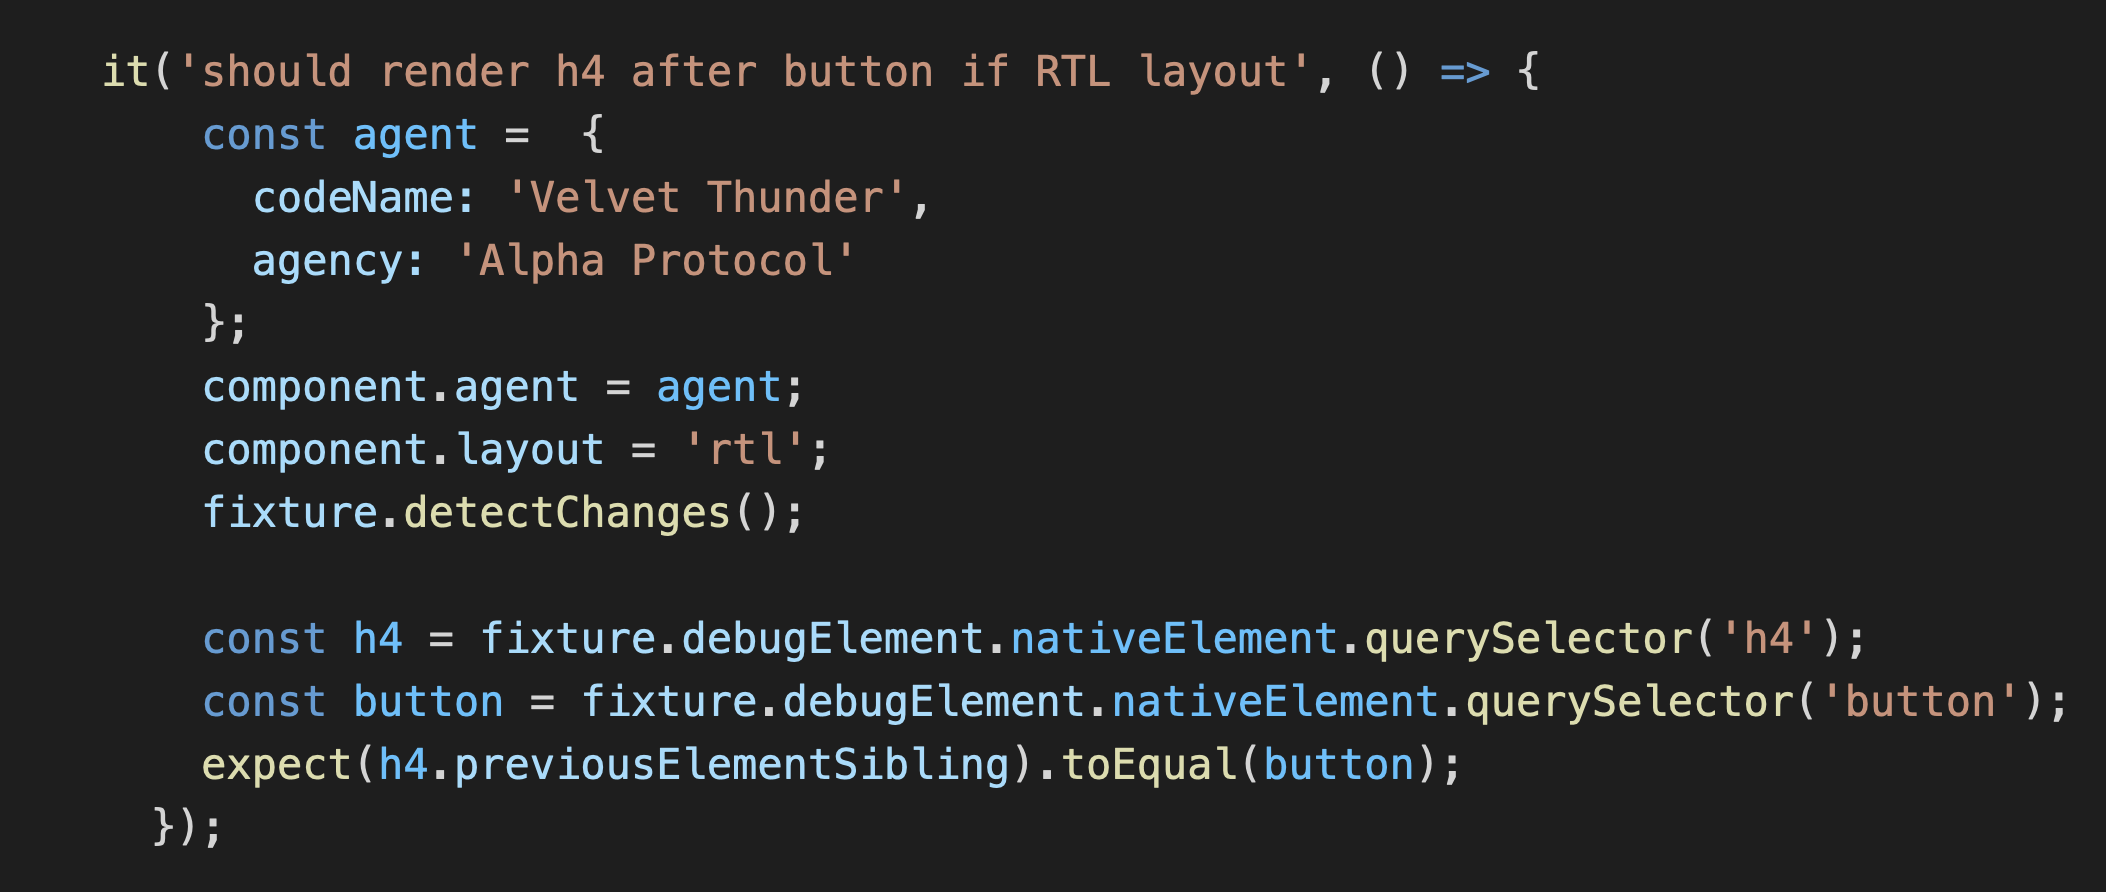
Again, here is the code for checking whether the H4 tag is positioned before the button.
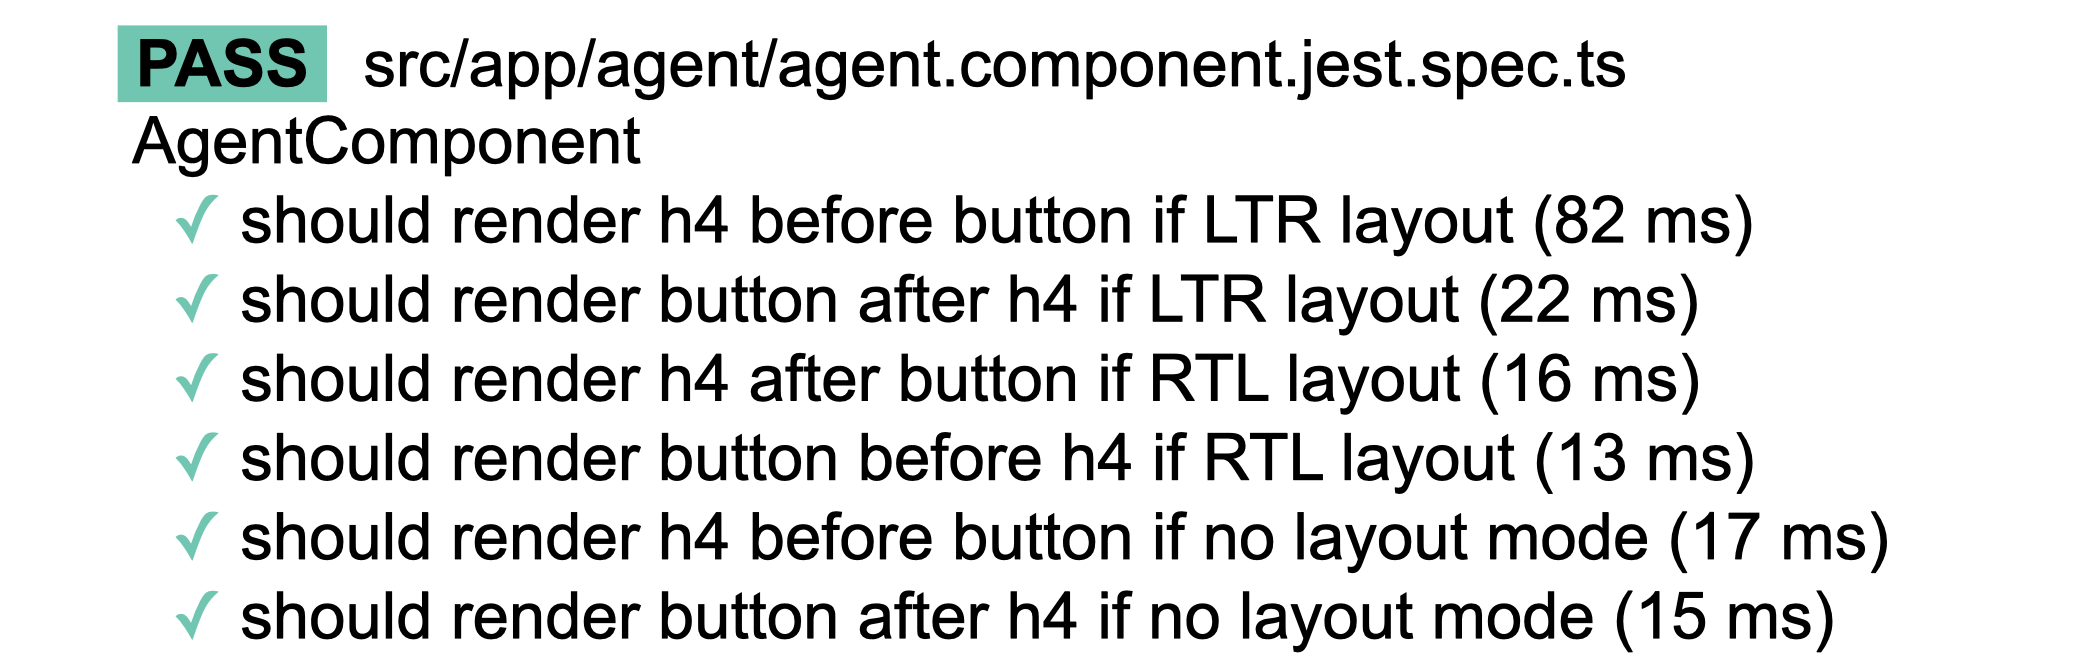
As we run the test, we’ll see four results testifying that all functions work flawlessly.

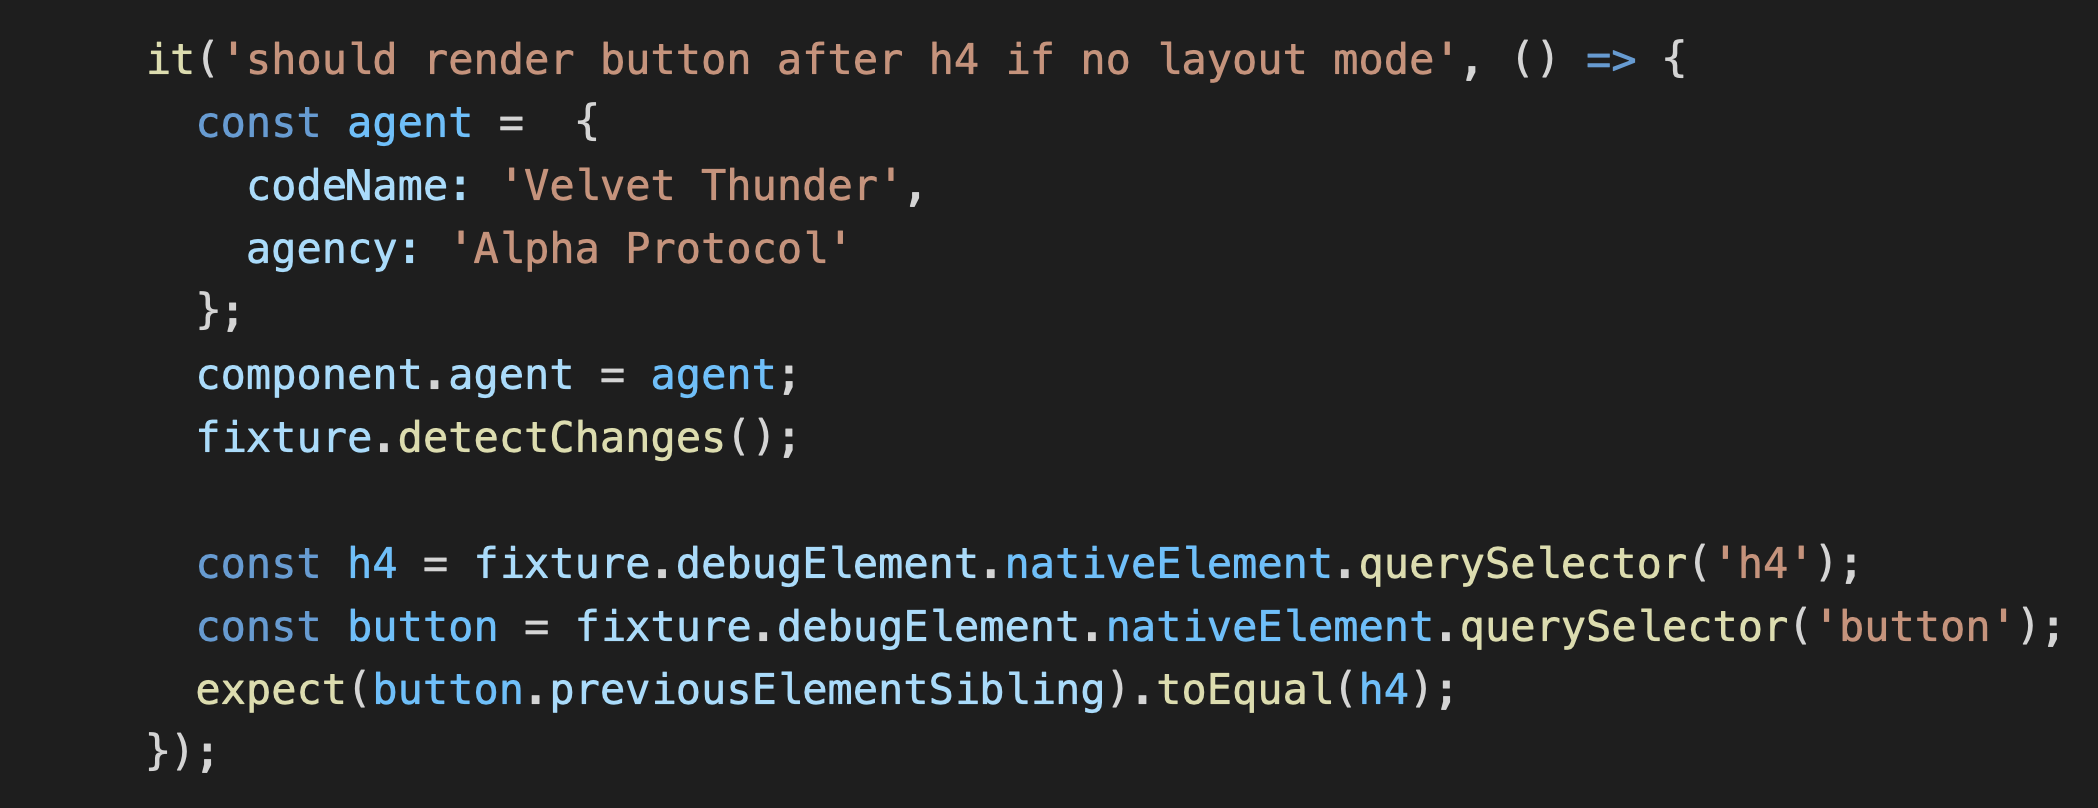
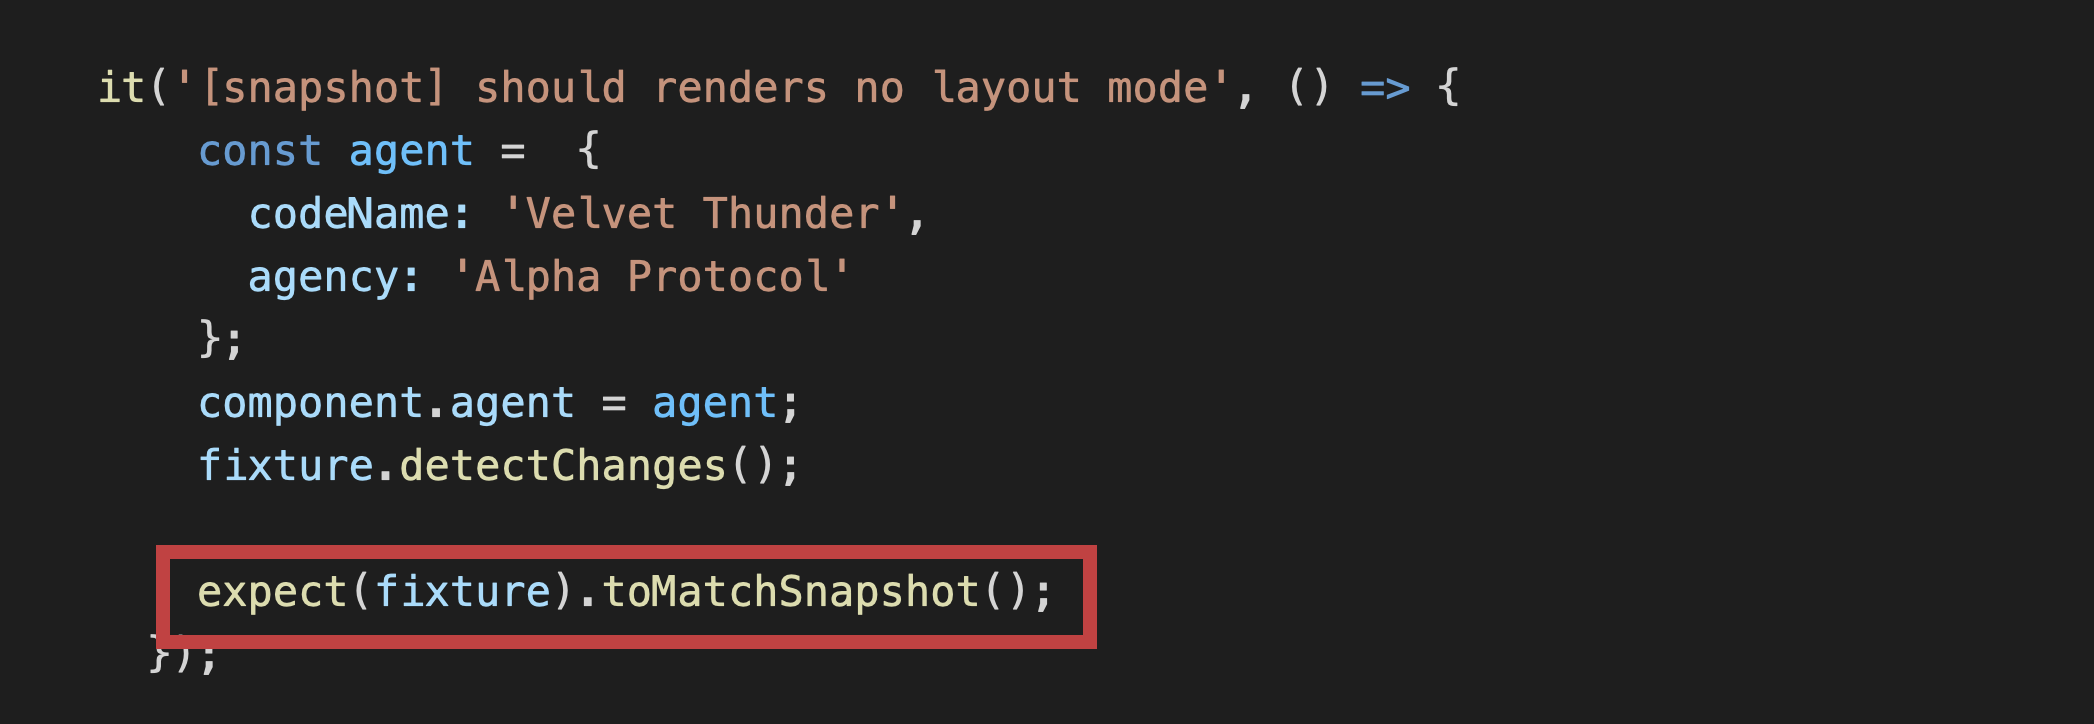
No-layout mode test
Let’s test one more case when no layout mode is specified.
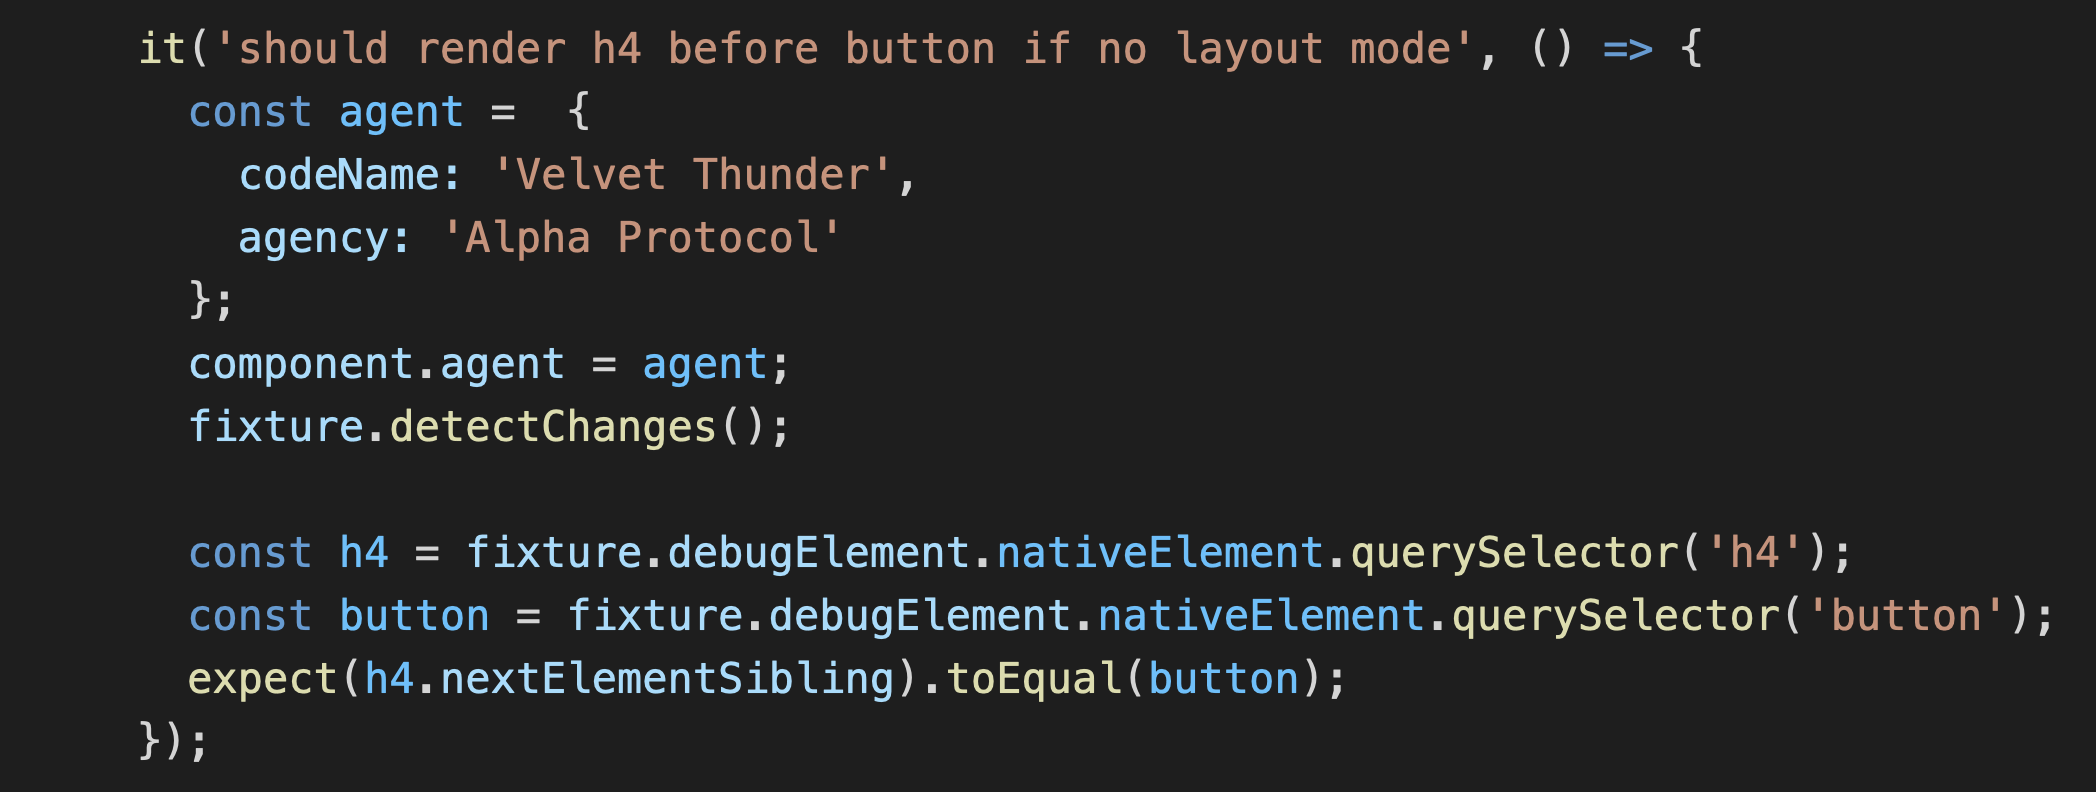
In this case, the default layout should be left-to-right.
There would be six tests, and you’ll see their results. In our case, all of them are successful.
Change Request: Add Agency
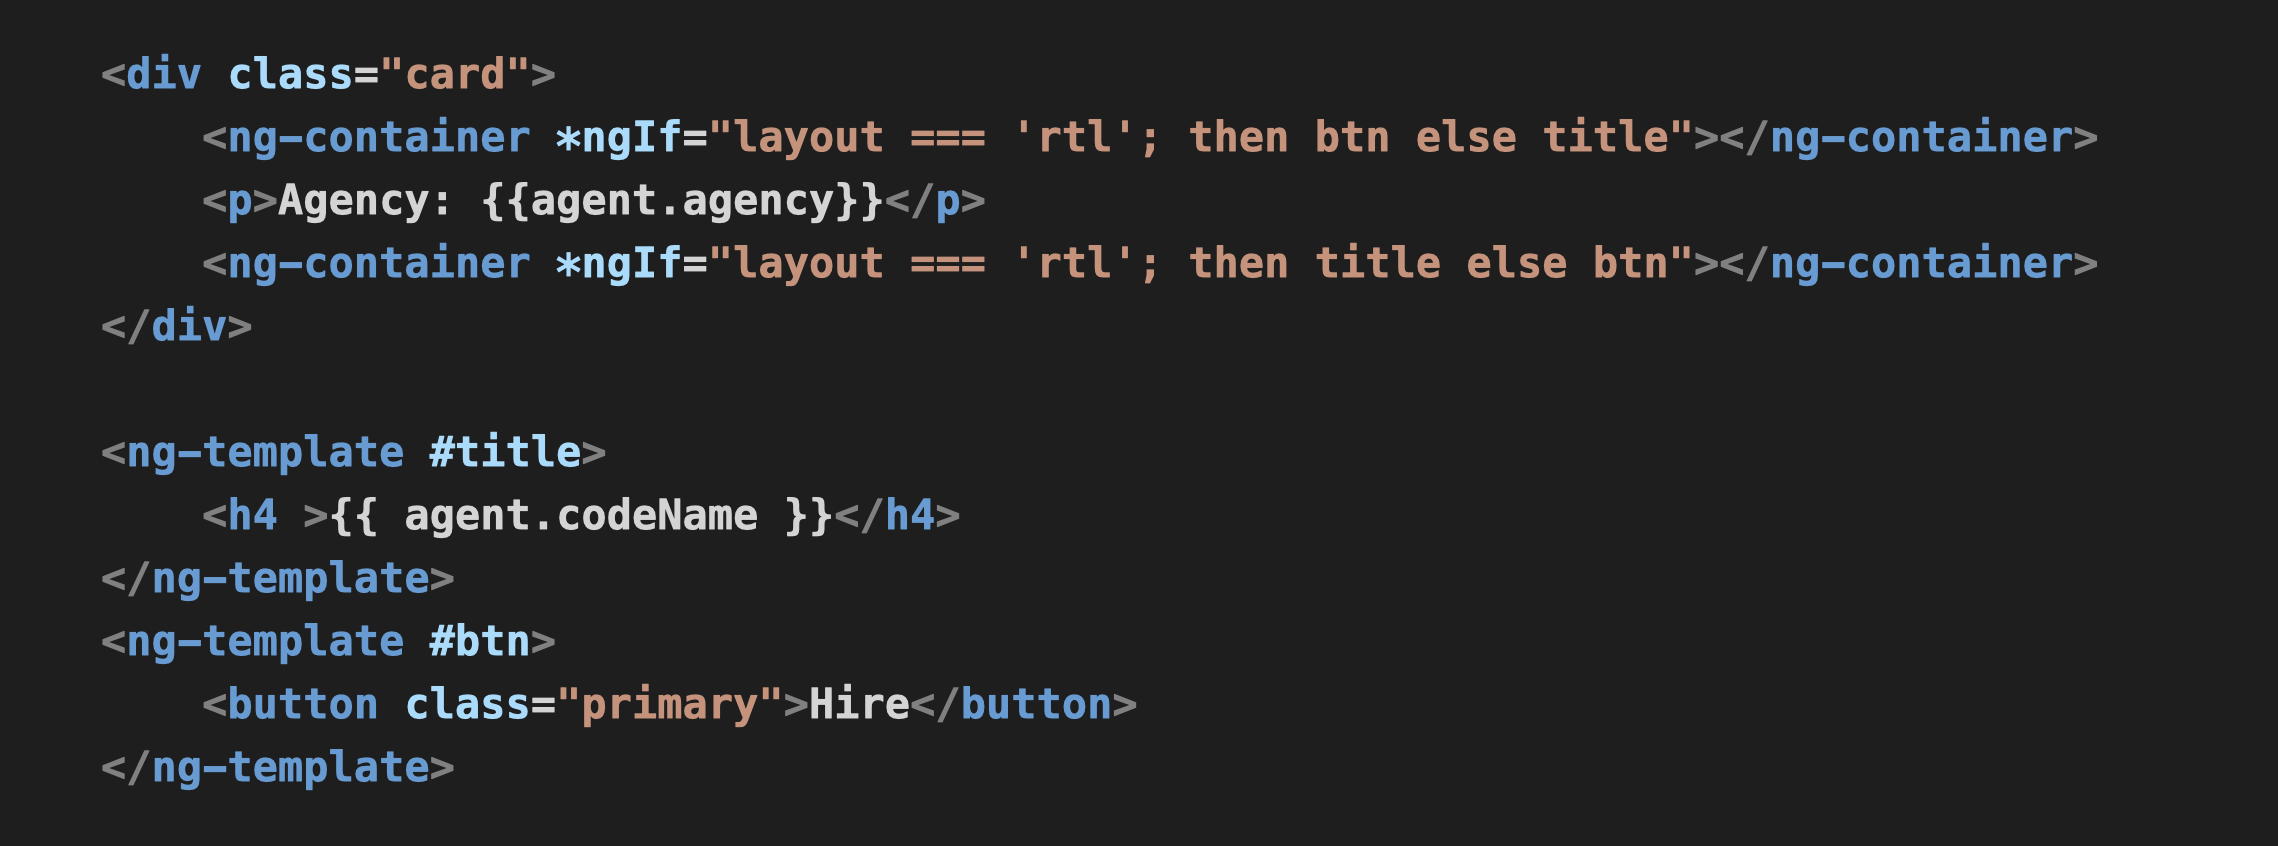
Let’s assume that we’ve got the change request to add an agency to the card. In other words, we’ve got to add the agency that would be located between the secret agent name and the button.
Besides, as you swap layout, the agency should remain at the same place, while the button should go left and the agent name should be moved to the right side.
That’s what we updated in the code to bring those changes to life. As you can see, we used an old code but added the <p> tag line containing information about the agency between the containers.
But as we run the test, we’ll fail all of them. The results are pretty straightforward, agree? As we were writing the test, we didn’t expect the <p> tag to be located between the agent name and the button, so we used next sibling / previous sibling selectors.
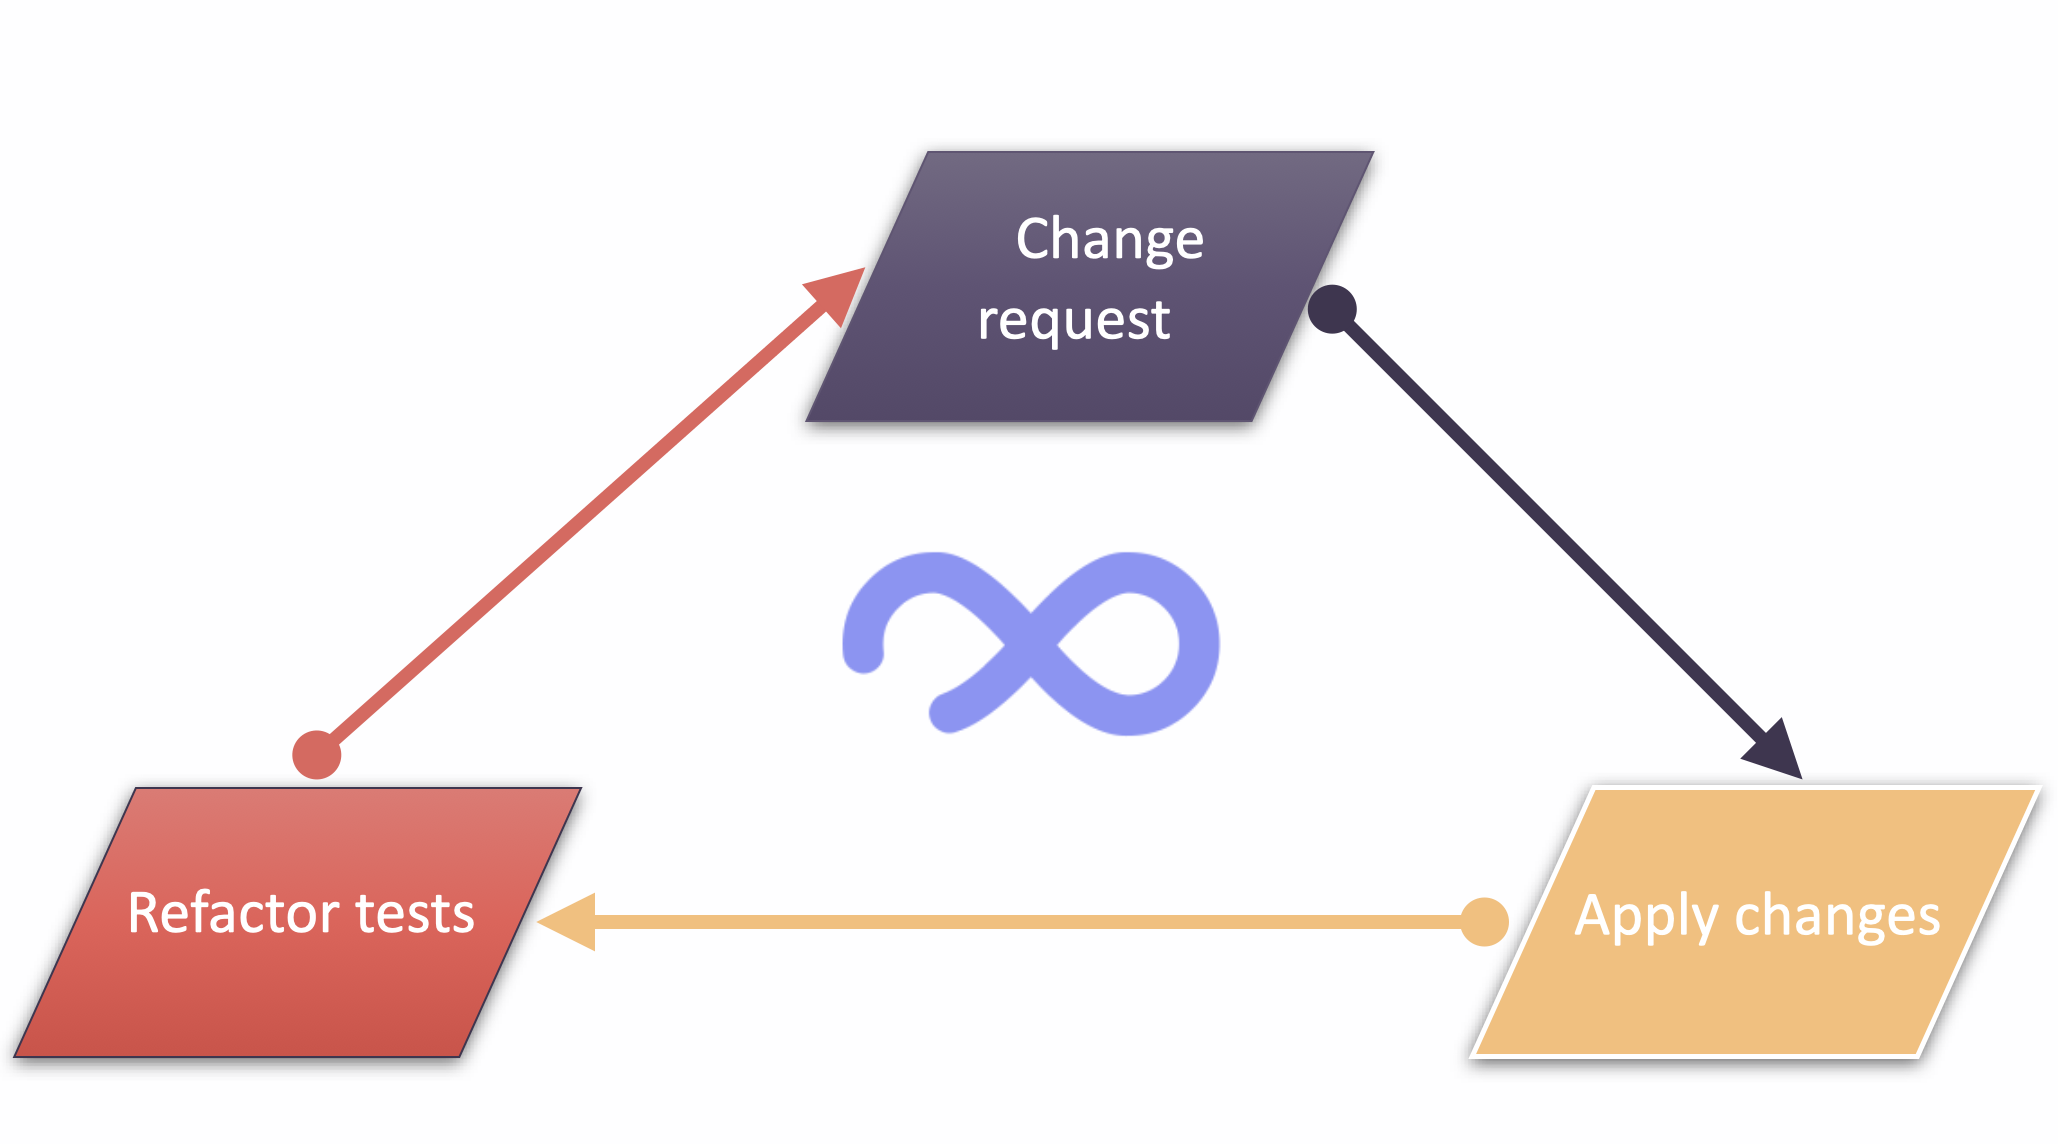
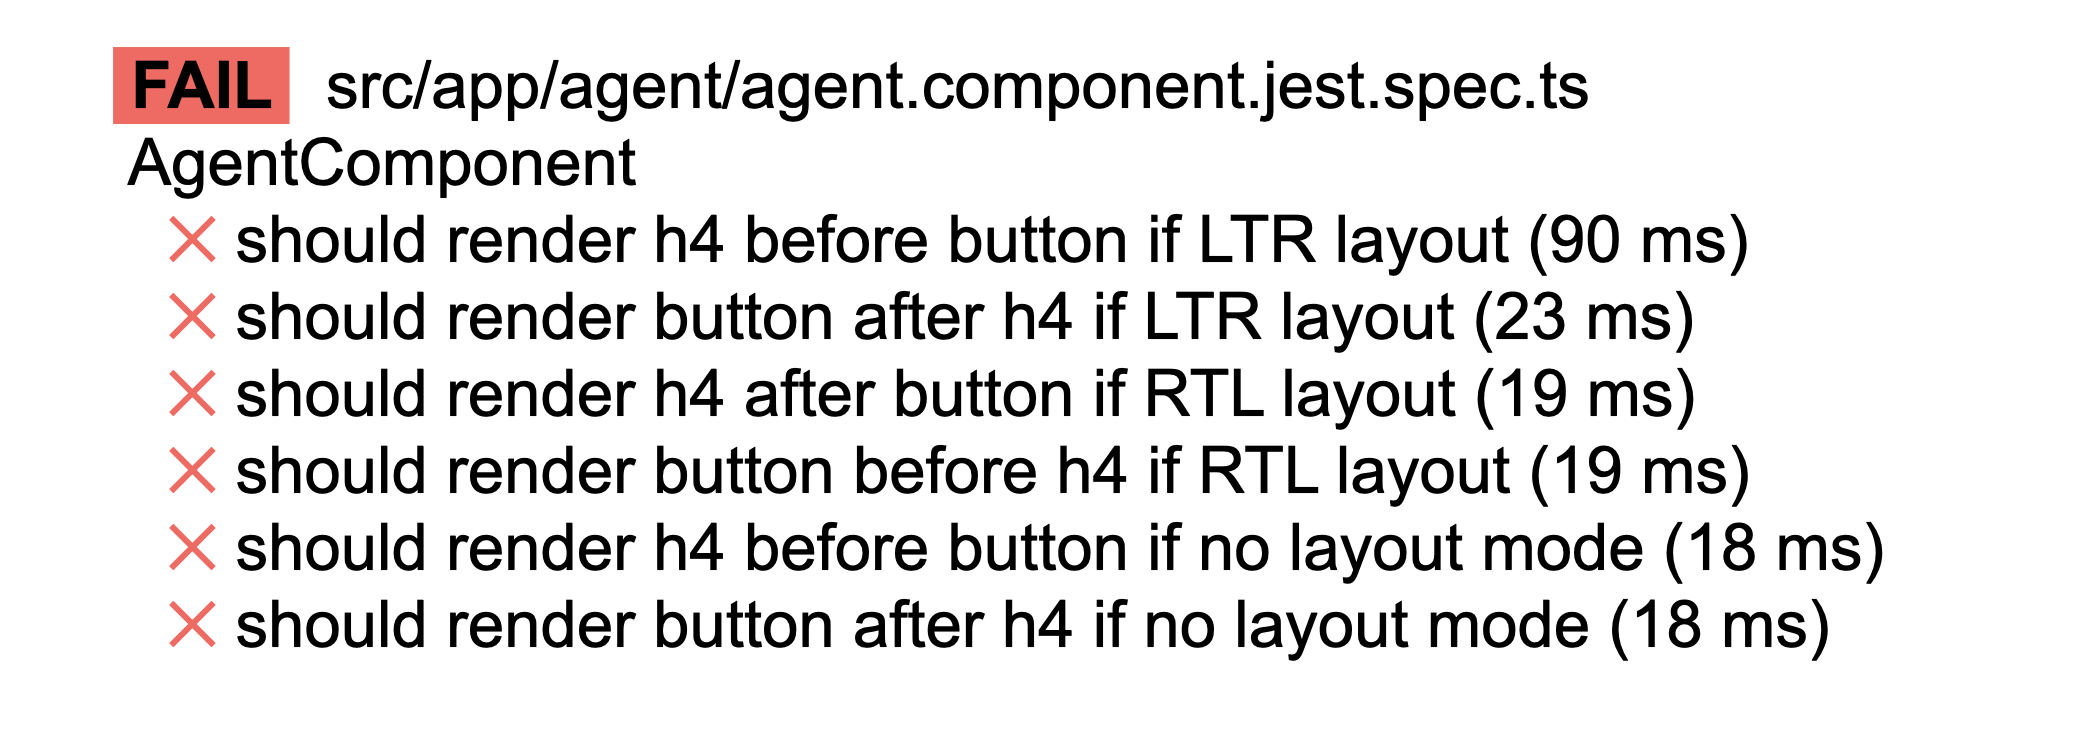
Once you revisit the code to make updates, those changes might cause something to break. So, every time we would be applying any changes to the code, our tests would fail, and we would have to refactor them. These issues would occur after every change request, and it would be inefficient to refactor tests in terms of time input and results sooner or later.
HTML Code Testing Using Snapshots
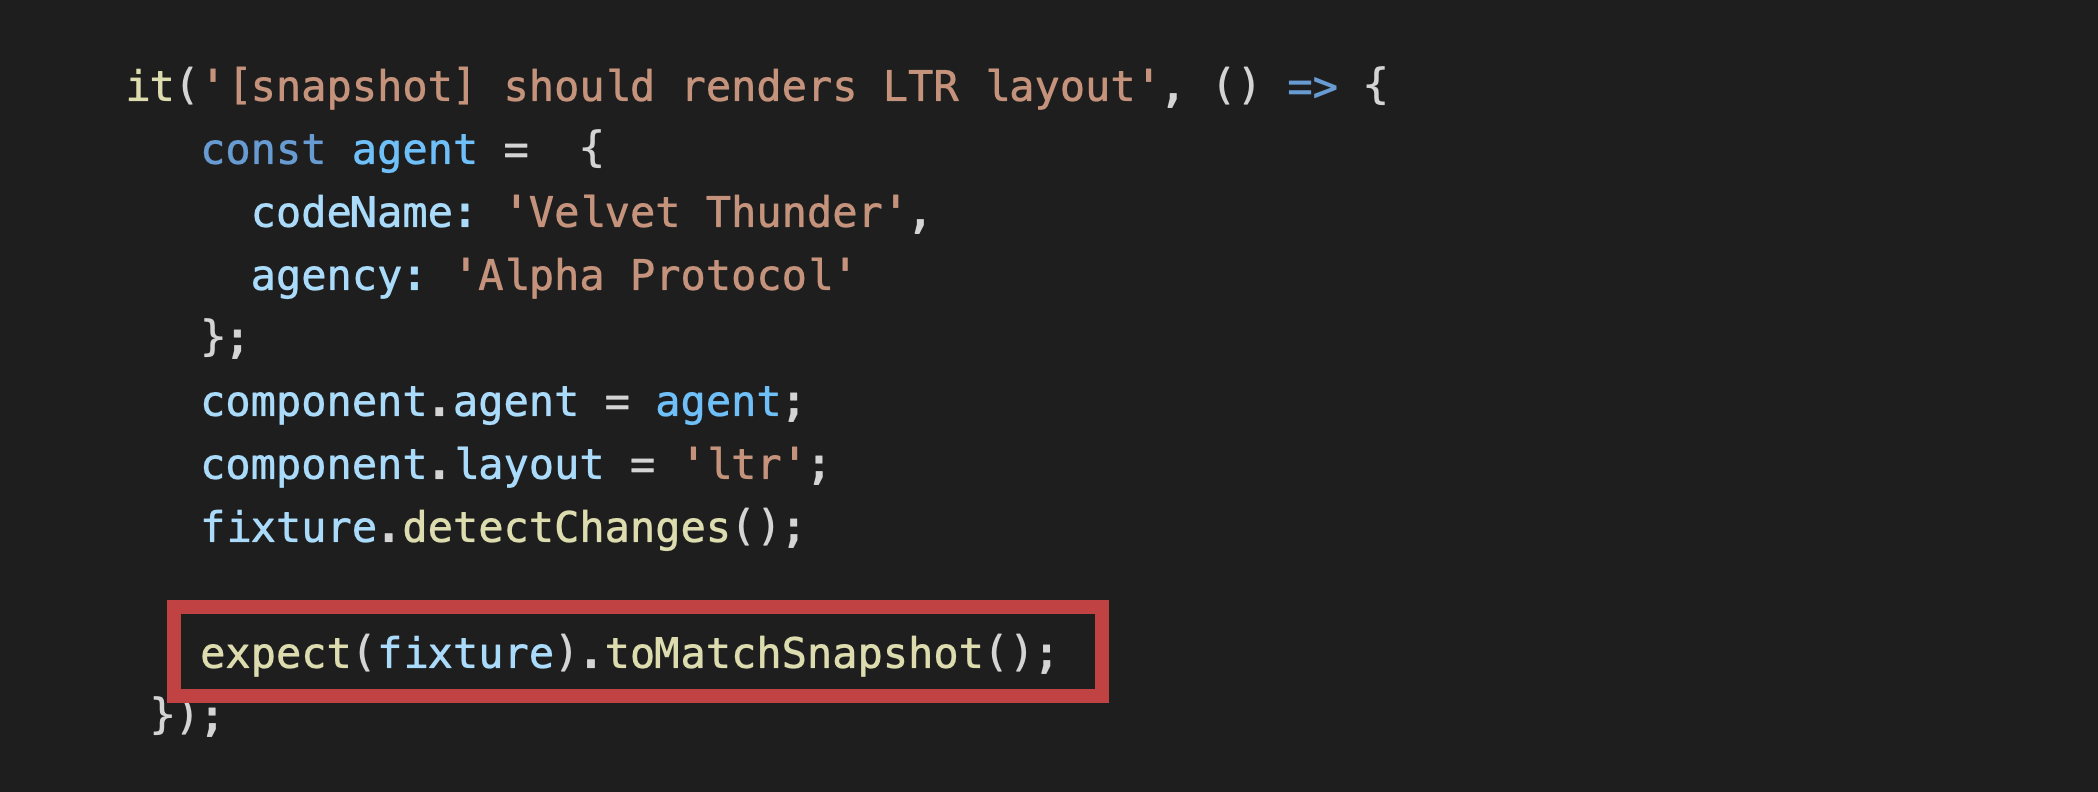
Let’s go back to where we didn’t have any agency tags and tested the swap layout.
We rolled back the code, so there is no <p>Agency</p> tag out there.
Let’s write the test to check the components’ HTML using snapshots. The code looks pretty much the same. We mock the agent, set the layout, and wait till it renders. Then we expect the render that would be sent to DOM to match the snapshot. Below you can see the piece of code for the left-to-right layout.
The same thing for the right-to-left
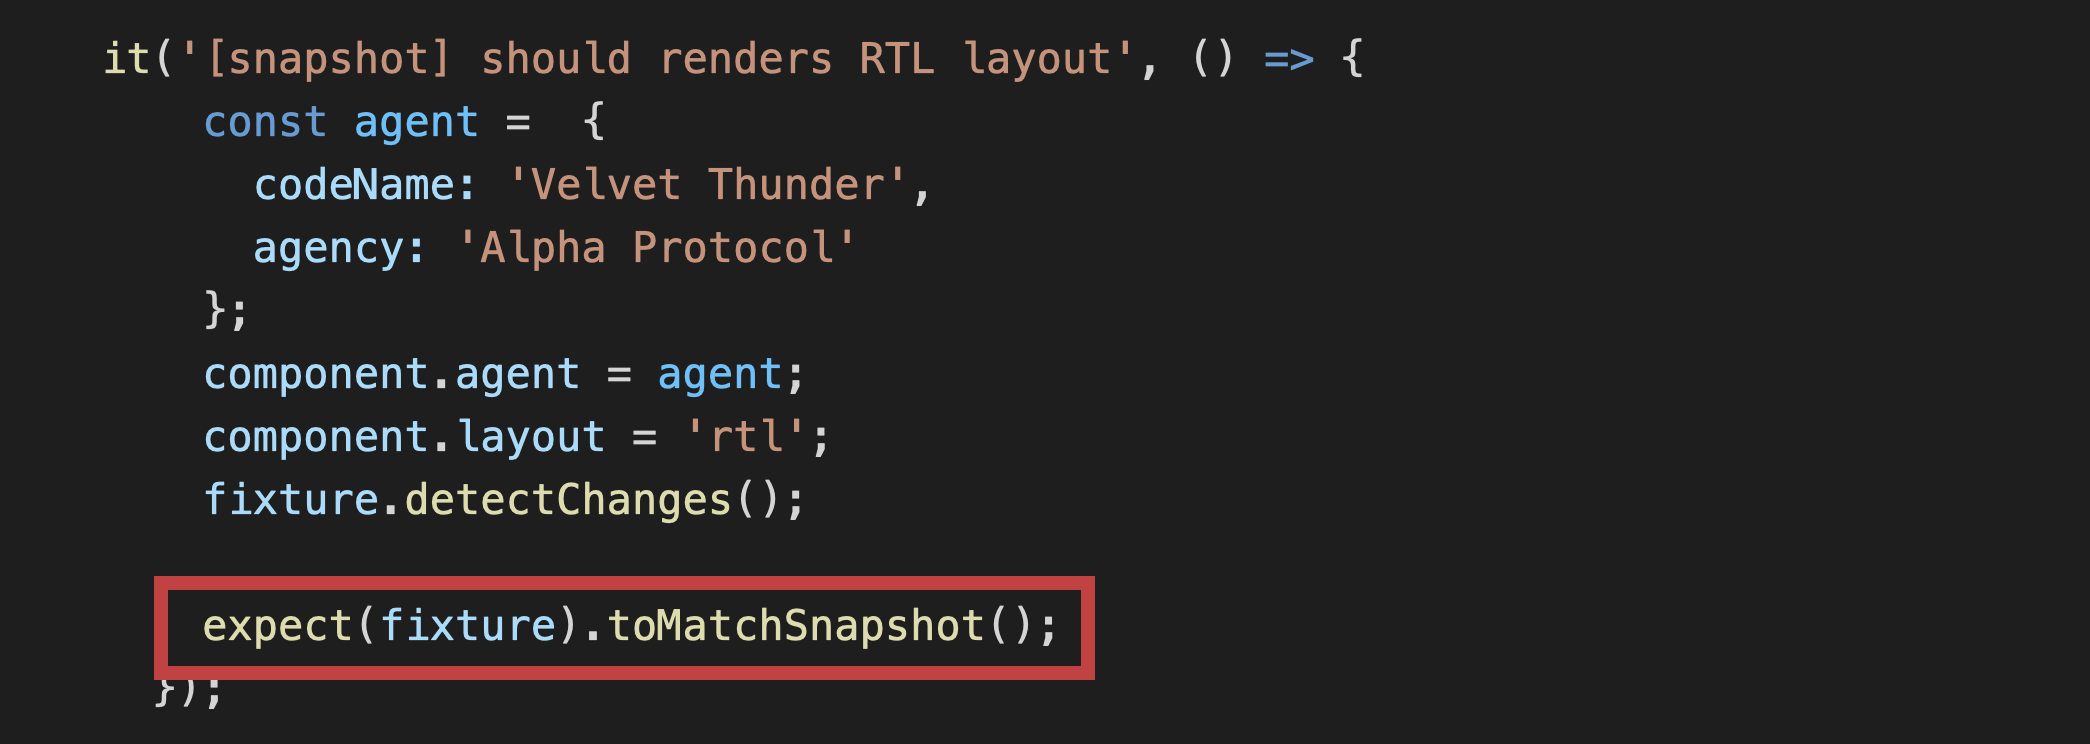
and no layout modes.
The test results would be the following:
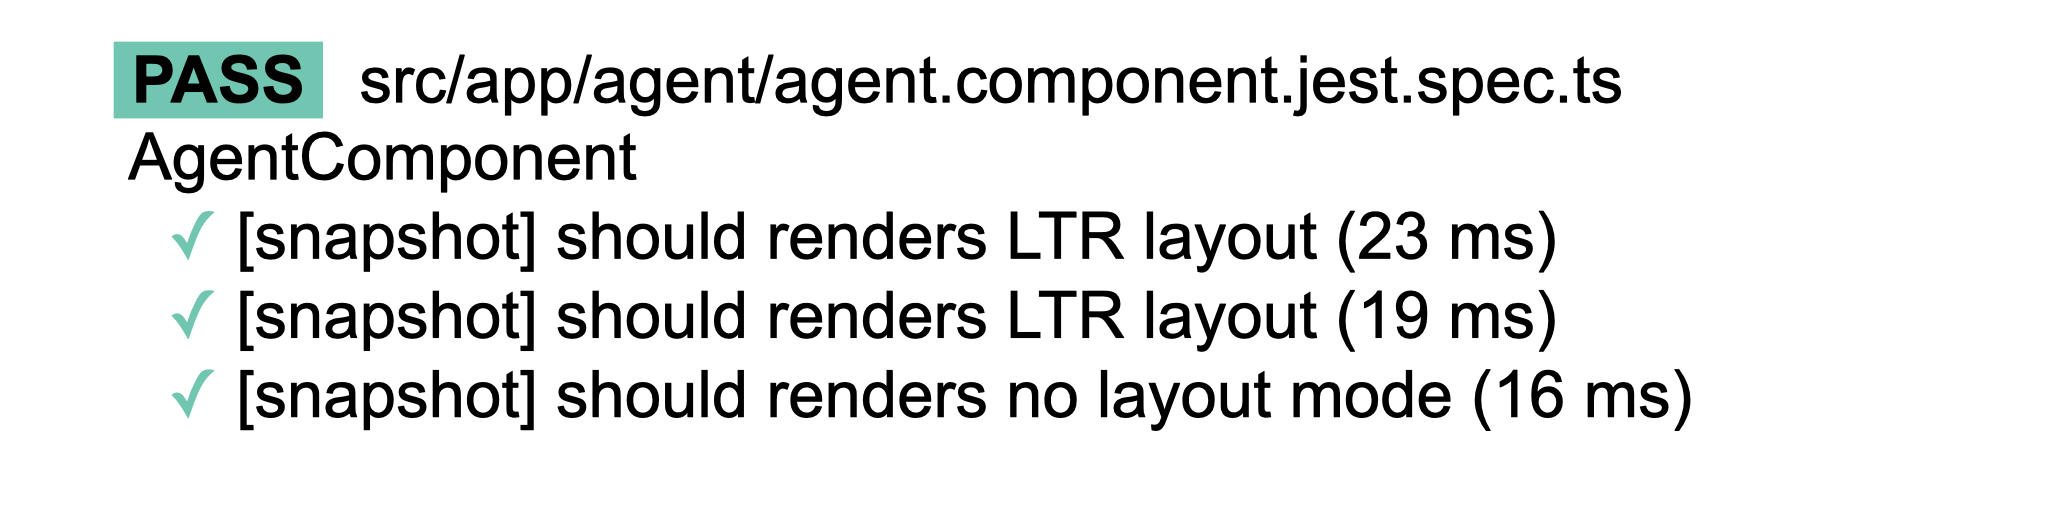
Let’s take a look at what happened during the tests.
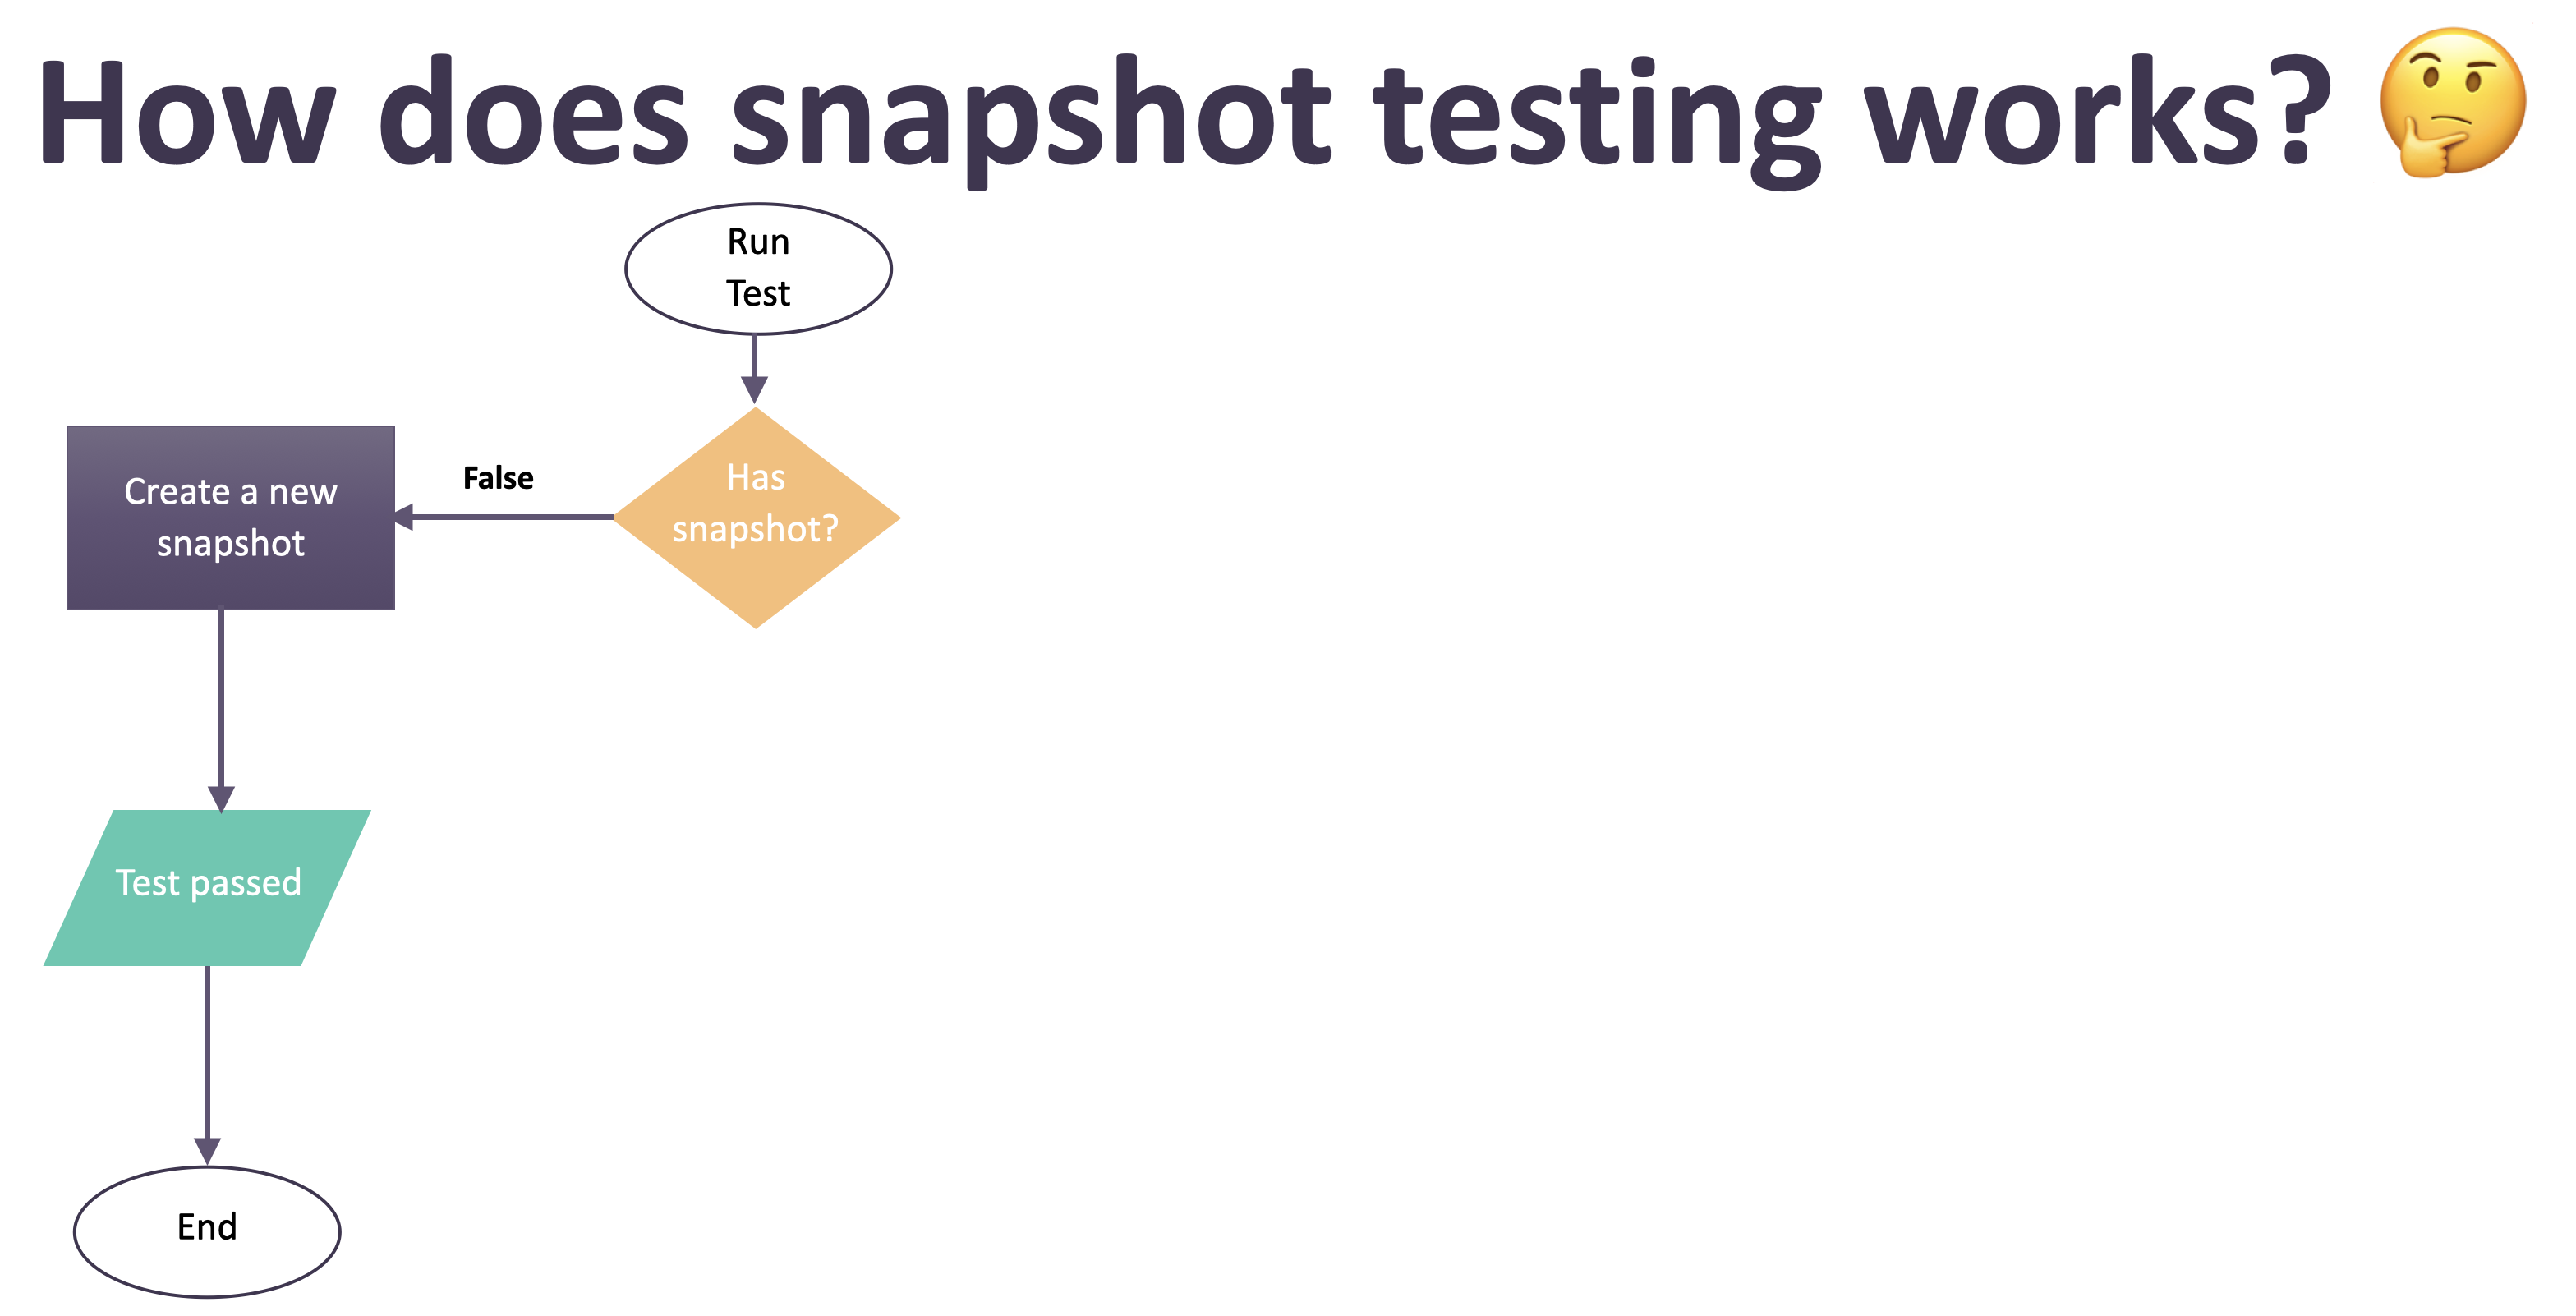
So, What Happened?
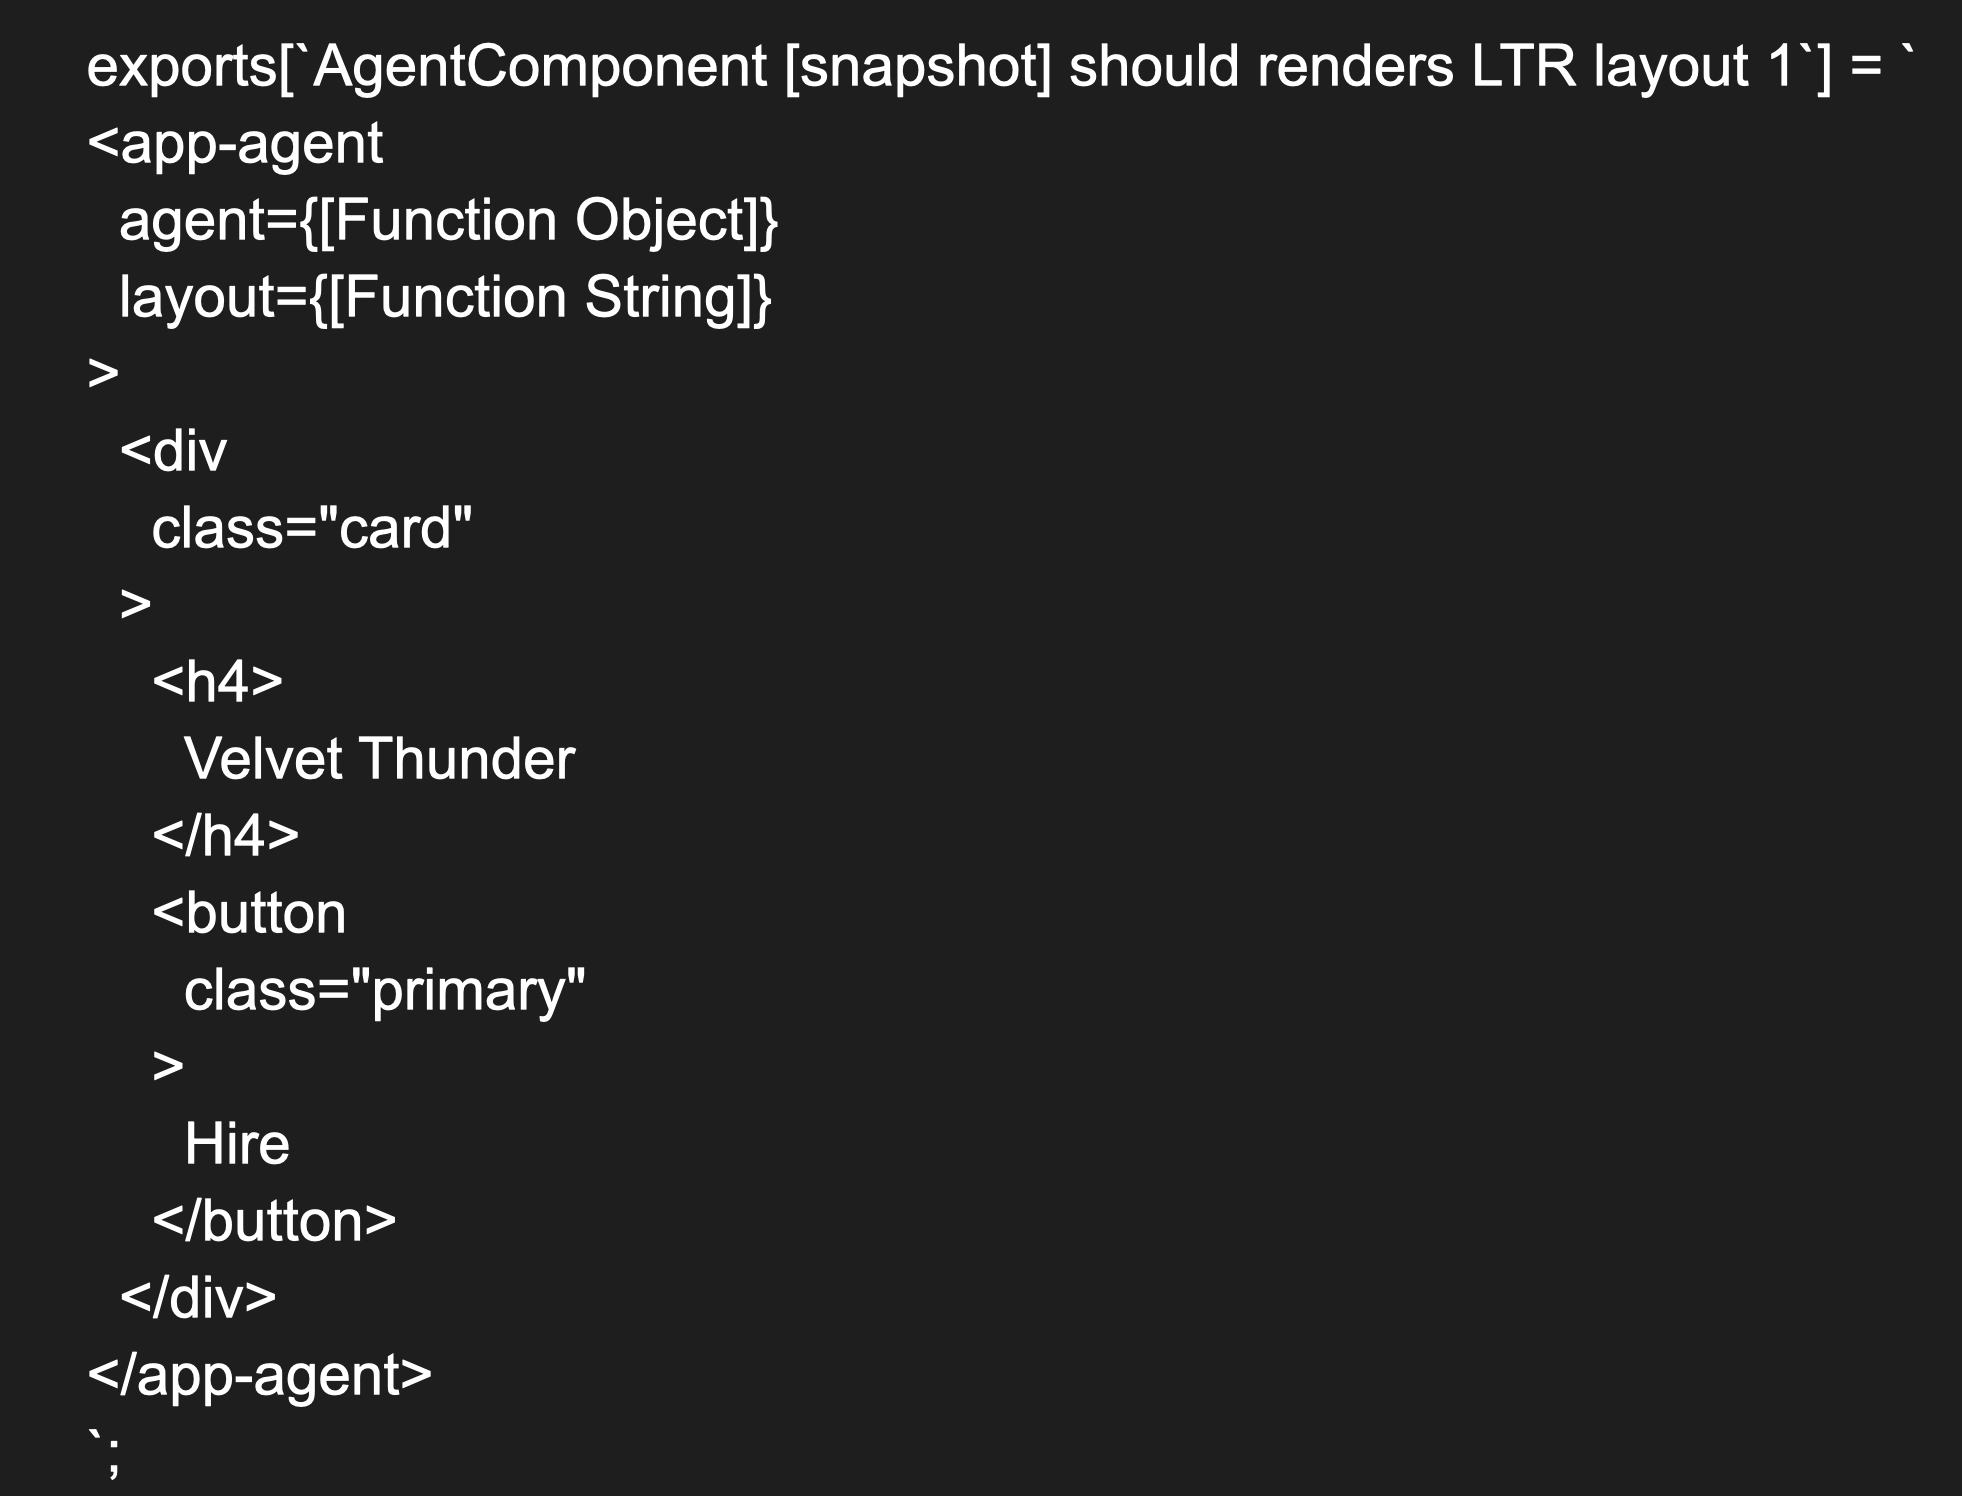
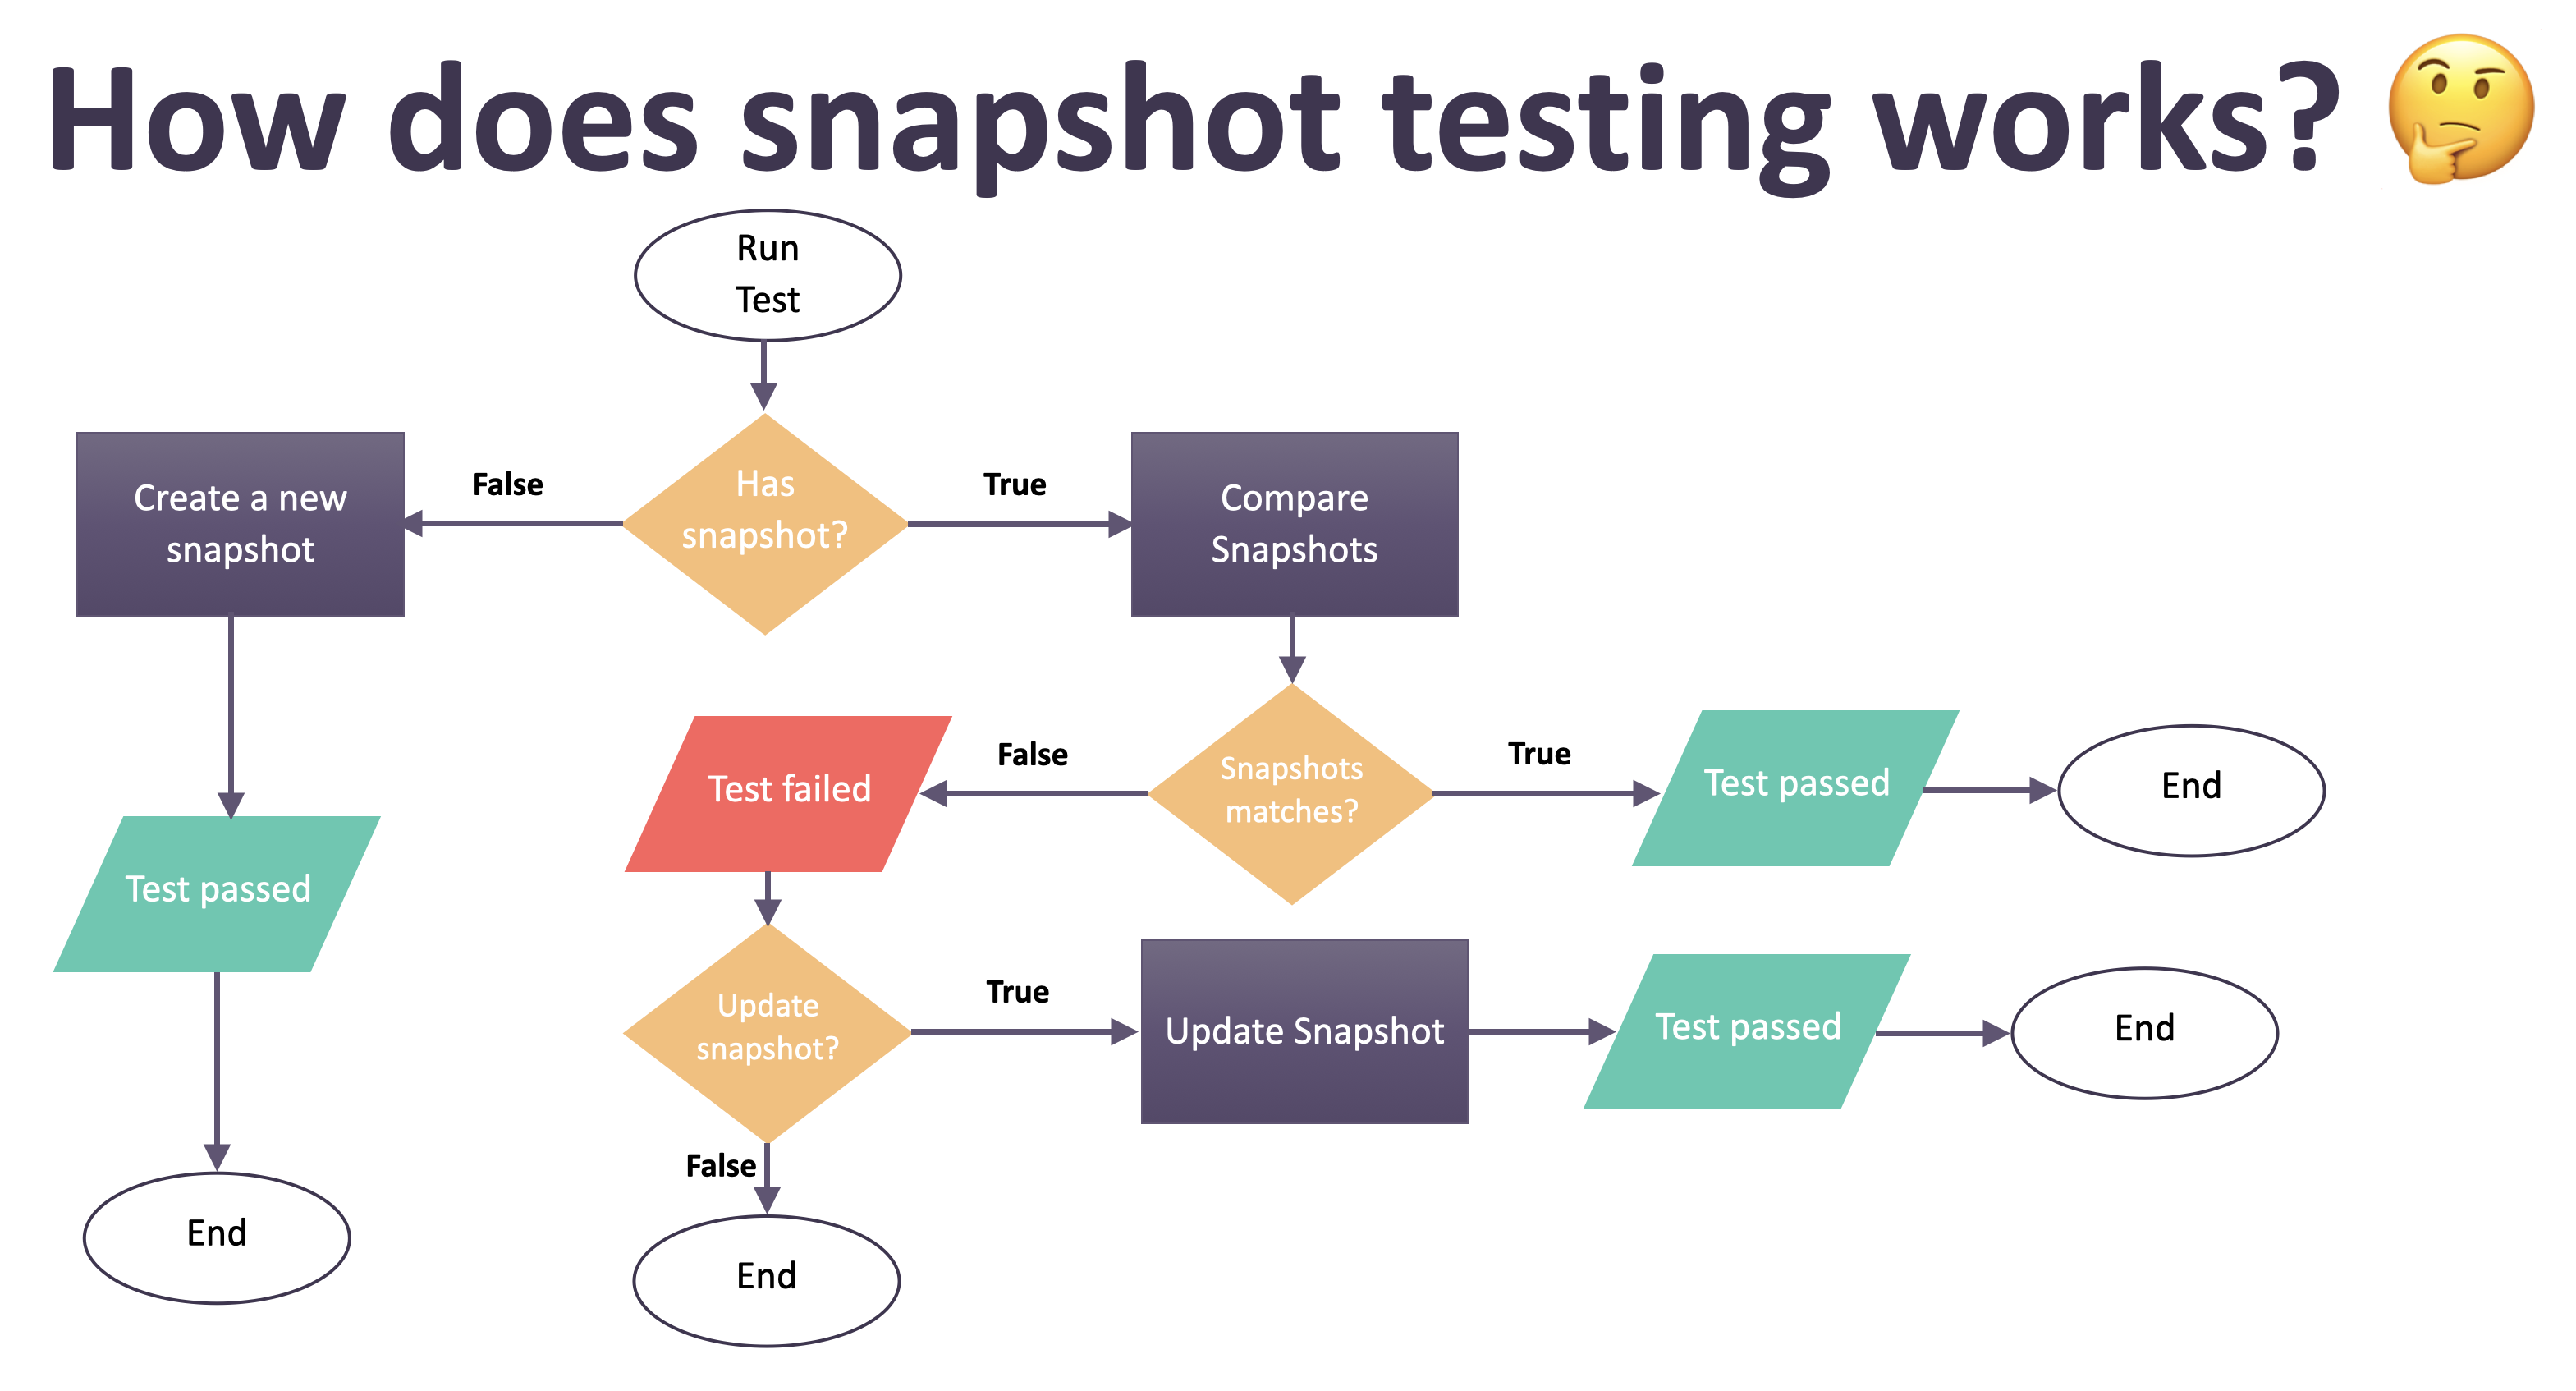
As we start the test, the availability of snapshots would be checked first. The snapshot gets generated automatically as we run the first test. In this case, the test is successfully completed.
You can find the snapshot along with other testing files. It is a file that contains text rendered from HTML, including information about the test title and its value.
Change Request: Add Agency
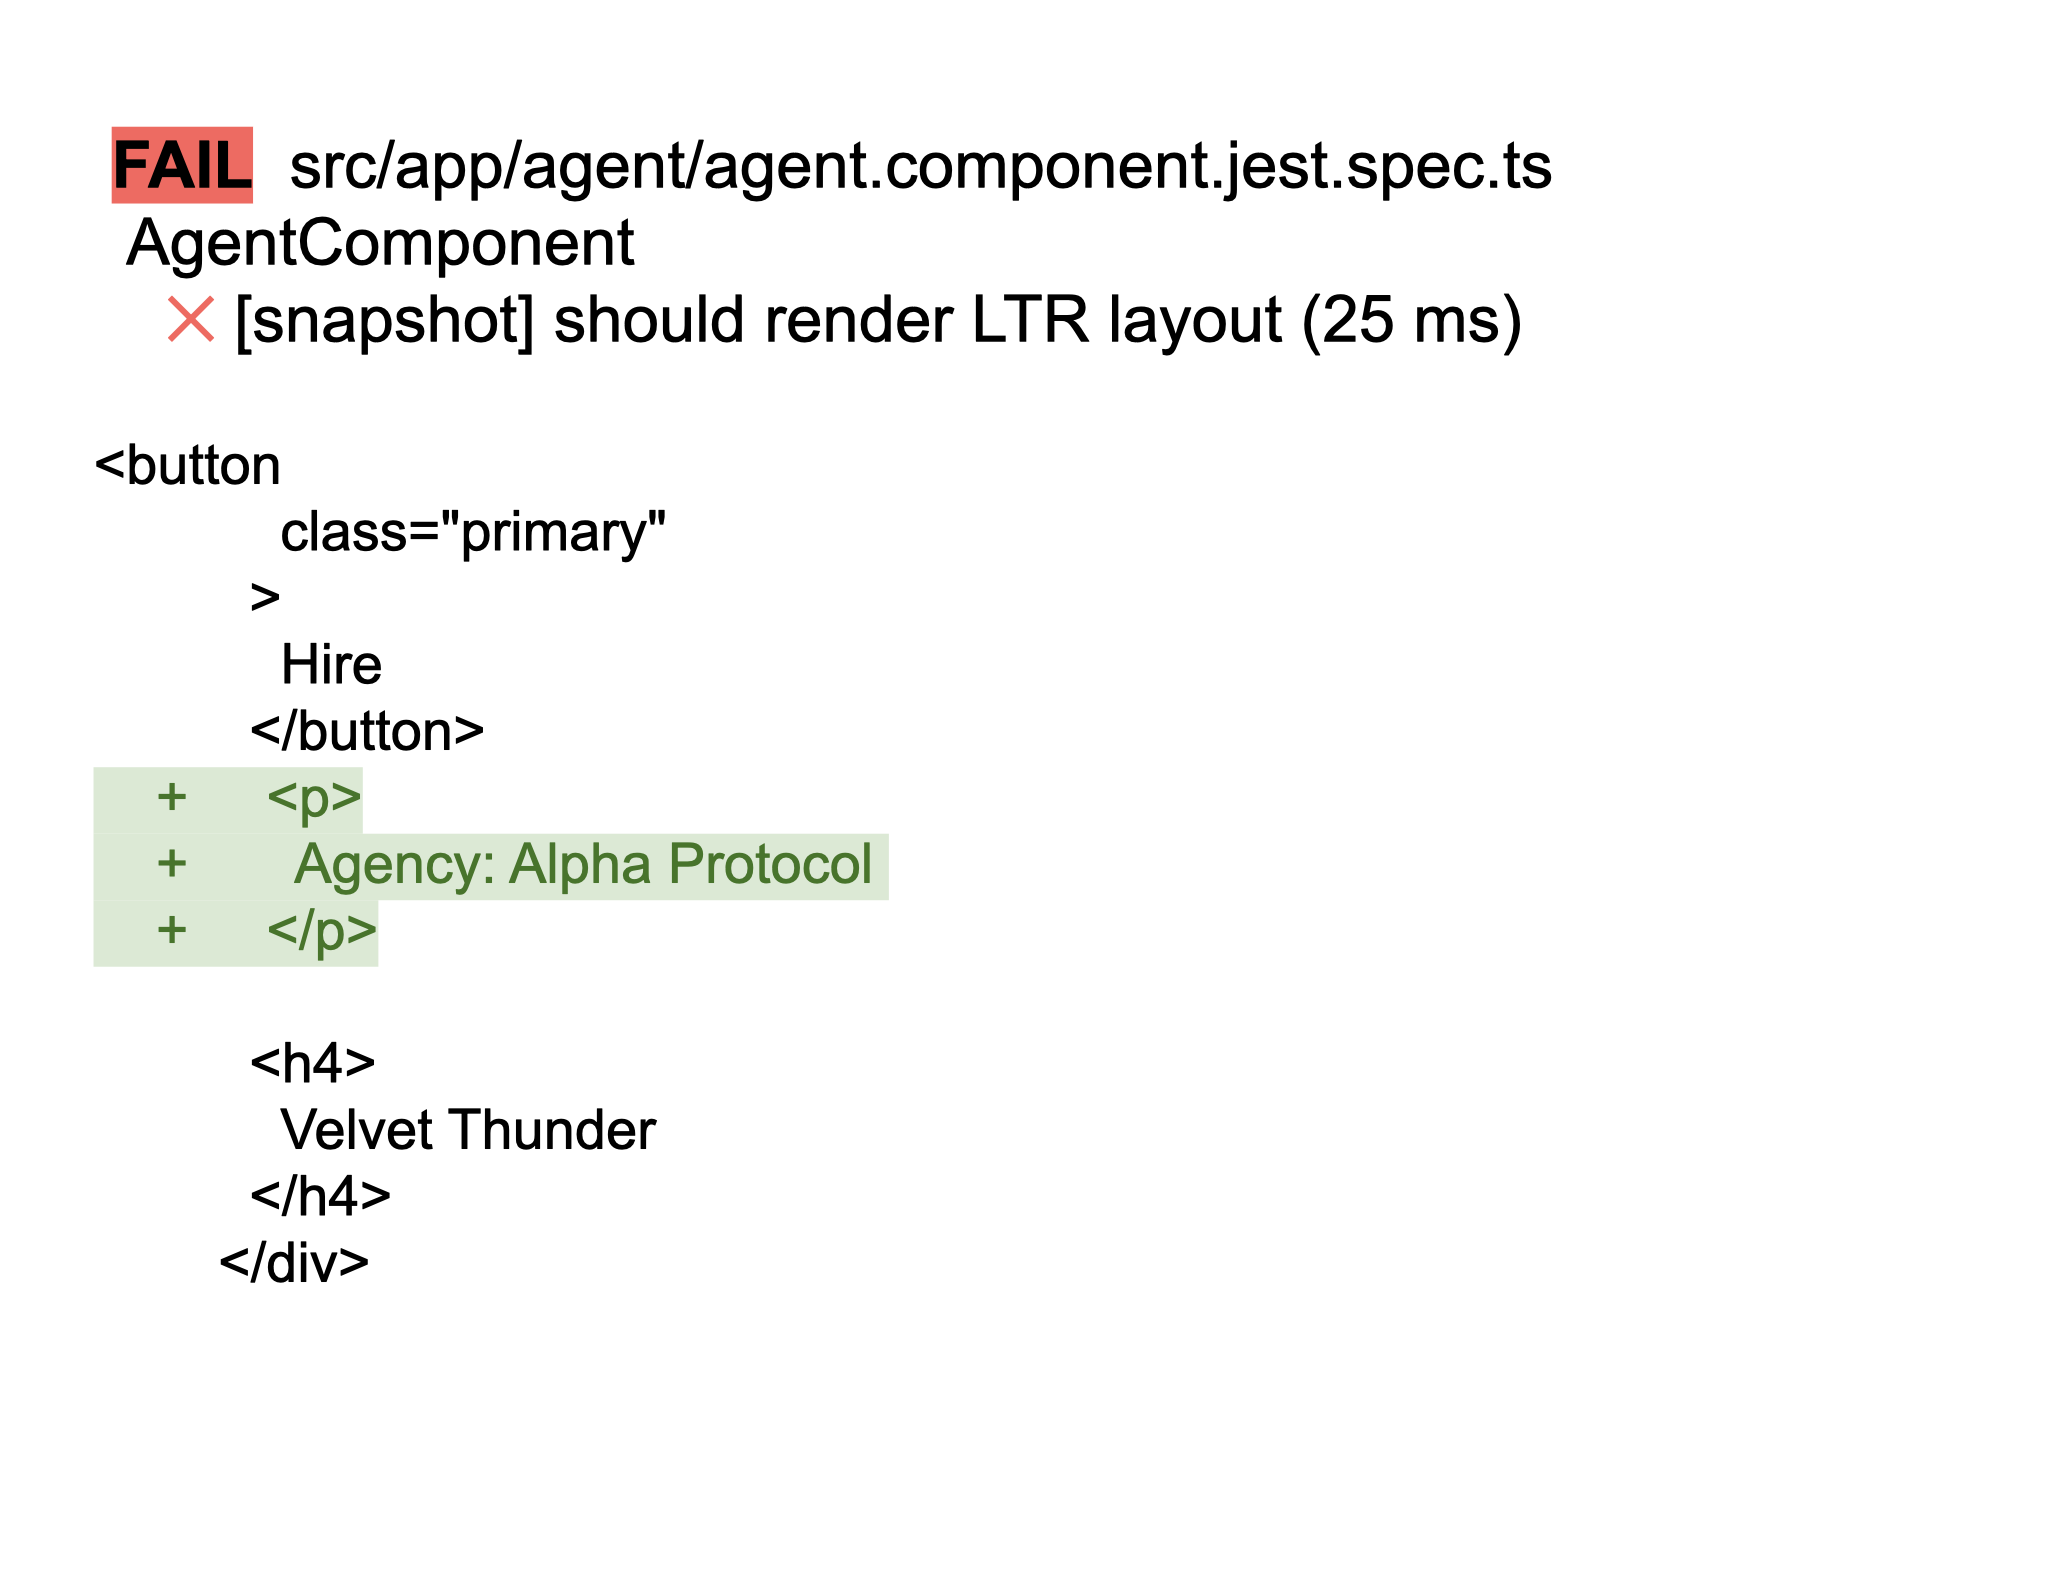
Let’s see how snapshot testing would work on the condition when we add a new Agency tag.
So, we add the <p> tag between the containers, just like in the previous case.
But the test will fail again, meaning that something in the code is broken. But the greatest advantage of snapshot testing is that it shows the changes that could have caused the test failure.
This drives us to two conclusions. First one, this change is expected. We added the <p> tag and that’s the way it should go. And the second one is that this change might be unexpected, and we have no clue how the <p> tag was added to the code.
What’s Next?
So, we start another snapshot test. According to the algorithm, it would first define whether there is a snapshot among the files. Since this is our second test, the snapshot has been already created. After this, we compare the first and second snapshots if they match or not.
- On condition the snapshots match (meaning no changes in the code were made), the test would be successfully completed.
- When the snapshots don’t match, you’ll see the failure in the test results. But Tthis is not the end, as the next actions will depend on whether the snapshot changes are expected or not.
- If the changes are unexpected, the testing ends, and we’ve got to go back to the code and figure out what caused the error.
- In case the changes are expected, and we deliberately change the code, we update the snapshot by clicking the ‘U’ button on the keyboard to update the snapshot. That’s it. The test will be marked as successfully completed.
So, snapshots make testing much easier. You can easily track code changes and fix errors. Also, it is easier to update the components when they change. Compared to a traditional testing method, snapshot testing increases test coverage.
Mocking Objects
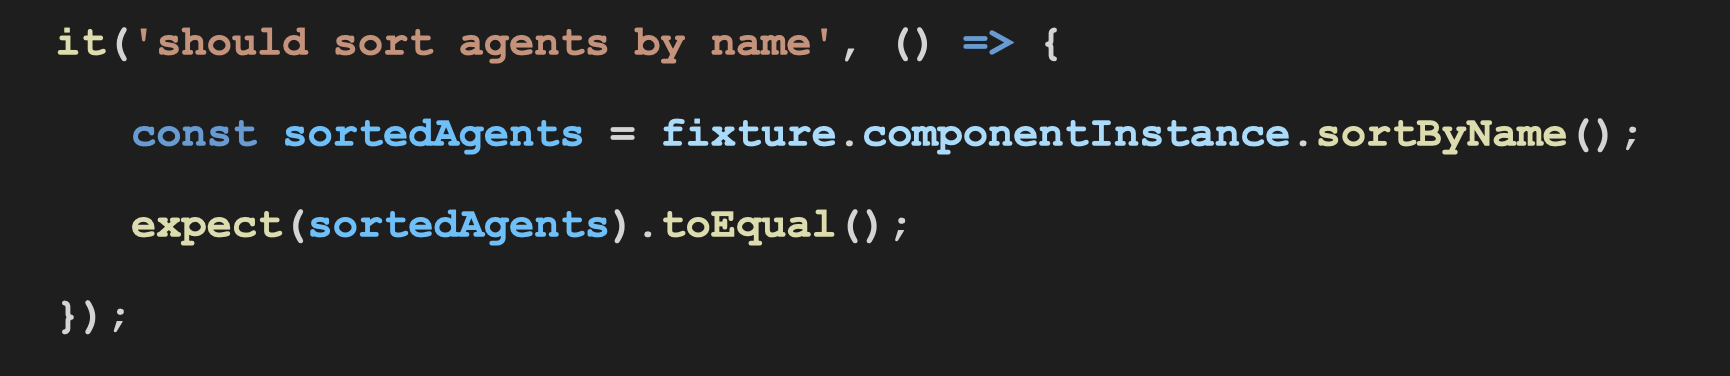
Let’s get back to our demo project, but this time test the container’s functionality – Sort by name.
We use the basic sorting method, so let’s see how it works through traditional and snapshot testing methods.

Testing the Traditional Way
We save the sorting results to variable and then expect the sorted agents to be equal to something. We are still uncertain about this since there are several options how can we get the sorting result.
We can either do it manually, which is not a good idea. Or we can bring the result to the console, then mock it, and…
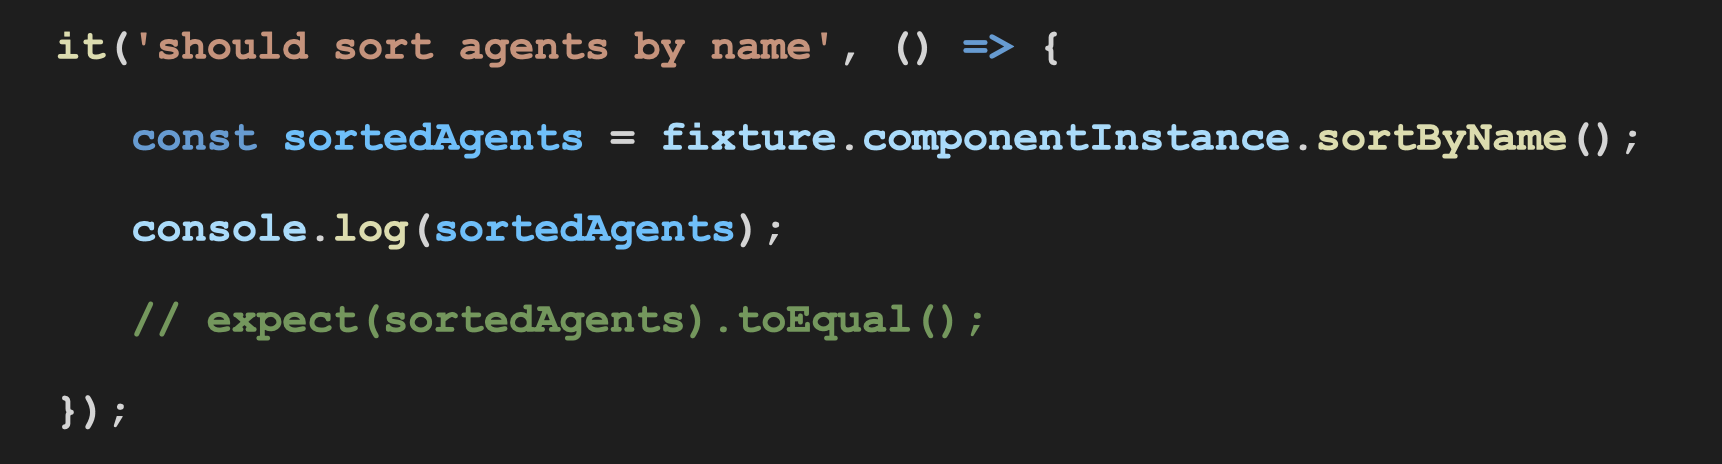
… add the result in this way. This is a common practice for sorting, searching, or other features.
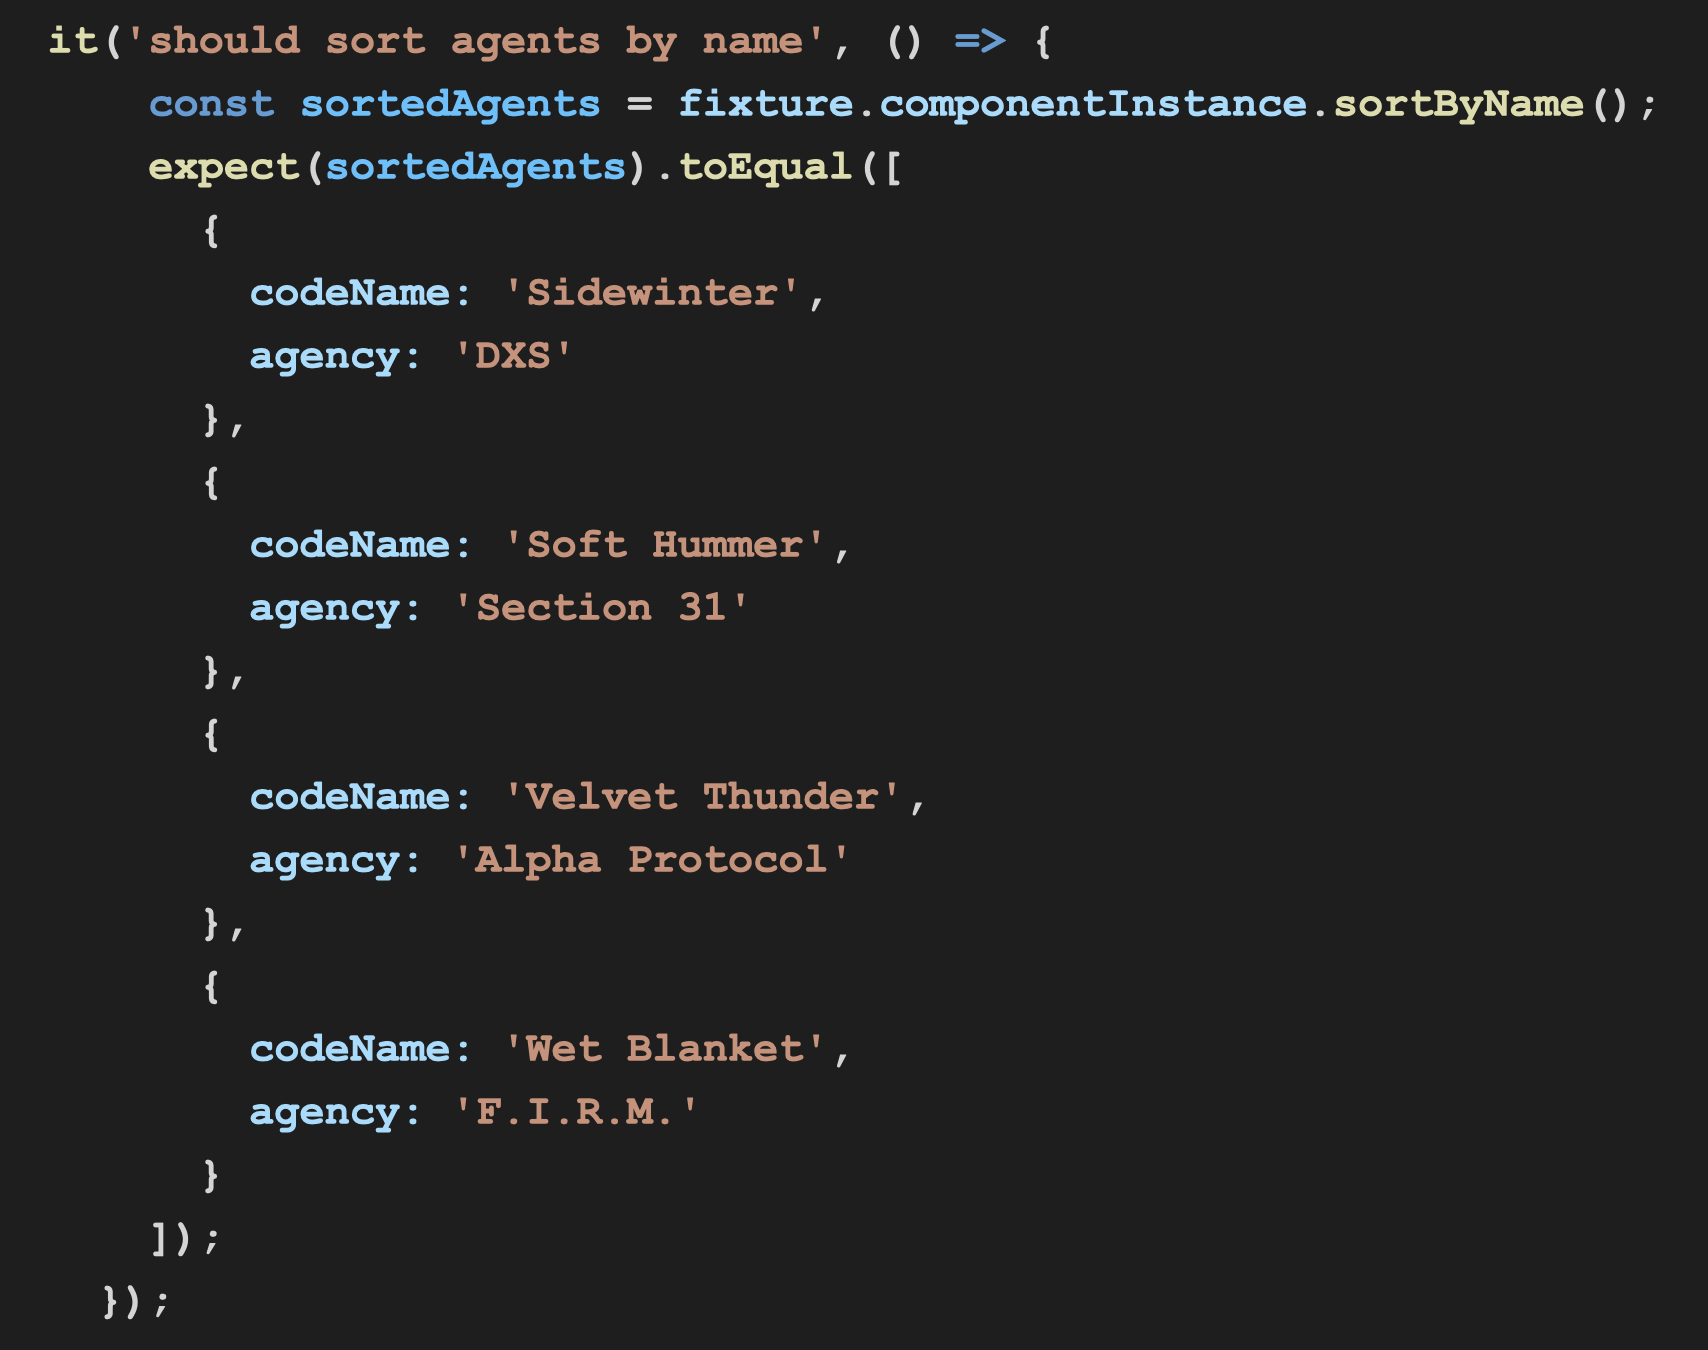
We’ll pass the test as we run it.

Change Request: Add New Agent
But what test results would we get once we’ve got to change the request and add a new agent?

On running the test, we’ll fail it. So, we’ve got to fix it somehow.
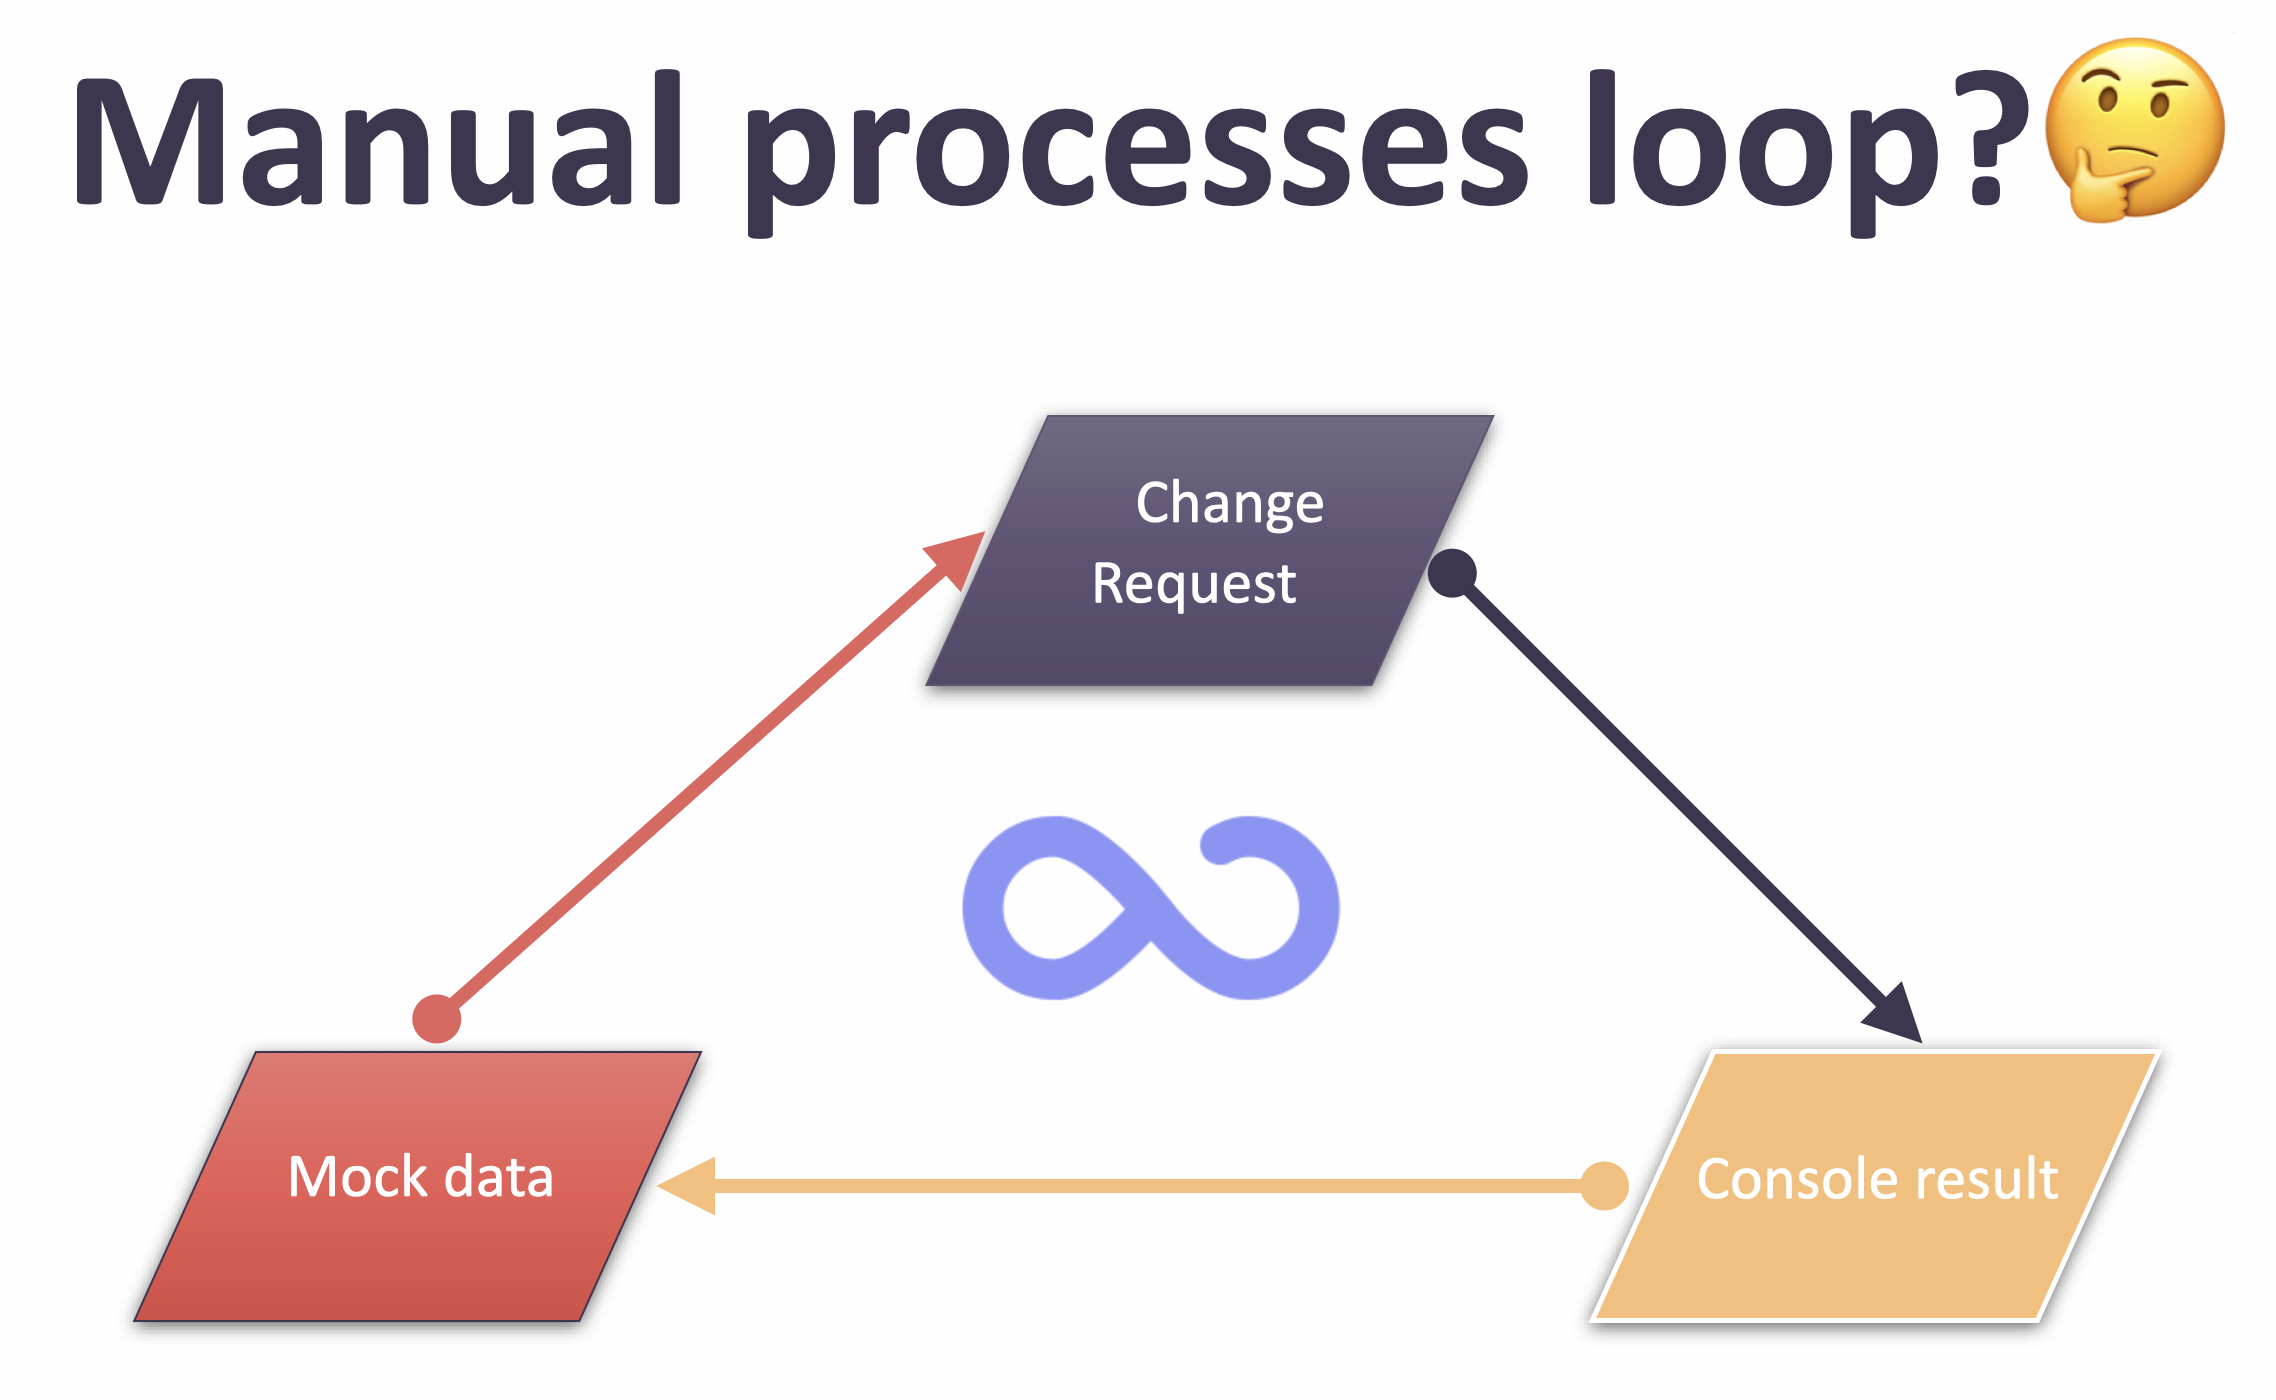

To fix this issue, we go to the test file, give comments, bring the result to the console, mock and paste it, run the test once again, and that’s it. We passed the test. But it might not be the way you want to fix the issues.
So, what’s the problem? Every time there is a change in the code, our tests fail. So, we’ve got to bring the result to the console, mock it, and repeat the test. Whether you add, delete an element or just update the code, you’ve got to go through the loop of manual processes endlessly.
So, let’s automate this process through snapshot testing.
Testing with Snapshots
Instead of mocking the result, we will compare it with the snapshot.

So, once we run the test, we will create the first snapshot file. We turn both Render and an object array into text.
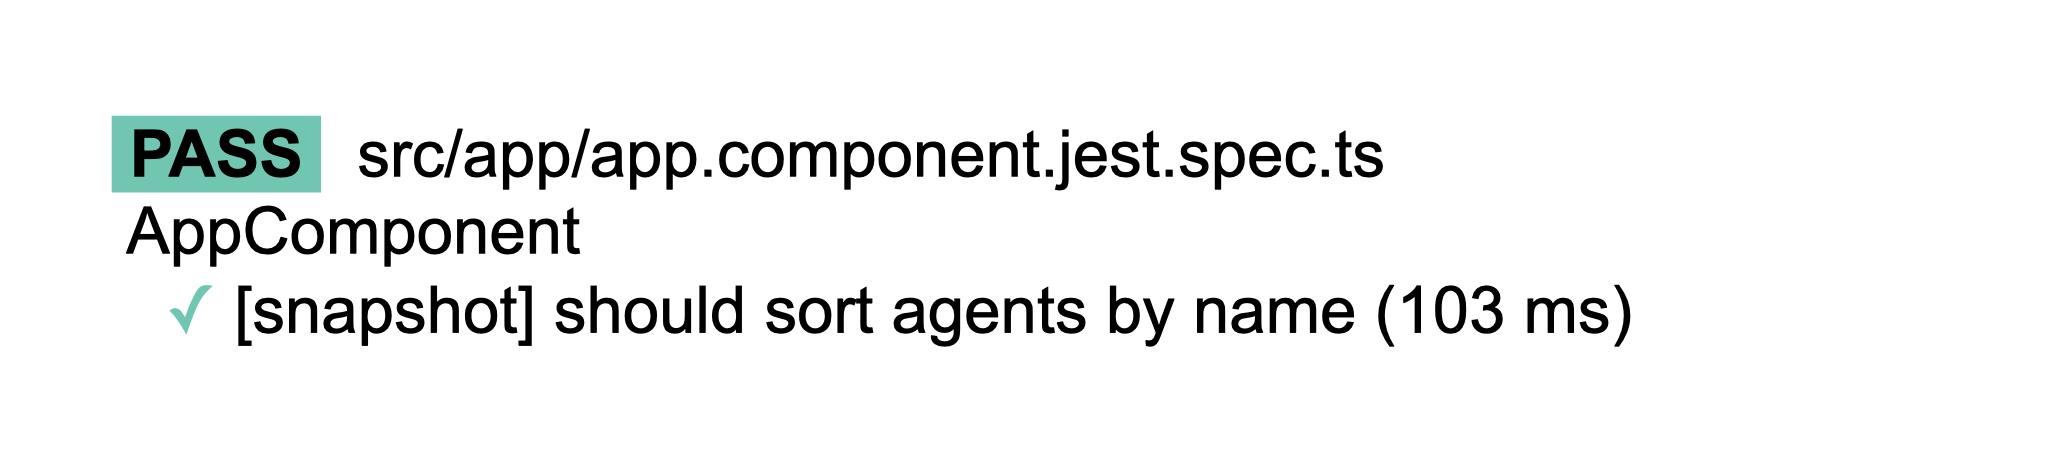
We’ll successfully pass the test.
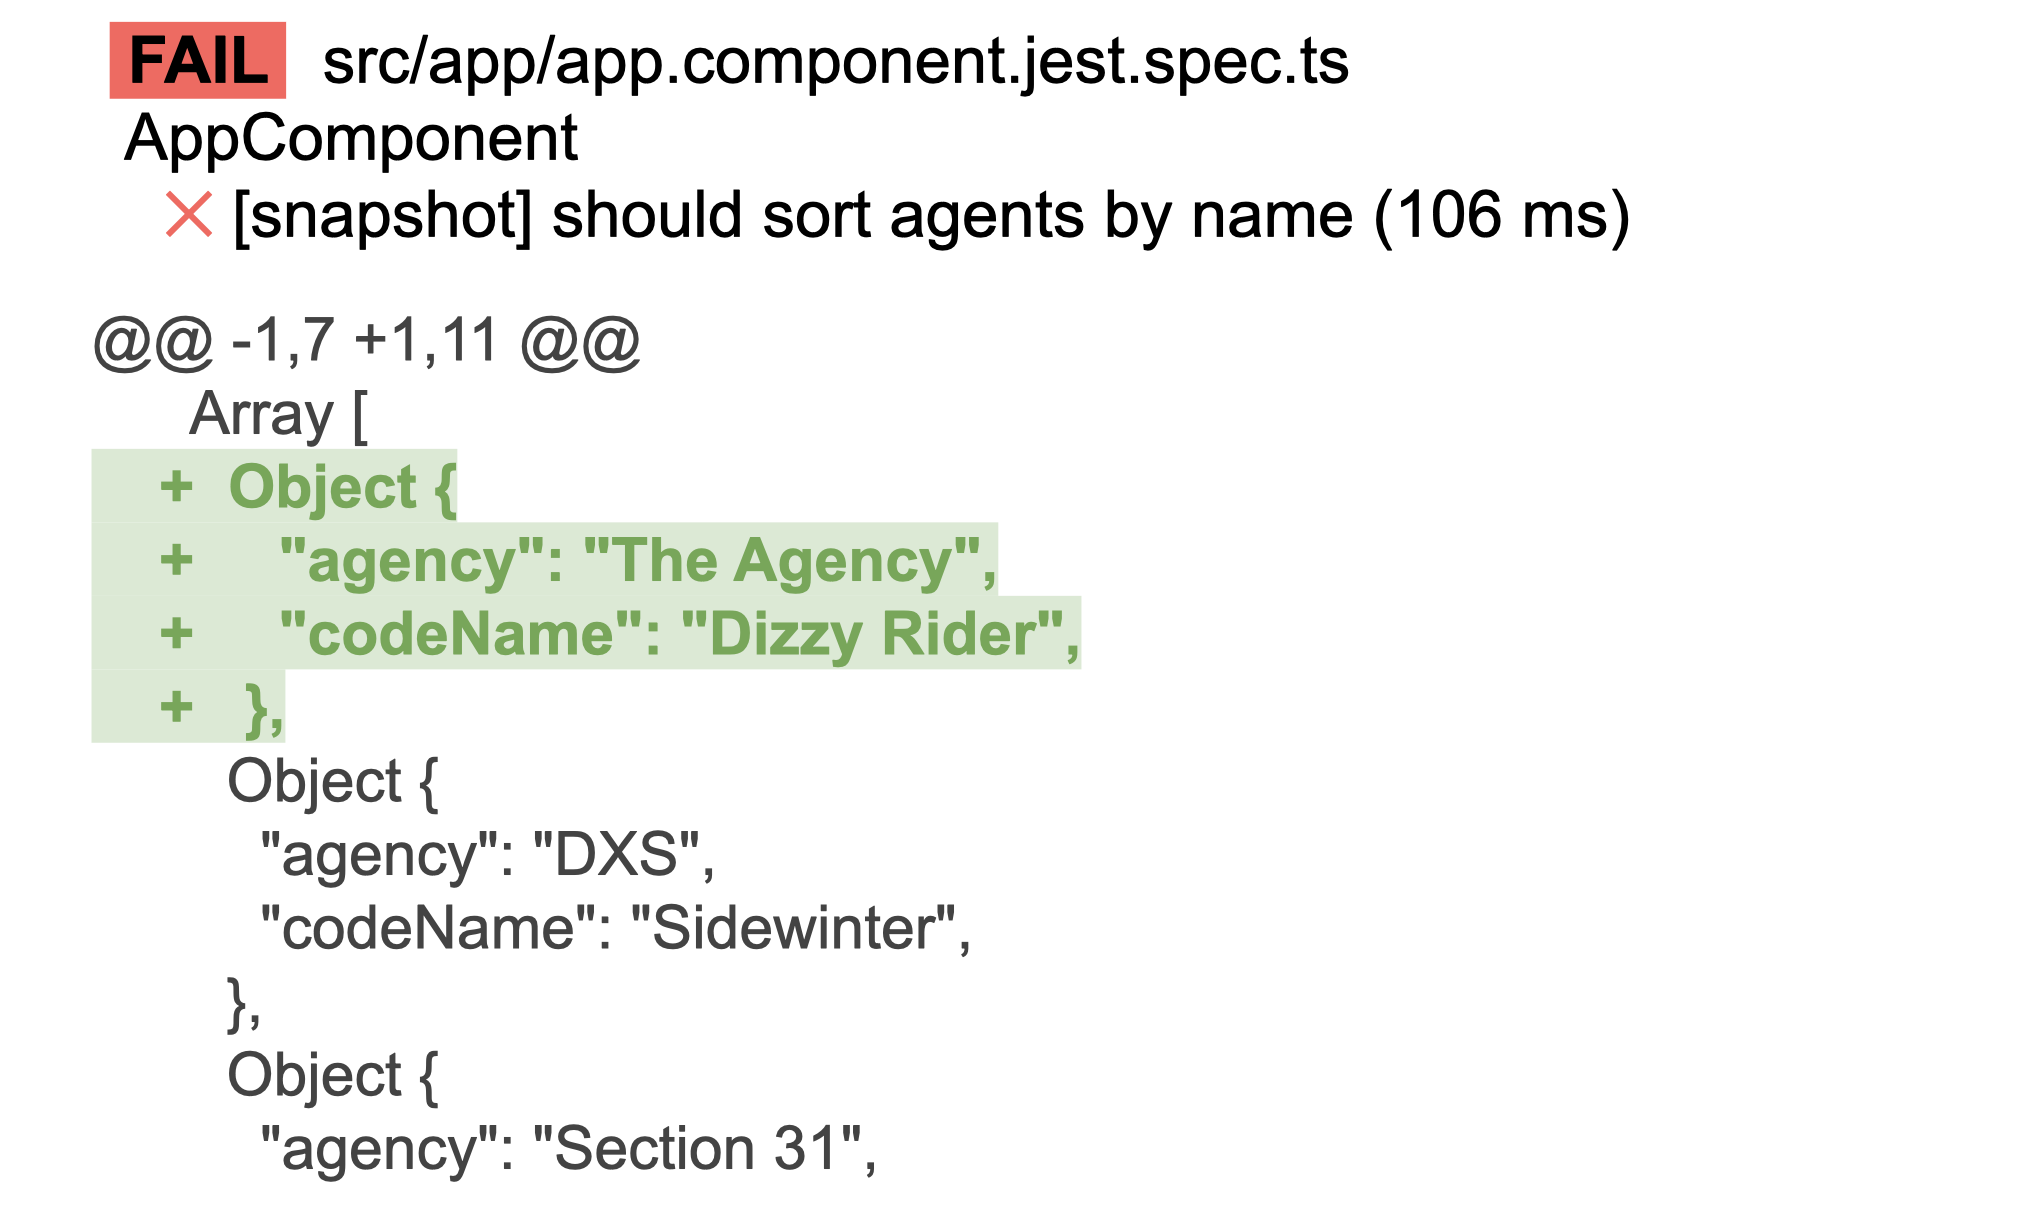
Change Request: Add New Agent
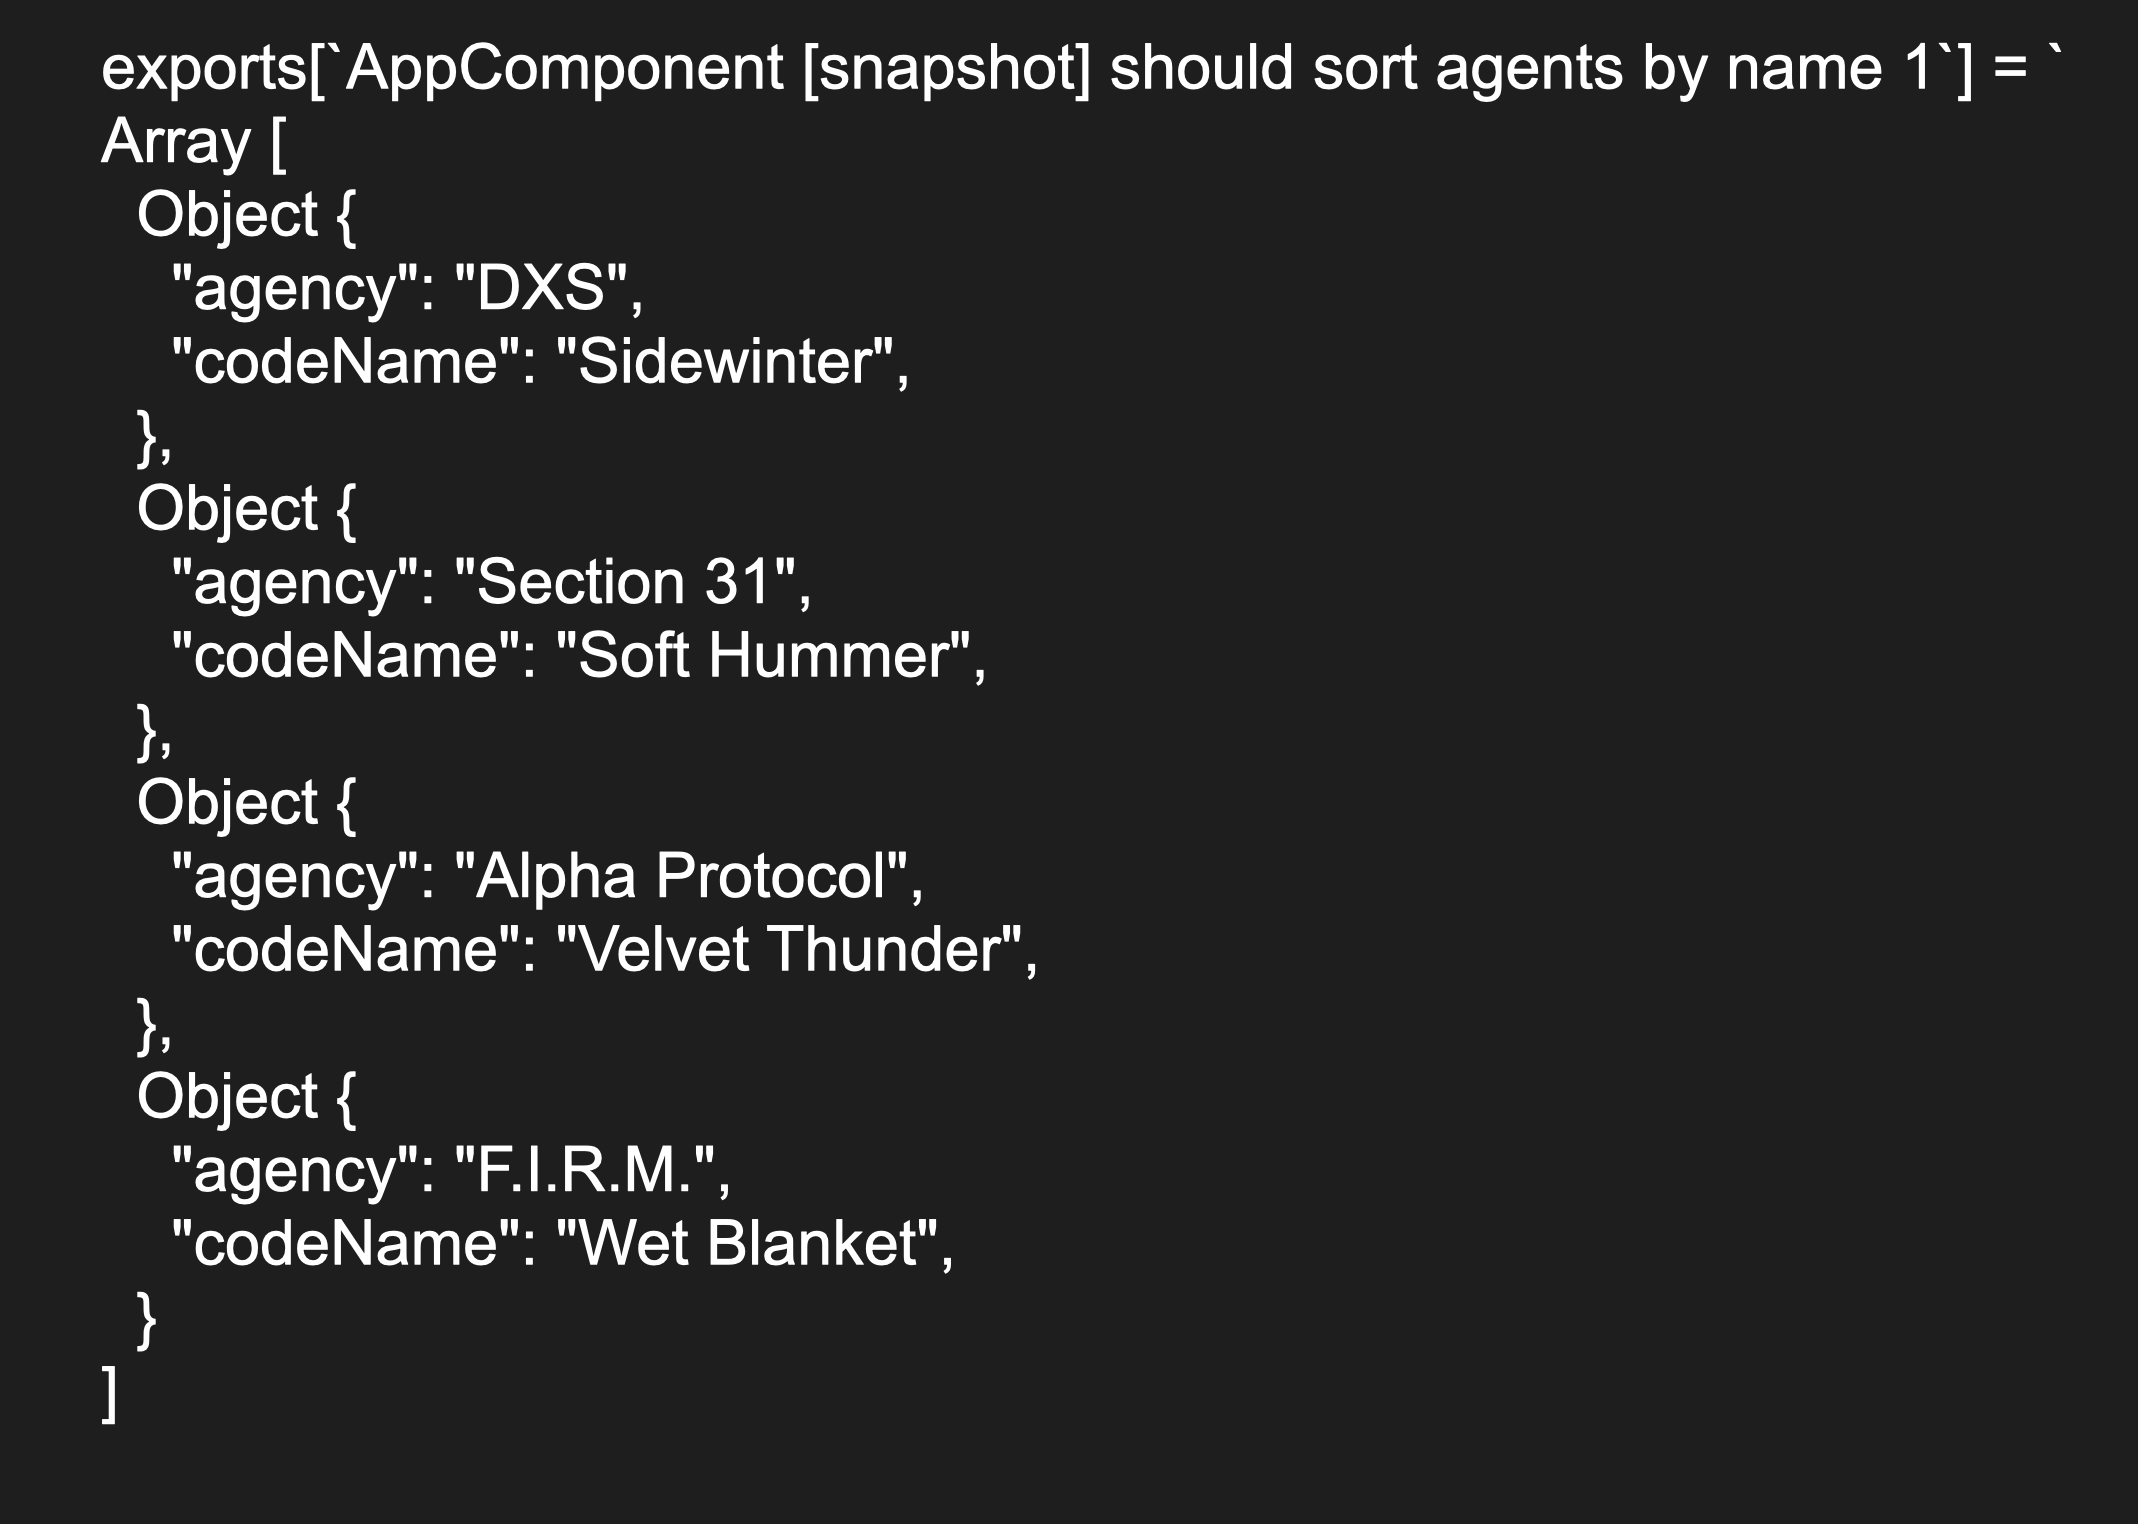
Again, we add a new element – a new agent Dizzy Rider to the object array.
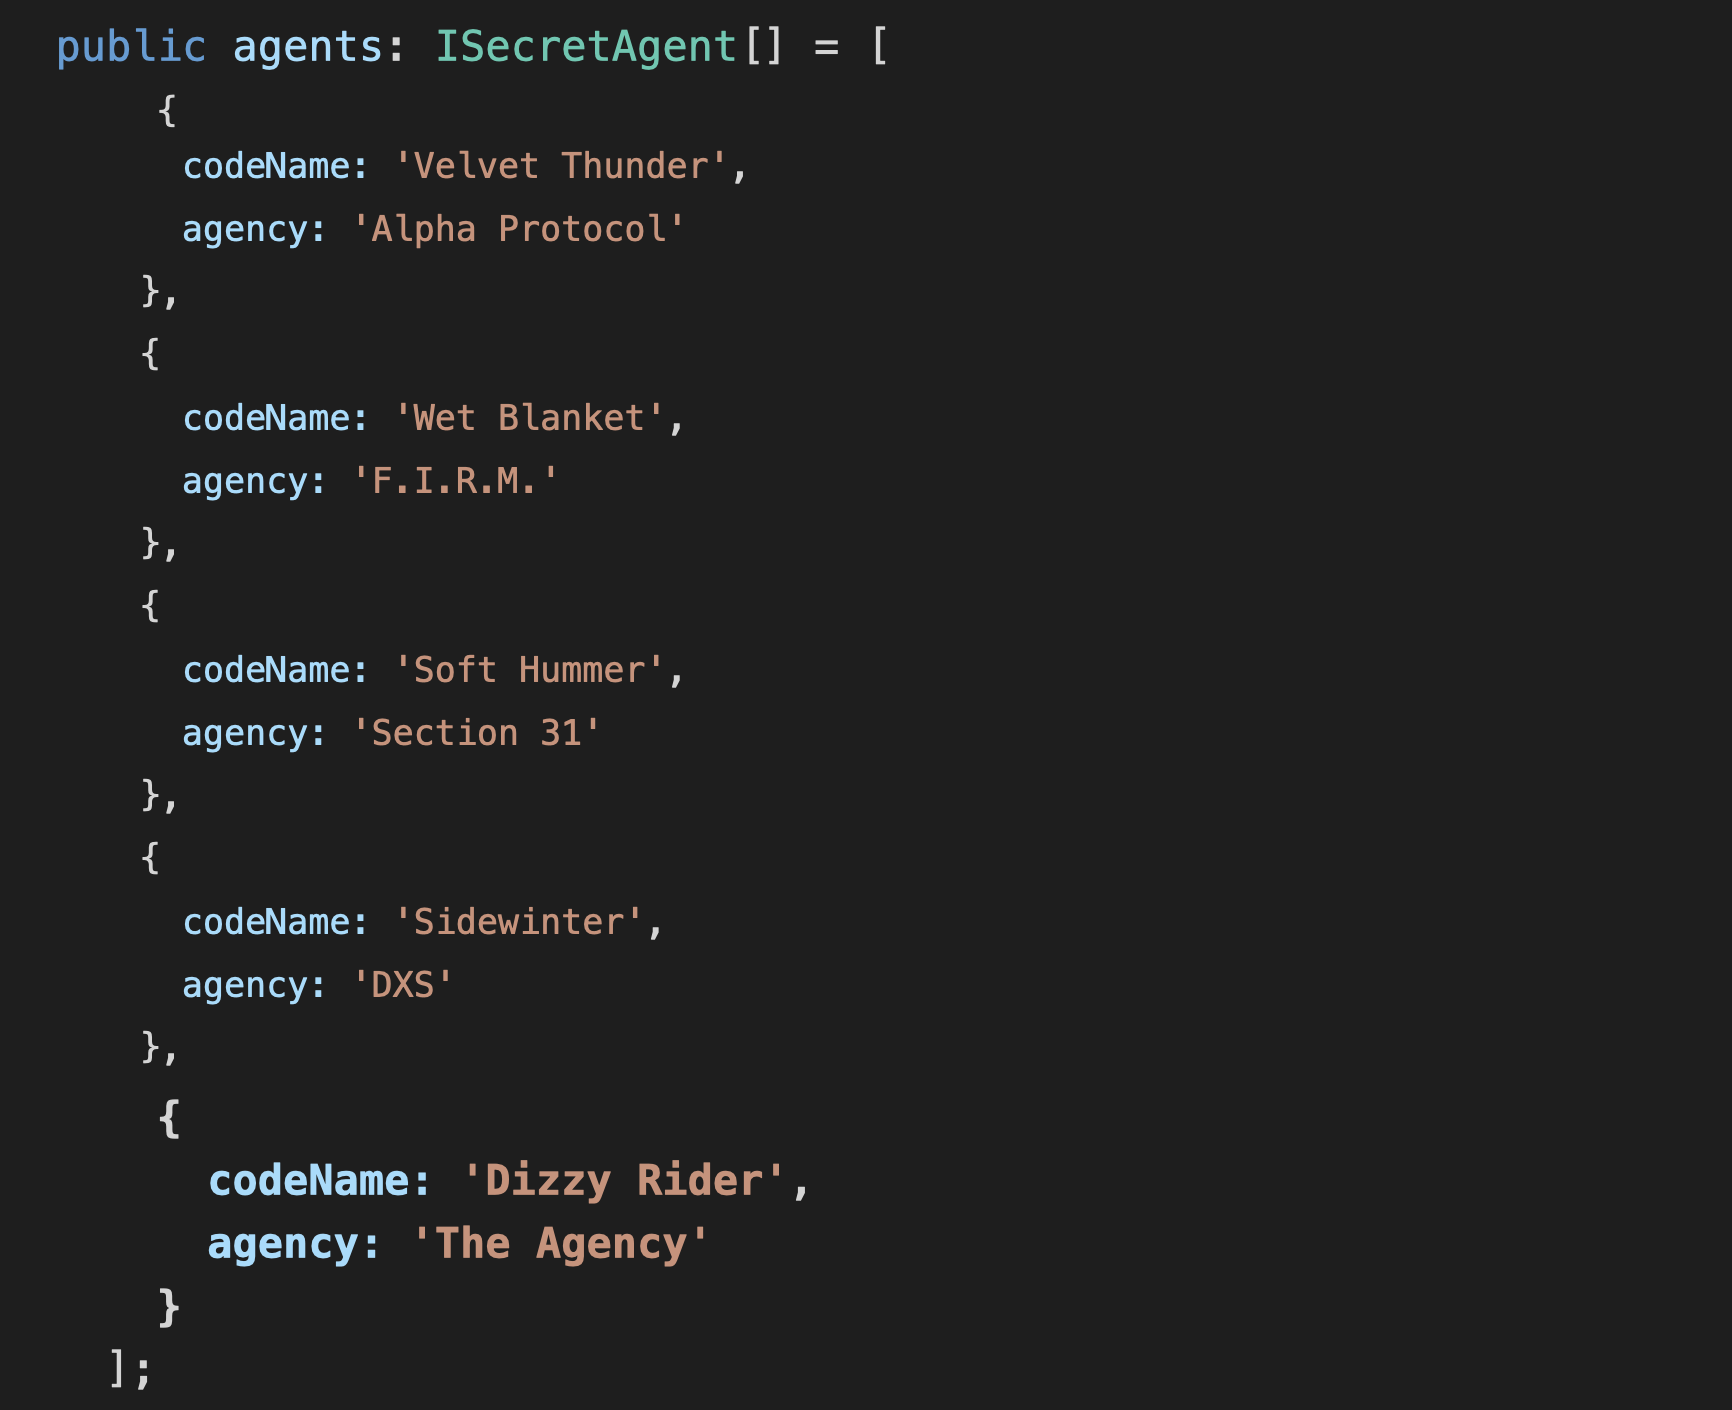
But the test will fail since the snapshots won’t match due to a new object. We can assess whether this object is expected or unexpected and then act based on the result of our decision-making.
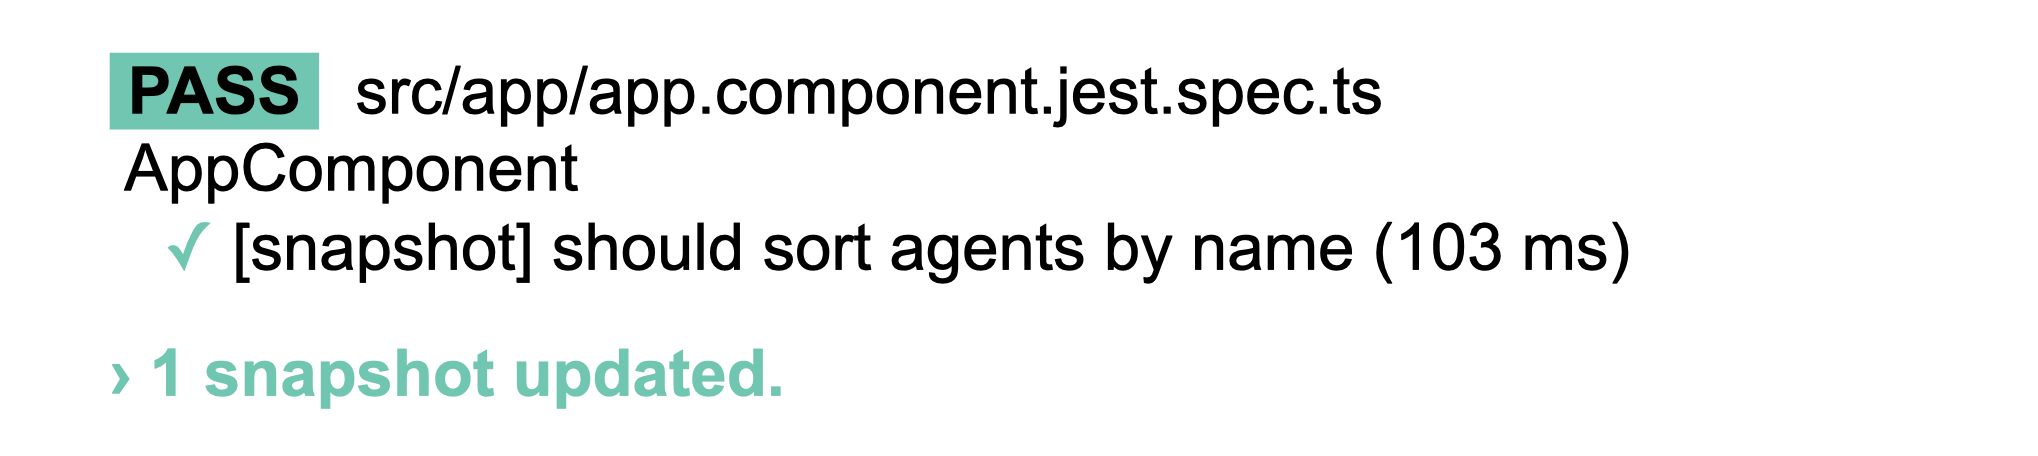
We added the fifth element to the object array on our own. So we just hit the ‘U’ button, and the testing ends successfully.
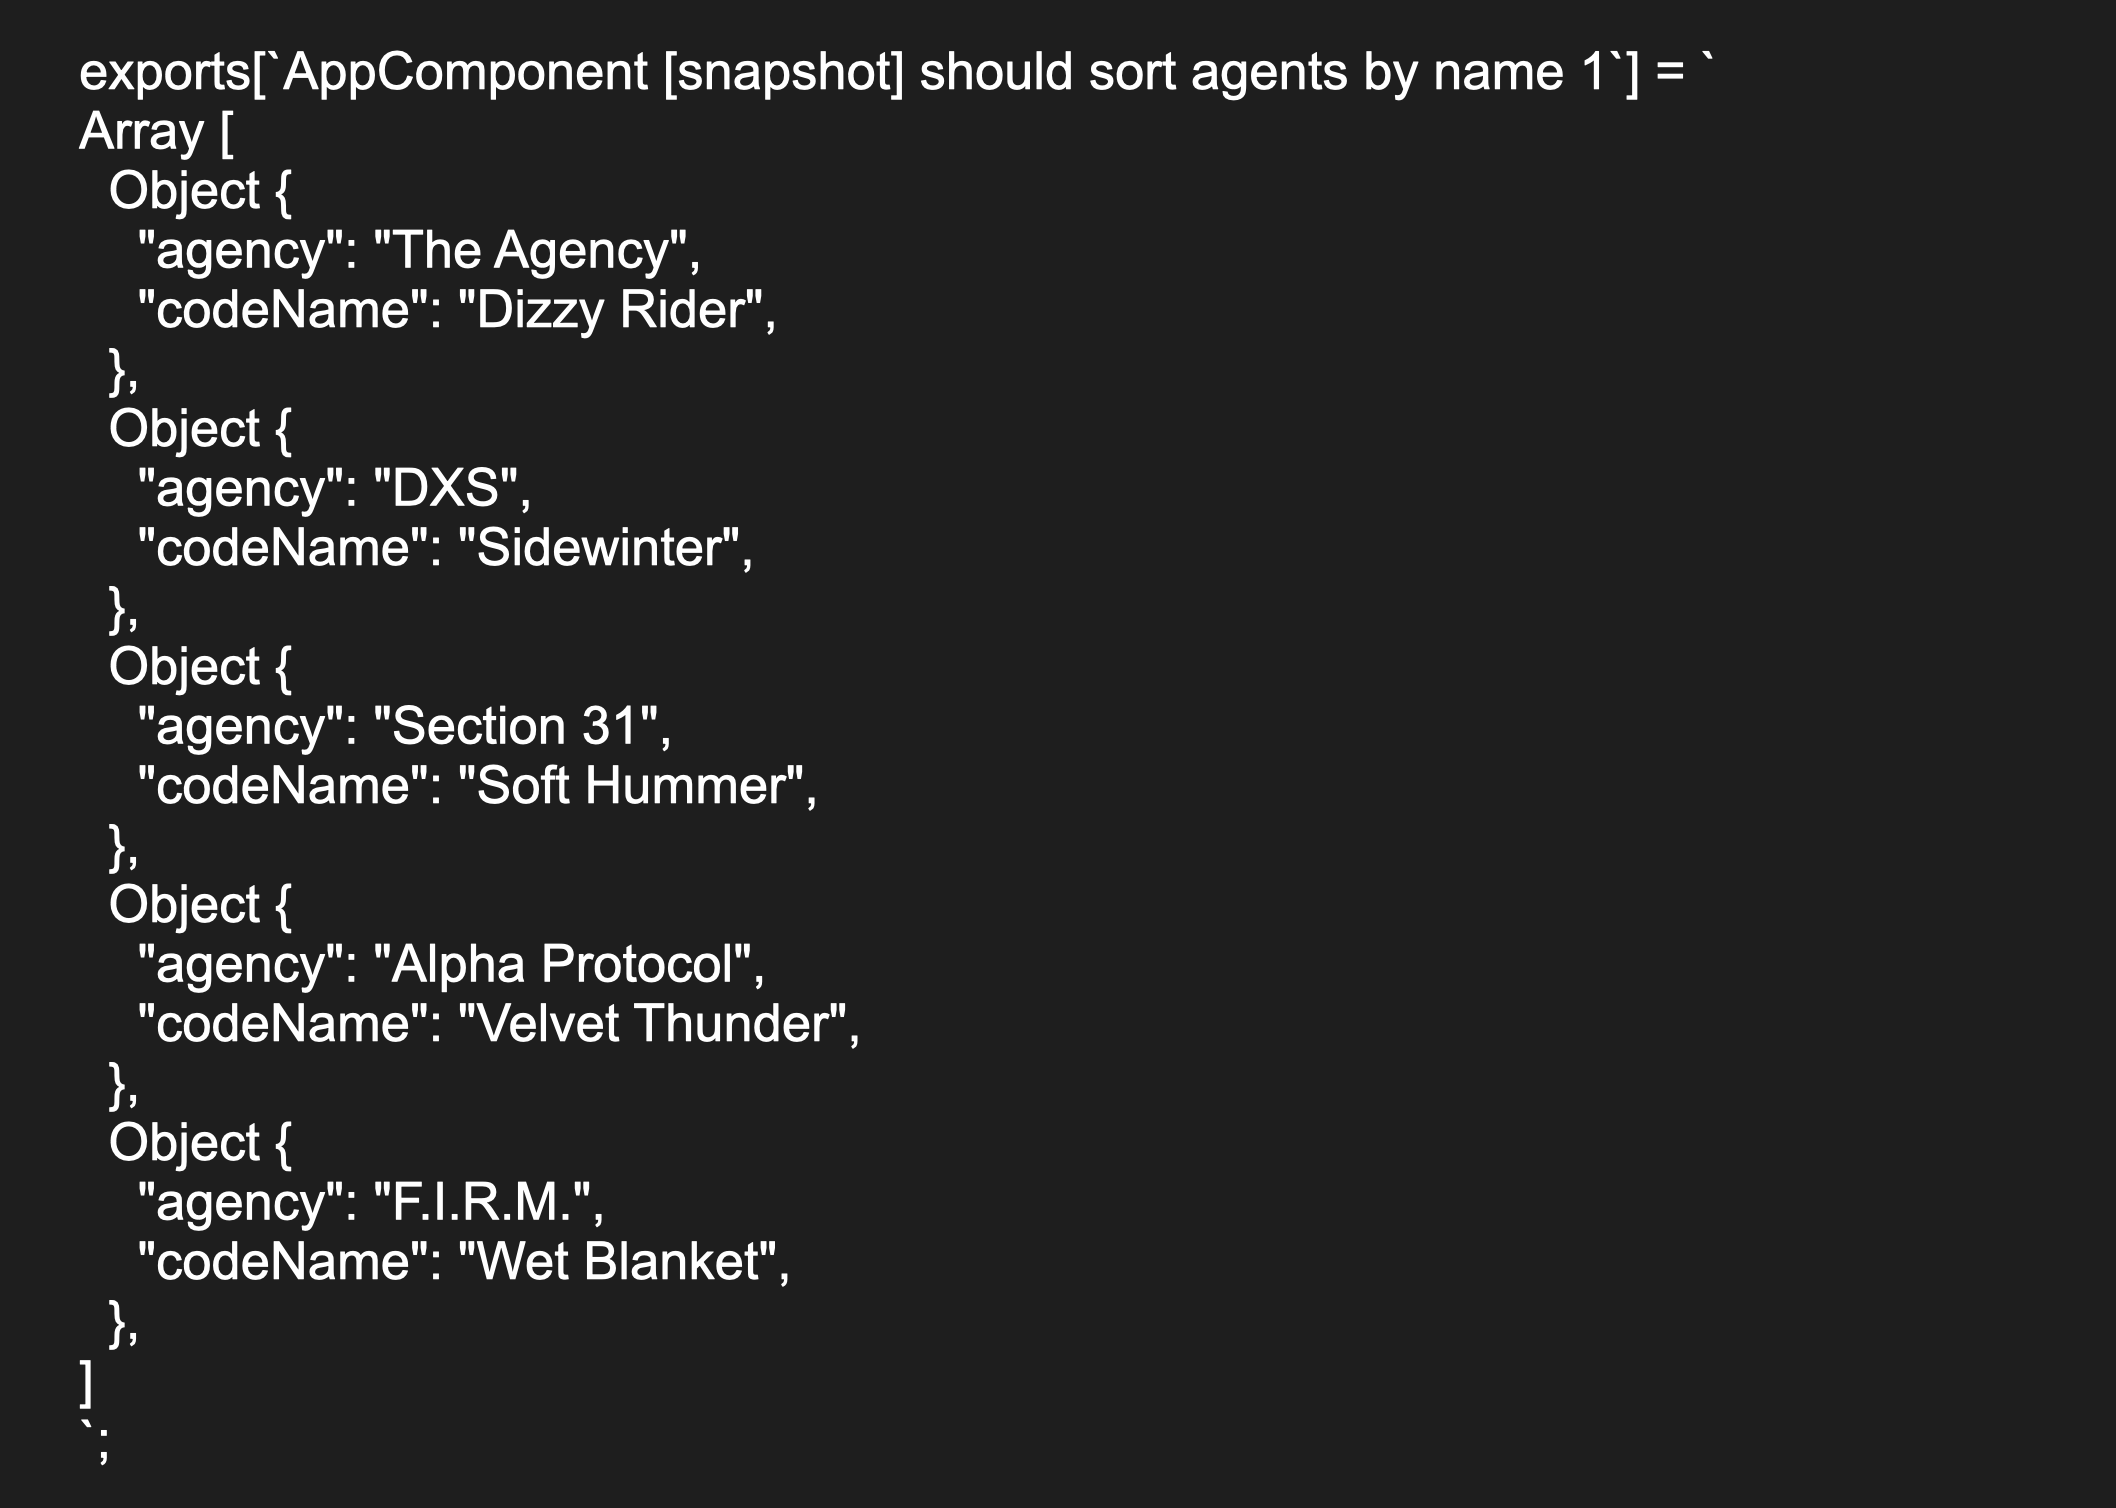
As we open the snapshot file, we’ll see five objects instead of four.
The Pros and Cons of Snapshot Testing
Just like any testing method, snapshot testing has its strong and weak sides.
Pros of Snapshot Testing
We’ve already seen the greatest perks of snapshot testing while testing our demo project, so let’s just sum them up.
Snapshot testing allows you to:
- Improve tracking changes that affect the application
- Avoid errors related to manual work
- Decrease testing time by eliminating manual work
- Boost test coverage
Due to its nature, snapshot testing works great for apps with already written code. When the code has been tested manually, and we know that it works, we don’t have to write large unit tests. All you’ve got to do is to run the snapshot test and record the first snapshot, which would allow you to compare it with the next versions.
Snapshot testing is also a good solution for refactoring when you’ve got to refactor a class or a method while maintaining its functionality.
Cons of Snapshot Testing
One of the disadvantages of snapshot testing is that there is no test-driven support. But it doesn’t make a big difference since it is very unlikely that developers or testers will be attempting to manually create snapshot files.
The overuse of snapshot testing is not beneficial as well. Replacing unit or functional tests with snapshot testing can be ineffective in certain situations.
Another issue of this testing method is that it can lead to merge conflicts. Every snapshot file should be added to the repository so other developers can have a source to compare the result of their test. As multiple developers work on the same component, this could be the reason for the merge conflict. Resolving merge conflicts can be cumbersome, especially when the snapshot is large.
Wrapping It Up
Snapshot testing is a fantastic tool for ensuring your UI does not change unexpectedly. It has numerous advantages and allows you to increase test coverage, track how changes affect the results, and diminish manual errors in the code.
But just as great as this testing method is, you should use it with caution. You should never accept the changes blindly and know the situations when it is effective. Also, even though snapshot tests are easier to carry, you should never replace unit or functional tests with snapshots. These tests do not testify that the app operates properly. They just prove whether the code hasn’t been changed and how the changes affected it.
Check out the demo code following this GitHub link