Hello! In this part we will speak about communication between microservices, and will add an API Gateway to our project. If you missed the first part of this topic, you may find it here.
When you build an application with microservice architecture, you will definitely have couple services running separately. Of course you will need them to communicate between each other. And also you would not probably want to keep in mind all DNS names of your servers to be able to call them. So, that makes sense to have some kind of “entry point” or “gateway” for your application. So you will make a request to that Gateway Server, and it, in his turn will redirect requests to the correct microservice.
So, lets do it!
From the last topic we already have Configuration Server, Eureka Server and the microservice called user-service. Let’s add one more service, and call it payment-service.
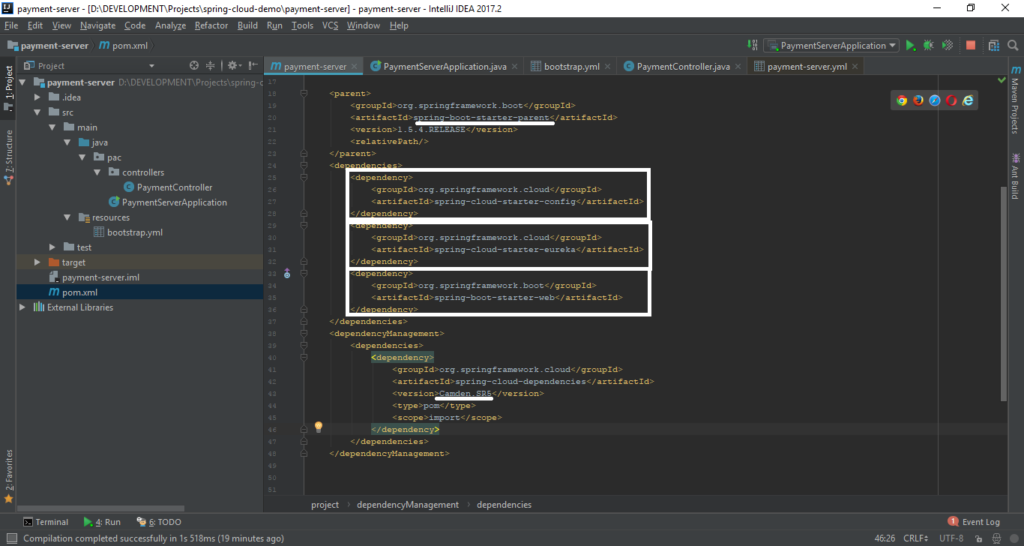
Create new Spring Boot Application. Then go to your pom.xml file, and here we will need to put dependencies that will teach our microservice:
- To communicate to Configuration Server, for requesting own configurations.
- To communicate with Eureka Server, for registering itself within our system and for getting information about other services that are already running.
- To become the MVC project, so would be able to set up REST endpoints for this service.
We also created PaymentServerApplication with main method.
@SpringBootApplication
@EnableDiscoveryClient
public class PaymentServerApplication {
    public static void main(String[] args) {
        SpringApplication.run(PaymentServerApplication.class, args);
    }
}
Also we need to tell our application where to find the configurations when it starts up. So let’s add bootstrap.yml file:
spring:
  application:
    name: payment-server
  cloud:
    config:
      uri: https://localhost:9999
server:
  port: 7002 //tell to use this port, in case server will not find remote configuration
So far we need to add configurations for the payment-server, and push them to the remote repository(we use GitHub);
server:
  port: 8002
eureka:
  client:
    serviceUrl:
defaultZone: https://localhost:2000/eureka- server.port = 8002 — when payment server is started up, we want it to serve on the 8002 http port;
- eureka.client.serviceUrl.defaultZone = https://localhost:2000/eureka — here we tell the Eureka addres where our payment-server has to go in order to register itself in the system and get information about all available and running instanses.
And last thing to add before testing if it’s working correctly, just a simpe REST controller with one mapping that will return a String value “Hi, this is message from payment-server”
@RestController
@RequestMapping(value = "/payments")
public class PaymentController {

    @GetMapping(value = "/message")
    public String getMessage(){
        return "Hi, this is message from payment-server";
    }
}Starting the server…
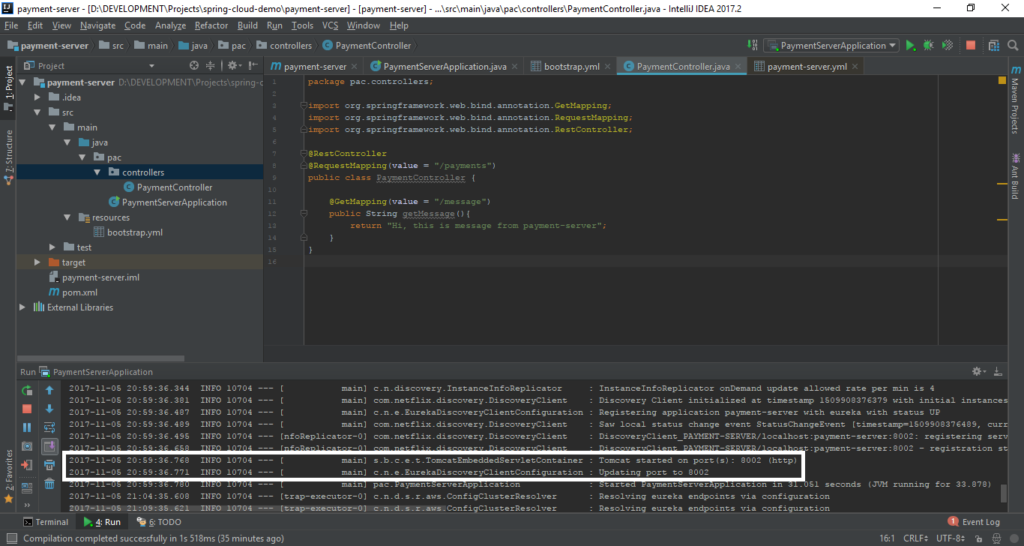
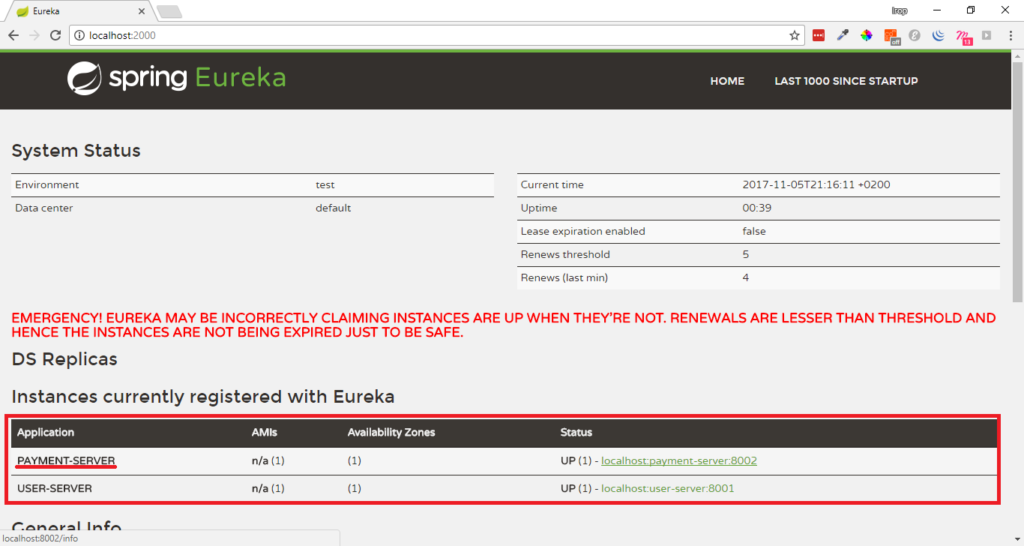
We can see that it Tomcat successfully started on port: 8002. And in the logs you can notice message “Registering application payment-server with eureka with status UP” — that’s mean that our payment-server registerd with Eureka and should be available and displayed in the Eureka UI. Let’s check. Open your browser, go to https://localhost:2000 — this is the address of our Eureka Server, and here we go:
The last thing is to check if the server is working and accessible. We ping the single mapping of the payment-server, which is /payments/message:
Awesome, now we have payment-server working and available on localhost:8002. So, any time we can make a request to it and got expected response. And if we want something from user-server, that we built in the last tutorial, we need to call localhost:8001. But what does that mean? If we have 10, or 30 microservices, do we need to remember all DNS names, or hosts and ports where they are running in order to make requests to them? If so — that would be very strange and uncomfortable 😉
Here where we need Spring Cloud Zuul!
What is Zuul?
- Zuul is JVM-based router and load balancer;
- It can be used for many API Gateway needs;
Zuul server should be working like a Gateway. You will make requests to one server(Zuul server), and it in his turn will redirect them to corresponding microservices. Let’s set up one!
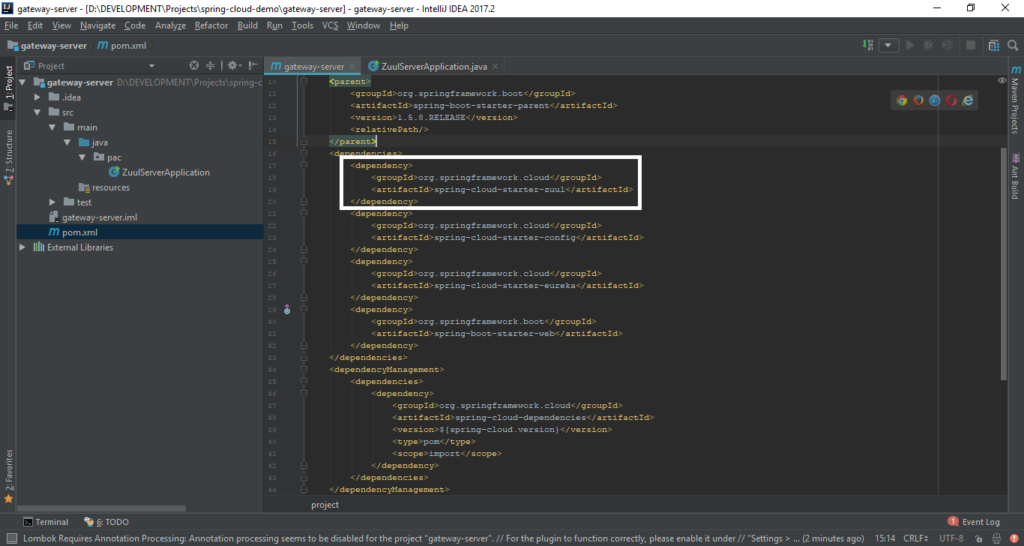
We need another Spring Boot Application. The pom.xml file should have additional dependency. It should be:
<dependency>
    <groupId>org.springframework.cloud</groupId>
    <artifactId>spring-cloud-starter-zuul</artifactId>
</dependency>
So, the whole file looks like:
In the main class of the application, it is ZuulServerApplication, we need to tell the server that it is going to be our Gateway, and that it should be registered with our Eureka Server in order to get information about all available instances, so it would know where to transfer requests.
@SpringBootApplication
@EnableZuulProxy
@EnableDiscoveryClient
public class ZuulServerApplication {
    public static void main(String[] args) {
        SpringApplication.run(ZuulServerApplication.class, args);
    }
}
So far we need to tell our ZuulApplicationServer where to go and get own configurations. For this we add bootstrap.yml with next data:
spring:
  application:
    name: gateway-server
  cloud:
    config:
      uri: https://localhost:9999
And also we’ll create gateway-server.yml with configuration for our Gateway, and push this file to remote repo:
server:
  port: 8080
eureka:
  client:
    serviceUrl:
      defaultZone: https://localhost:2000/eureka
So, from now on we want to make our requests to https://localhost:8080.
Let’s get messages from user-server and payment-server through our ZuulServerApplication:
As you see, all requests made to localhost:8080(our Gateway). URLs of theese requests contain name of the server(server id in Eureka registry), so Zuul definitely knows where to redirect current request.
So, with Zuul, Eureka client ids become URIs.
- /payment-server routes to payment server;
- /user-server routes to user server;
When Zuul Service starts up -> it automatically registers all services ids taken from Eureka and makes them as request mapping urls:
So, with the help of Spring Cloud Zuul you can take control of all incoming requests and automatically redirect them to corresponding microservices.
In next parts we will also speak about intercommunication microservice-to-microservice and how to make it possible. Stay tuned!
