As many development teams now use automated database migration, you should know what tools can help you configure and maintain database schemas. Using Flyway is just the right solution if you have a basic understanding of SQL. Database migration using Flyway is quickly gaining popularity in software development because it’s easy to use and can be integrated with your existing application system. Furthermore, it supports many databases, including PostgreSQL, MySQL, Oracle DB, H2 db, and many others.
In this article, we’ll review the Flyway database migration tool — one of the most popular in the Spring Boot world.
Let’s Go Over a Use Case With MySQL
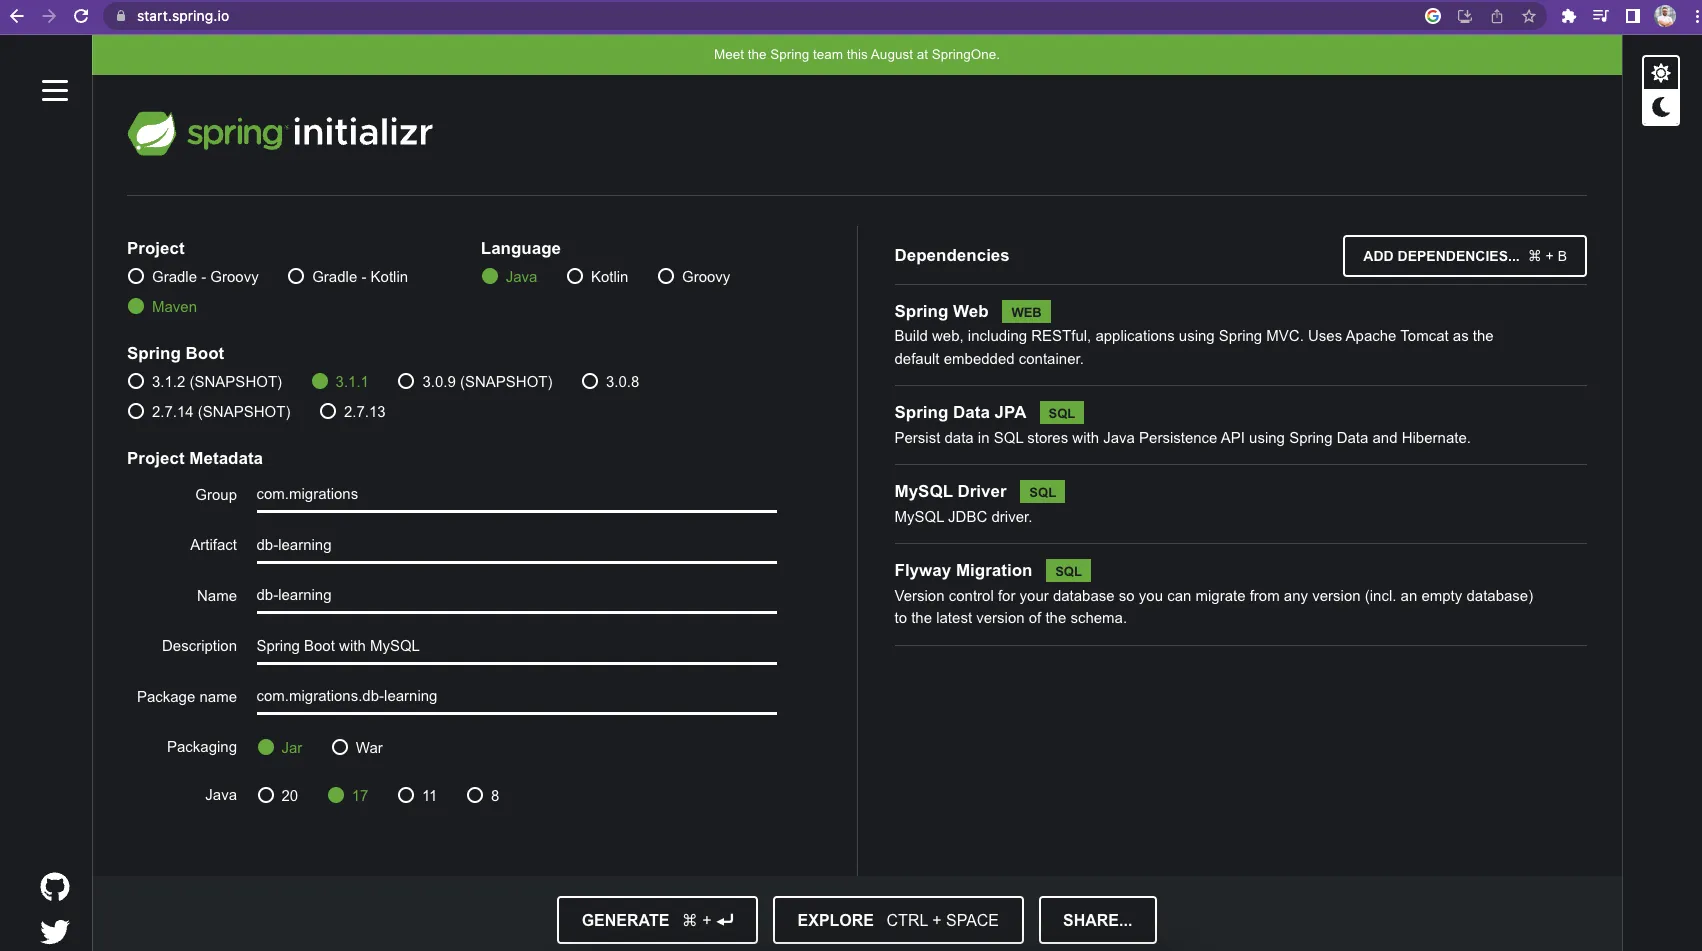
To start, we’ll go to the Spring Initializr website and create a simple project.
Suppose you have the MySQL database up and running. Ours is running at the local host and 3306 port. First, we create a simple User class.
@Entity
@Table(name = "users")
public class User {

@Id
@GeneratedValue(strategy = GenerationType.IDENTITY)
private Long id;
@Column(name = "email") private String email;
@Column(name = "password") private String password;
@Column(name = "createdAt") private Date createdAt;
}
We also need to configure our app to connect to local MySQL. Let’s do this in application.yml
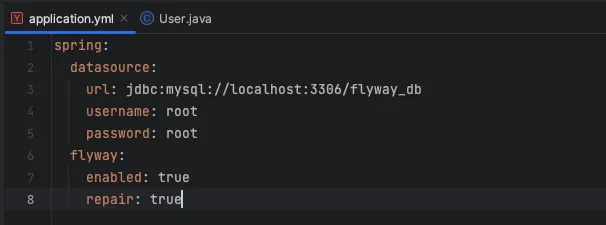
We also need to configure our app to connect to local MySQL. Let’s do this in application.yml
Creation of SQL Table Users in MySQL
It’s also necessary to create SQL table users in MySQL.
First, create a schema called flyway_db in your MySQL instance.
Then you can create your migration scripts; the first step is to create a users table.
By default, Flyway will monitor the db/migration folder under the resources directory and check scripts there. The naming convention for the script is the following:
V{incremental_version_number}__{your_custom_script_name}.sql
So our script for creating a users table has the following name:
V1__create_users_table.sql
SQL Statement Creation
We also need to create an SQL statement to make a MySQL table:

This will create a ‘users’ table in our flyway_db database.
With Flyway, you can create a migration script to populate db with some data. So the following script will add some users to the ‘users’ table.
It’s named: V2__insert_users.sql

When we run our application, the users table will be populated with these five users. And when you review them, you’ll notice that the created At column contains only date value, without hours, minutes, and seconds which is not useful for this type of data. We should change the column type to the one that will better fit our needs. Let’s change it to the TIMESTAMP data type. Flyway will let us do this with ease.
The new script will be the following: V3__change_created_at_data_type.sql

After this script, the users table has the createdAt column that is up to date. It holds the TIMESTAMP of user creation, including hours, minutes, and seconds
Let’s move on
Suppose you change an existing column name for any reason you may have during app development. Of course, you want all entities in your database to have these changes applied. To do this, we create another script.
V4__change_column_name.sql

When the application is launched, it will automatically pick up the newly created script and apply changes to the users table. So now the createdAt column is renamed to created_at.
Adding a new column to the user entity
The app is growing and includes a lot of developed features. At some point, you may decide to add a new column to the user entity. For this, we need to create another script.
V5__add_username_to_users.sql

This script will add a ‘username’ column to all user entities. So now you can create users with a username. However, old users do not have a username, and that’s not a good practice. You may want to fix that and apply some random string using your own pattern. In our case, we just use a random 10 chars length string for username for old users. Flyway will assist us again.
V6__set_default_values_for_username.sql

As you see, it works. All the old users registered before the implementation of our super feature now also receive a random username. Of course, they will be able to change it any time, but the point is that now your app won’t crash because of some NullPointerExceptions due to missing value for the username.
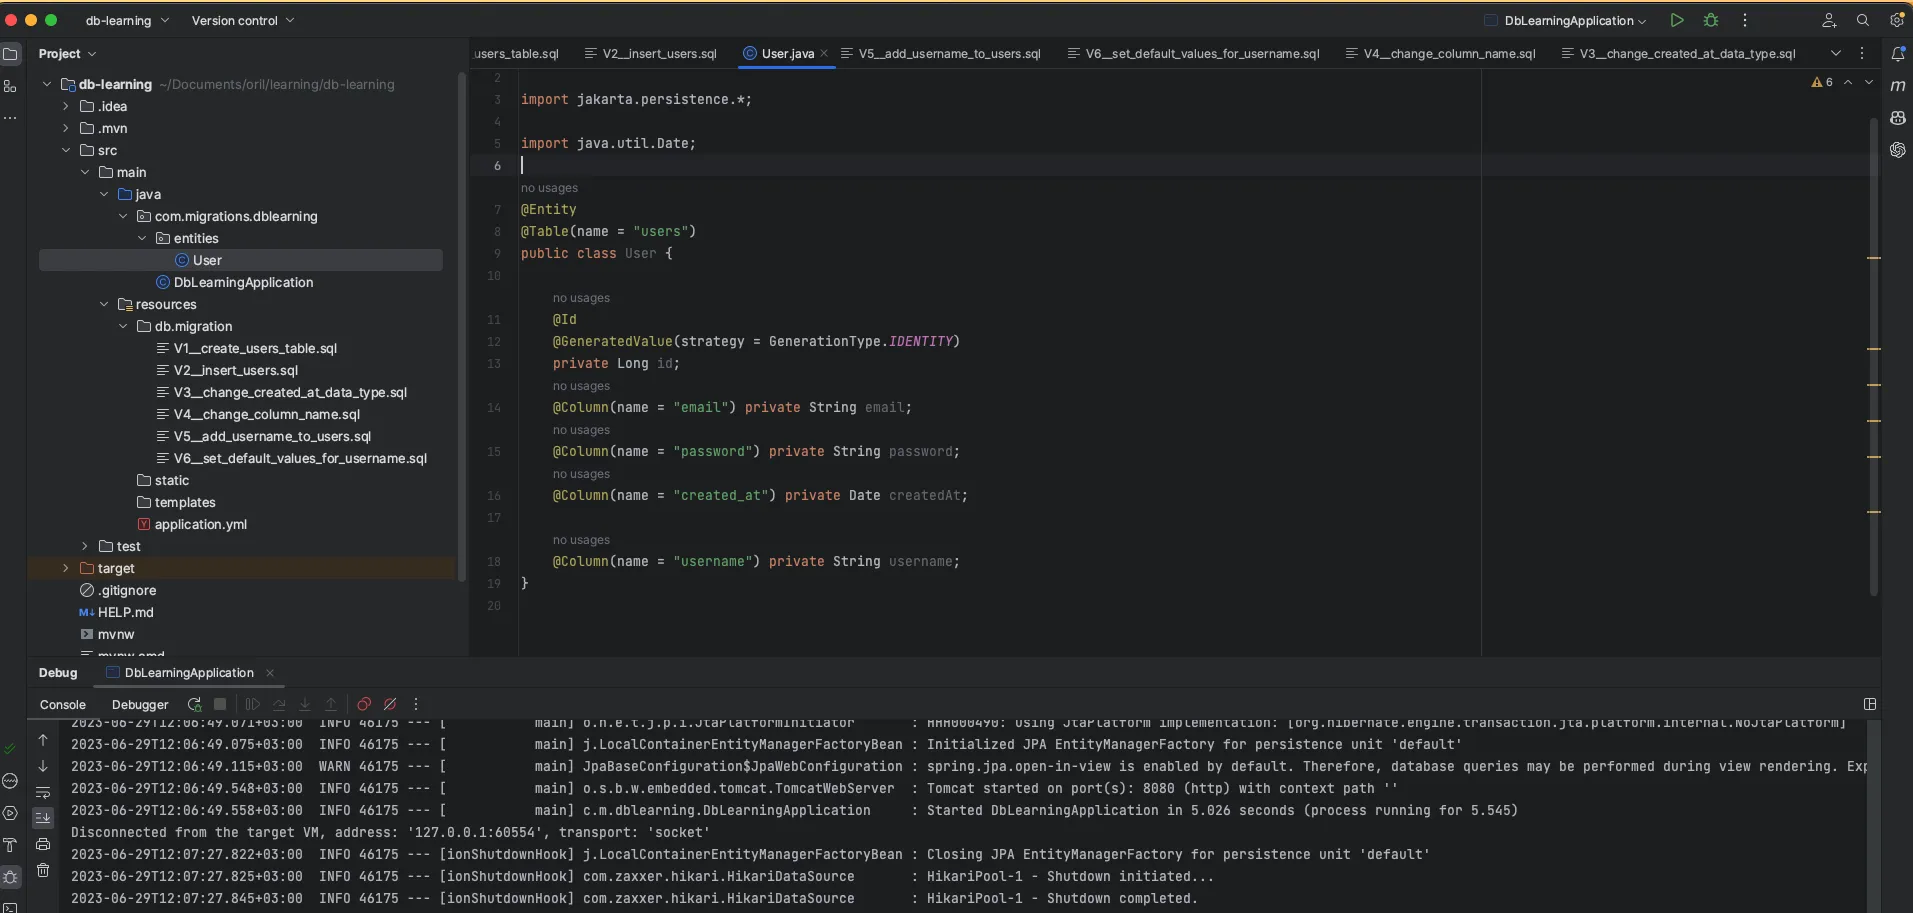
Here is what our project structure looks like:
To sum up
To sum up
Now all the scripts are located in the db/migrations folder and have an incrementing version number at the beginning of their names.
So this is how Flyway works — it allows you to manage any changes you add to your MySQL database over time during app development.
Thank you for reading the guide! I hope it let you better understand the Spring Boot world and the necessity of the Flyway tool for the successful migration of your database.
