Software development is getting more complicated, so every QA team needs to concentrate on boosting test coverage. To achieve this, it’s essential to use a variety of testing types, such as integration testing, system testing, performance testing, and end-to-end testing, depending on the complexity of your software application and requirements.
In case end-to-end testing sounds difficult for you, in this article, we’ll explain how to conduct end-to-end (E2E) testing with the help of Cypress, a front-end testing tool for web applications, and how to make this process easier, more effective, and less expensive.
What is End-to-End Testing?
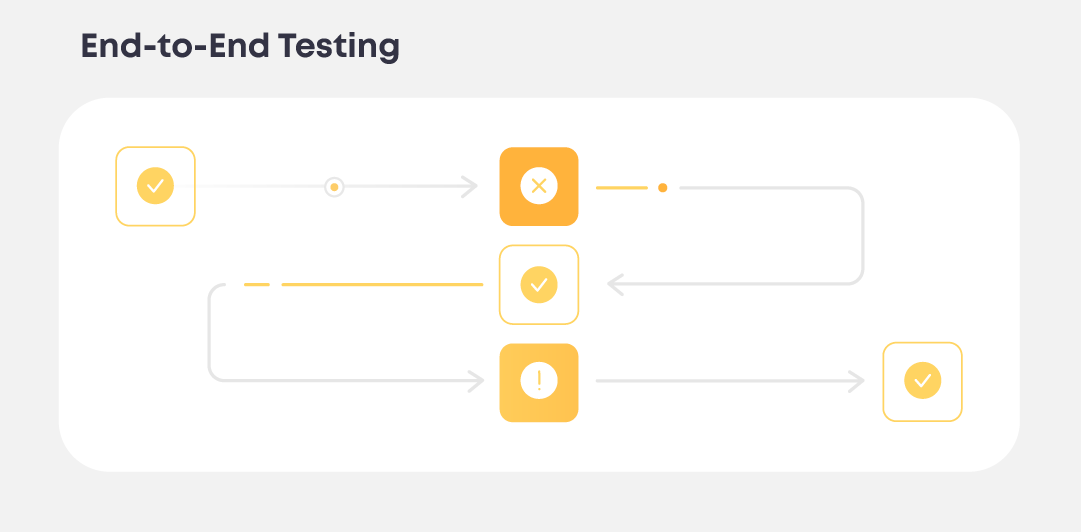
End-to-end (E2E) testing is a comprehensive approach that aims to validate the entire application flow from beginning to end. It involves testing the application’s functionality, performance, and user experience by simulating real-world scenarios. The key point is that this testing approach tests the app’s behavior as a whole rather than each component separately.
In addition, the approach involves multiple components, such as user interfaces, backend systems, databases, and integrations, to make all parts work and function seamlessly together. By running end-to-end testing, QA engineers can identify and address any issues or bottlenecks that may occur throughout the application’s development lifecycle, ensuring the app’s reliability and readiness for deployment.
What is Cypress?
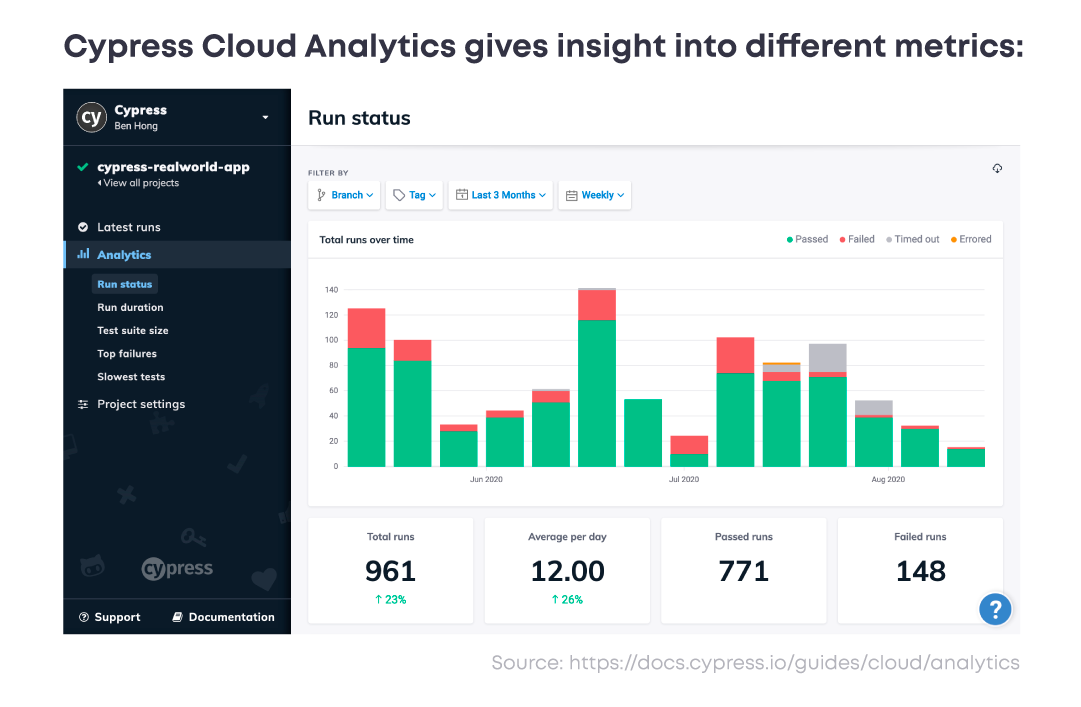
Cypress is a popular, JavaScript-based end-to-end testing framework for web applications. It allows QA engineers to write automated tests that simulate user interactions and verify the functionality of their web applications. Cypress provides a rich set of features and an intuitive API that simplifies creating, running, and debugging tests. Moreover, it offers built-in capabilities for assertions, mocking and stubbing, network traffic control, and real-time reloading.
Cypress comes with several powerful assertion libraries, including the popular Chai library, as well as useful extensions for Sinon and jQuery. One of the key advantages of Cypress is its ability to run tests directly in the browser, giving developers a complete view of their application’s state and facilitating debugging.
What Are the Benefits of Cypress Testing Automation
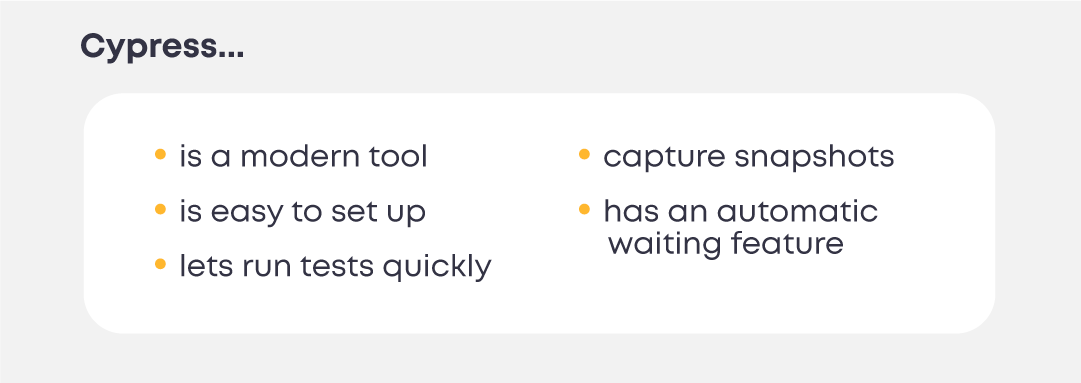
Using the Cypress testing framework offers developers lots of advantages. Let’s look closer at some of them:
Easy setup
Cypress does not require any additional libraries or dependencies to be installed – all the necessary dependencies are already in. As Cypress is built on JavaScript, you can simply download it by executing the command “npm install cypress” in your command prompt.
Fast running
Cypress offers a significant advantage in terms of speed compared to other testing frameworks because it functions as its own browser for running tests.
Automatic waiting
With Cypress, you can benefit from its automatic waiting feature. It’s built into the Cypress framework, which eliminates the need to manually define waits in your tests. Cypress also waits for commands and assertions.
Modern framework
With the shift towards Single Page Application (SPA) frameworks like Angular and React, a specialized testing framework is required. This is where Cypress comes into play, as it is specifically designed to test front-end applications built on modern technologies.
Readable errors
Error messages in Cypress are written in plain English, which makes them easy to understand even for non-technical people. In addition, the framework visually captures bugs, providing a detailed explanation of what is wrong with the application. This streamlined approach to identifying bugs enables faster and more efficient issue resolution.
Limitations of Cypress
However, despite all the benefits Cypress provides, it also has some limitations that you should be aware of, such as:
- Cypress currently provides support only for Firefox and Chromium-based browsers but not for other browsers such as Safari and Internet Explorer.
- Cypress testing doesn’t let running tests on multiple tabs simultaneously.
- The framework has limited programming language support for writing tests (JavaScript).
- Cypress doesn’t offer native support (the ability to handle a certain feature without requiring extra plugins or software) for testing web applications.
- There is no built-in support for parallel testing.
How to get started with Cypress
Let’s install Cypress via npm/yarn:
- cd /your/project/path
- npm install cypress –save-dev
- yarn add cypress –dev
Then open the app:
- npx cypress open
- yarn run cypress open
The LaunchPad
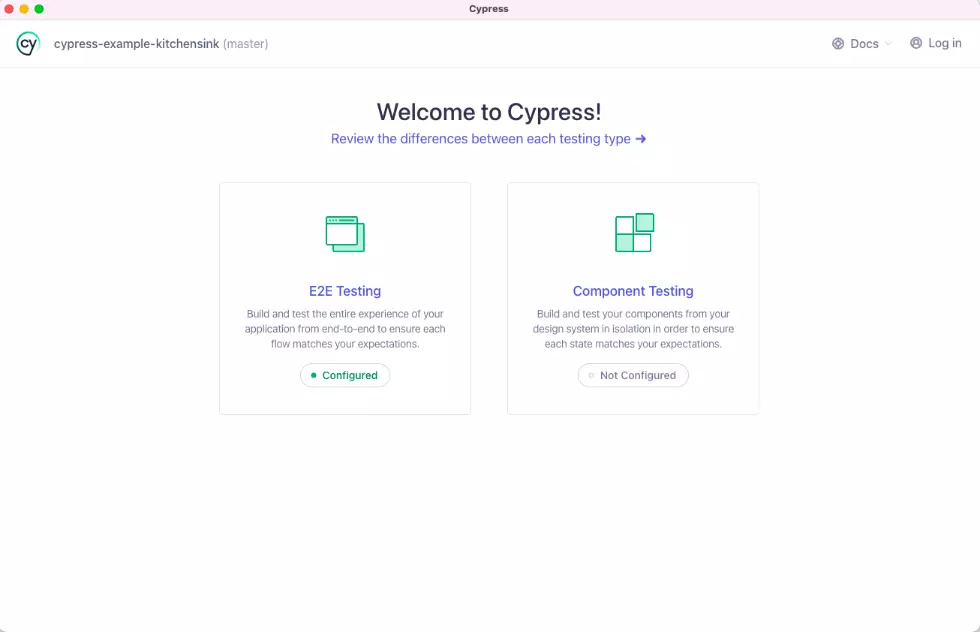
The purpose of this Launchpad is to assist you in making decisions and configuring the necessary tasks before you begin writing your initial test. If you are new to Cypress, it will guide you through the following steps in a logical order.
Choosing a testing type
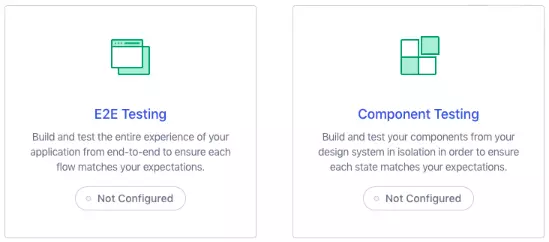
The Launchpad provides you with the initial decision that creates a strategy for your testing. It depends on what type of testing you’d like to perform: E2E testing, where you simulate the entire application and navigate through pages to test them, or component testing, where you isolate and test individual components within your app. We will focus on the E2E testing part.
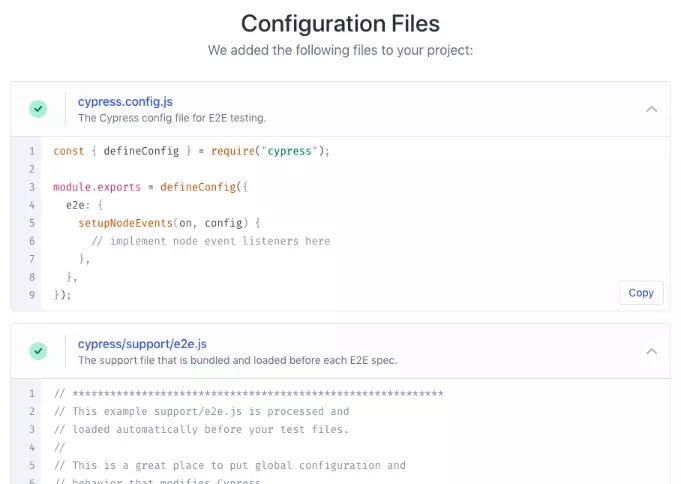
In the next step, the Launchpad will generate the necessary configuration files based on your selected testing type. The changes made will be displayed, allowing you to review them. If you’d like more details about the generated configuration, you can refer to the Cypress configuration reference. In order to proceed, simply scroll down and click Continue.
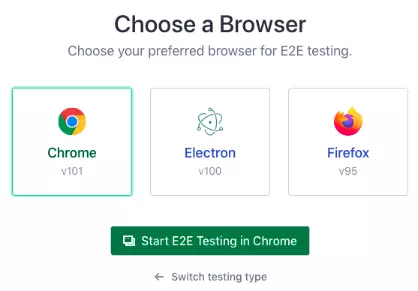
Finally, you’ll see a list of compatible browsers that Cypress has detected on your system. If you want to learn more about your browser options, refer to this guide on launching browsers. Remember that you can switch browsers whenever you want. Now, click the Start button to begin your testing journey!
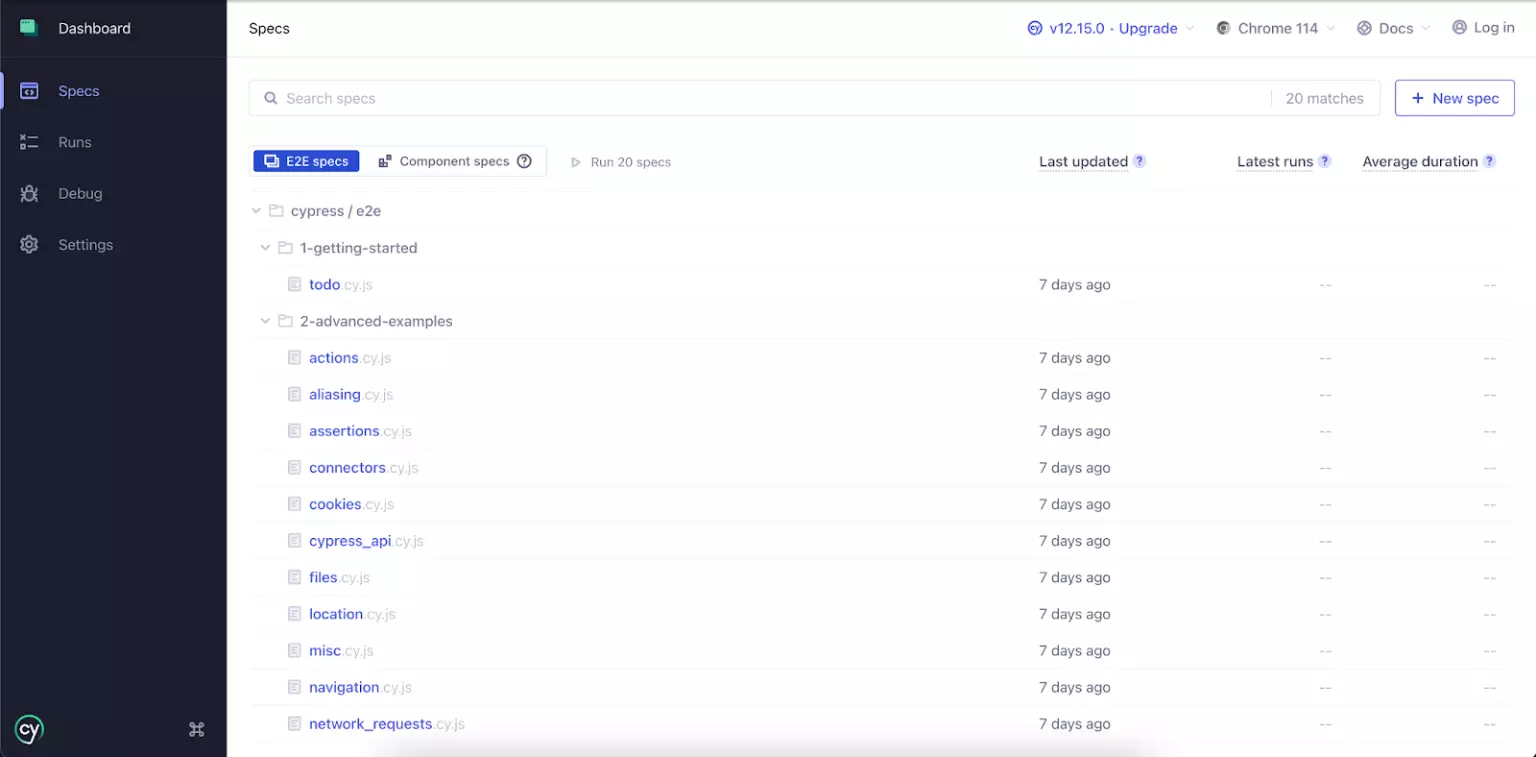
On the Dashboard, you can see a list of specs. Create new specs and run them. Now let’s conduct some tests
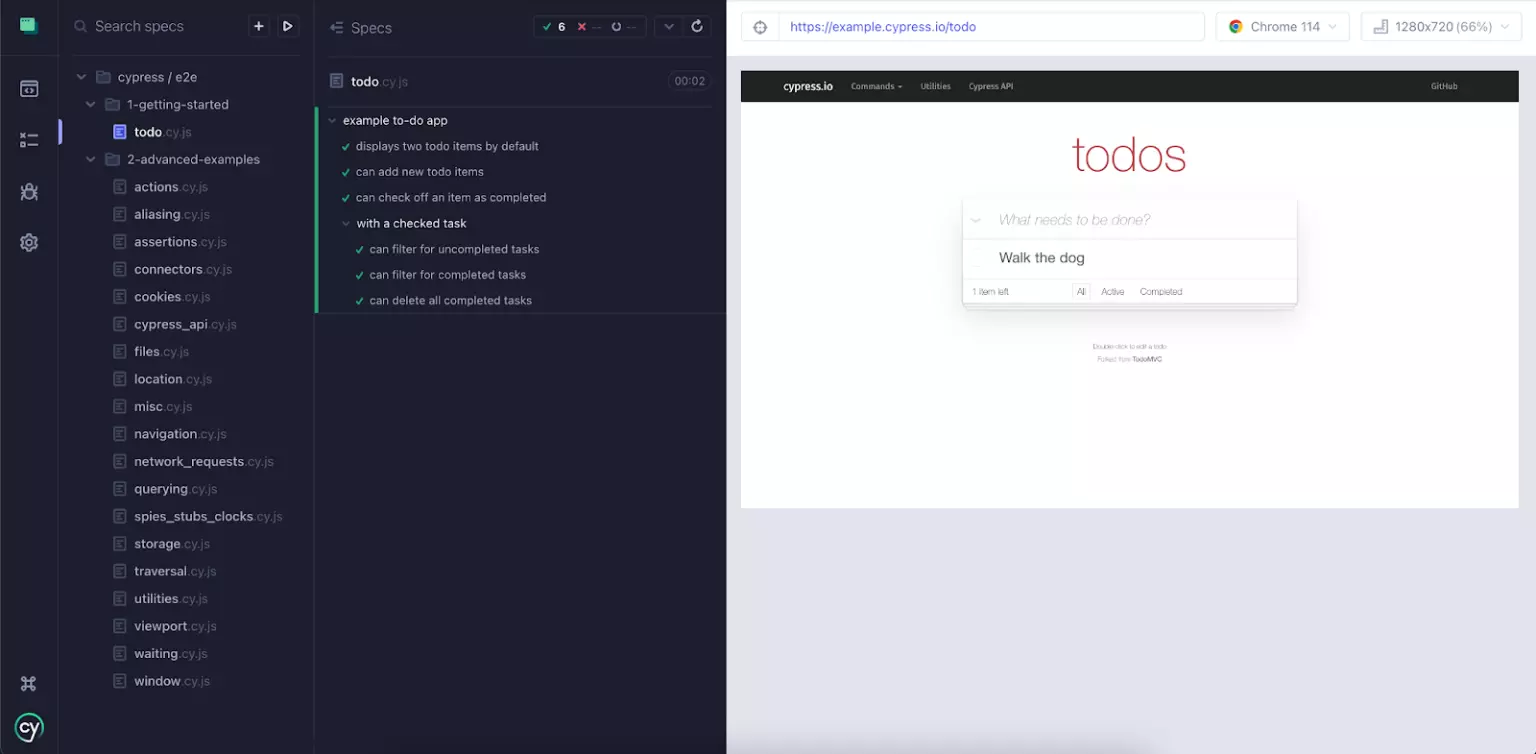
Here we can see a list of tests, counters of passed/failed tests, and the start/stop button. There is also the preview window with the current URL, zoom mode, browser selector, and preview itself.
Time Travel
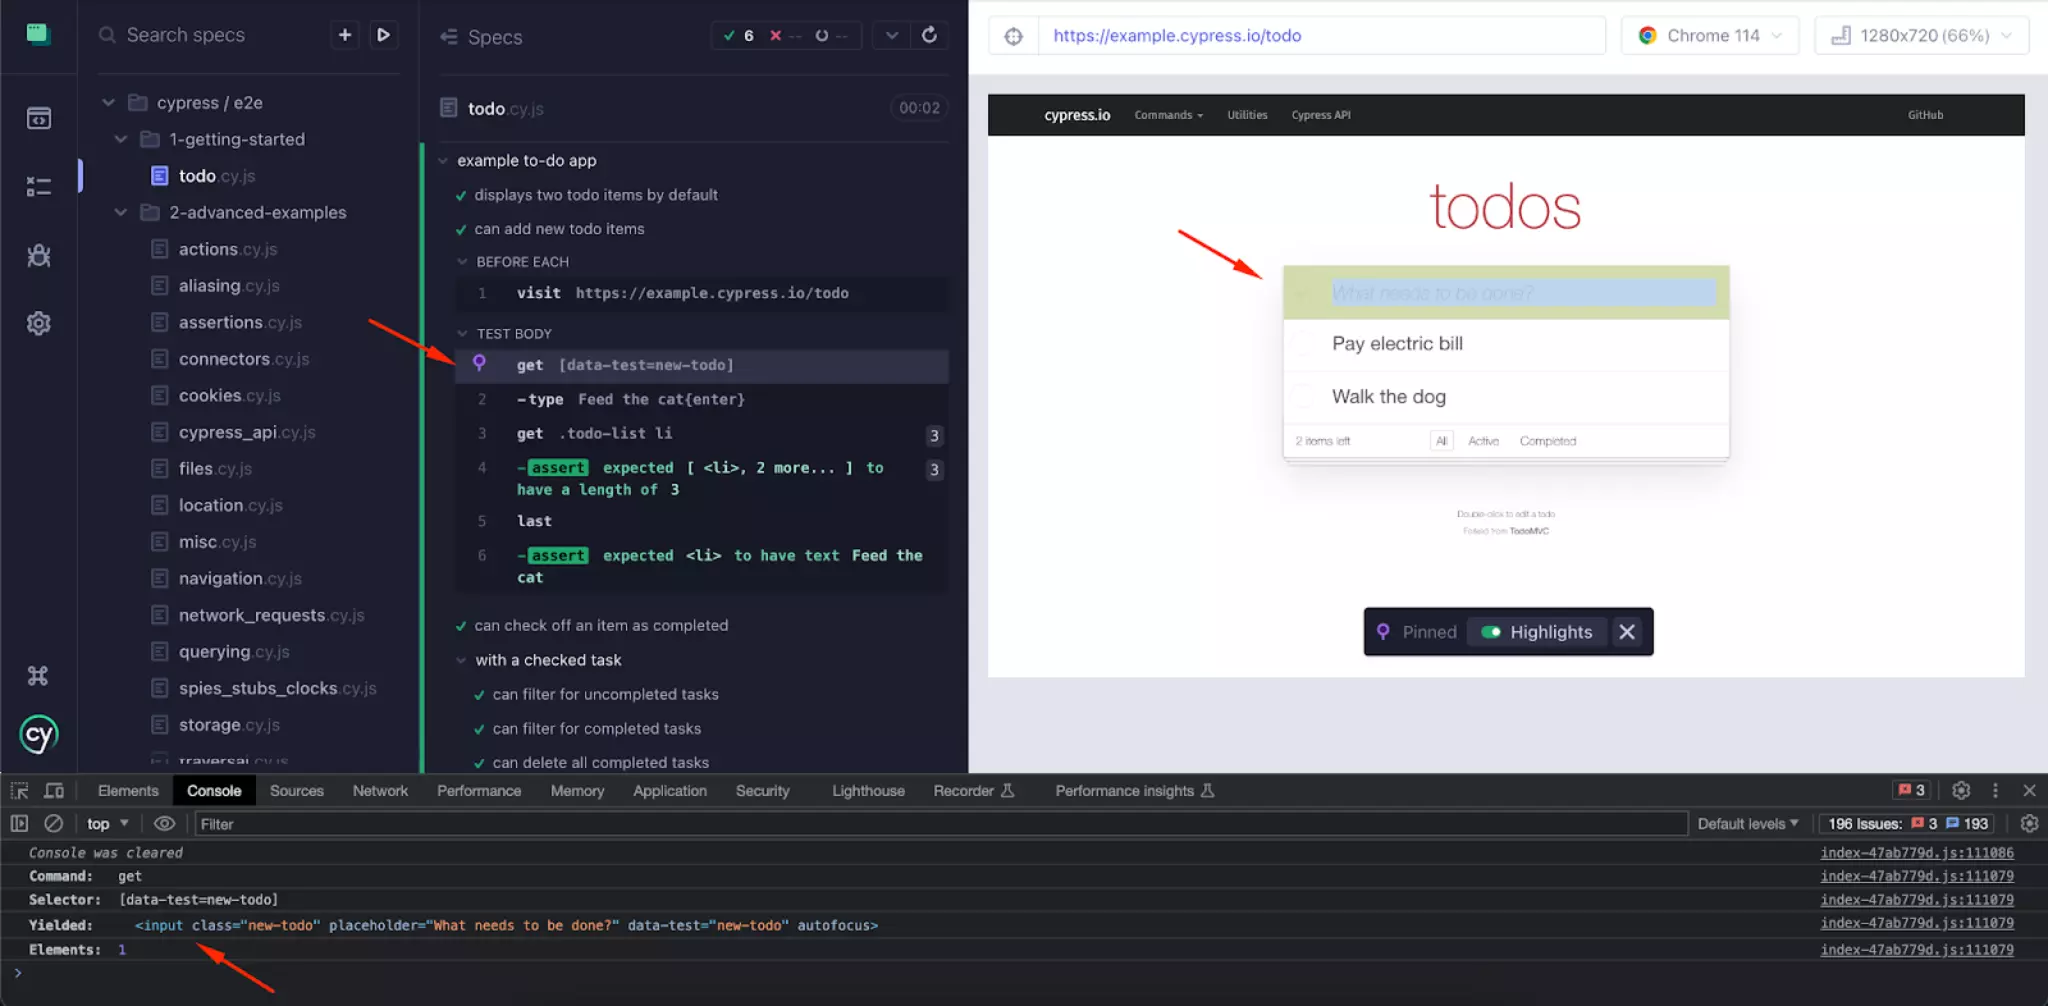
We can use the Time Travel feature of Cypress to go through the test line by line. When you click, the line corresponding element will be highlighted in the preview window and printed in the Dev Tools Console with more details. It can also be done with HTTP Requests, assertions, navigation, etc.
Errors Preview
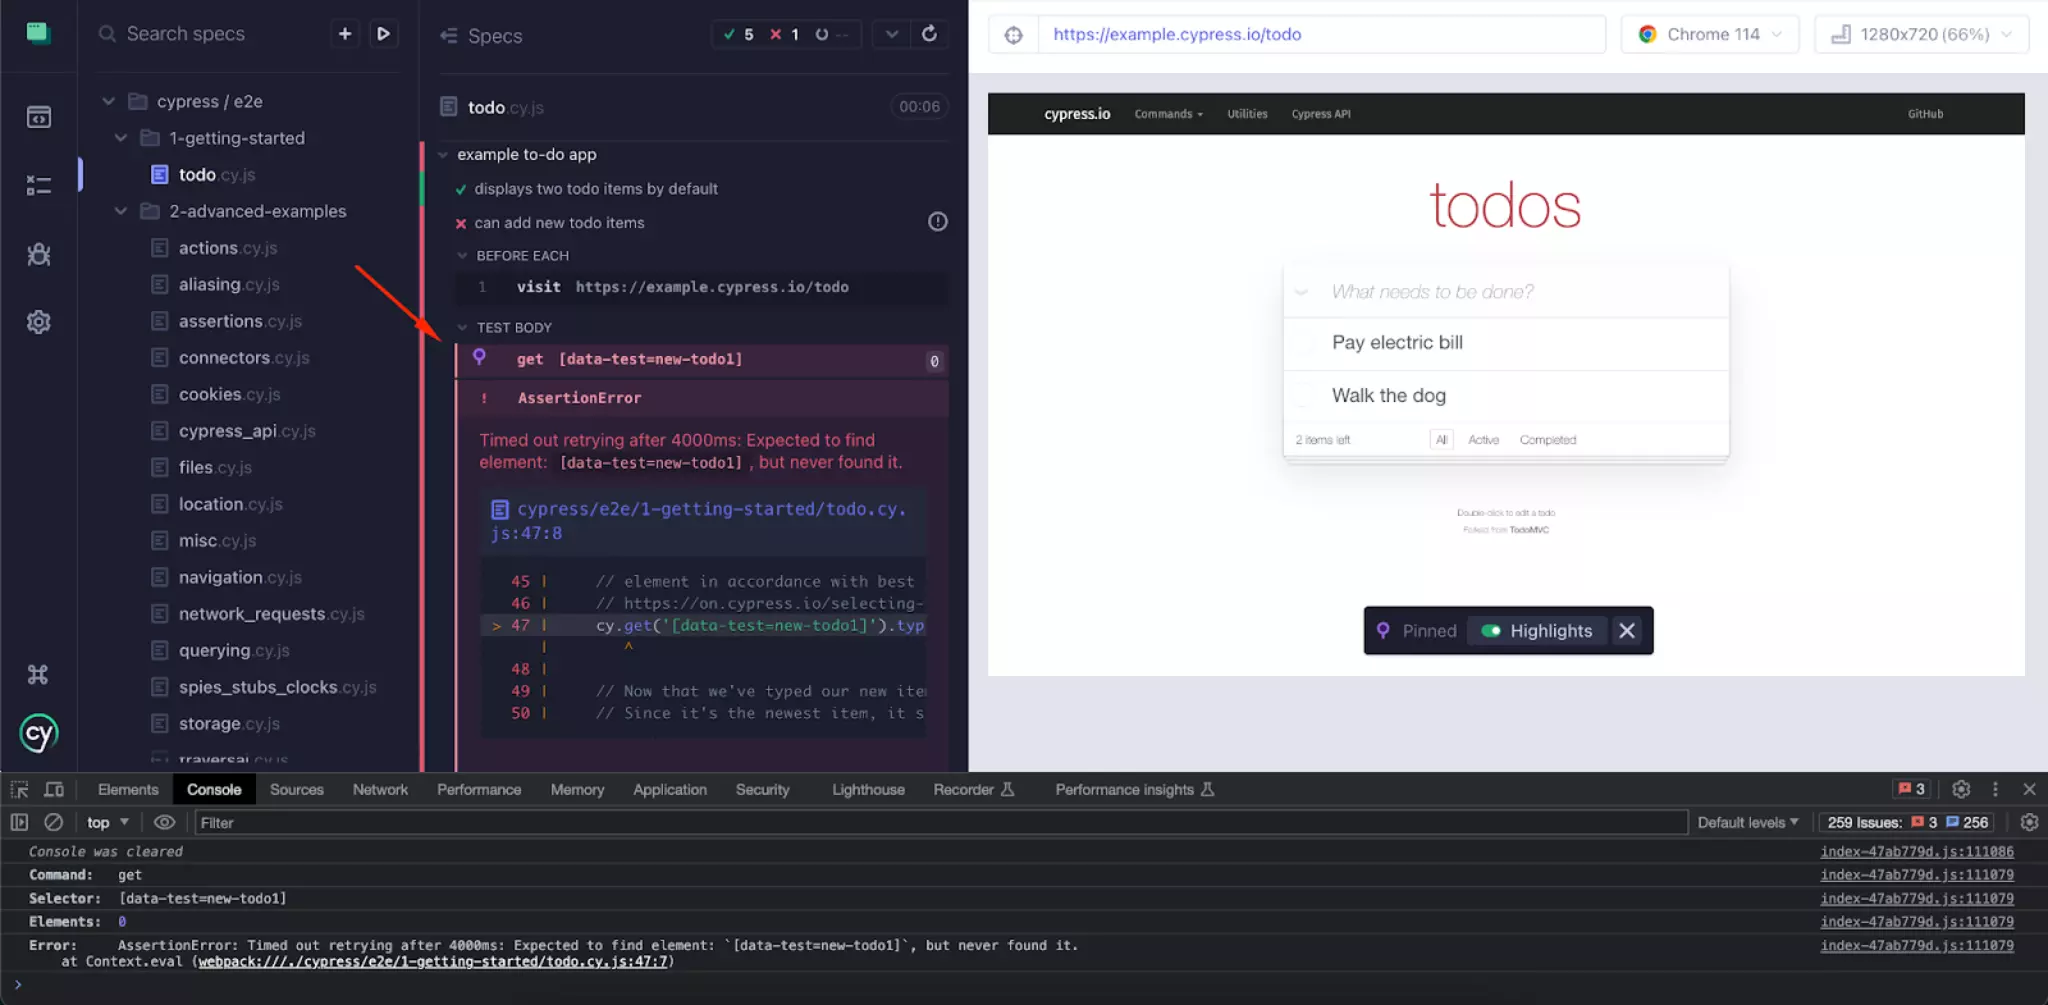
If there is an error in the test, Cypress will show the error message and the line where it occurs.
Run Cypress in the terminal
- npx cypress run
- yarn cypress run
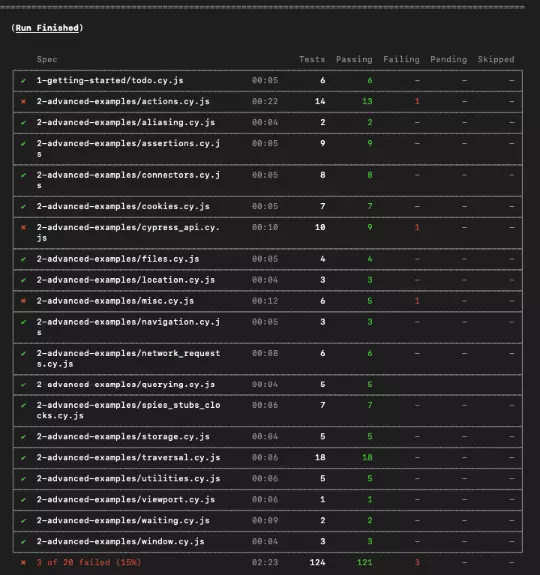
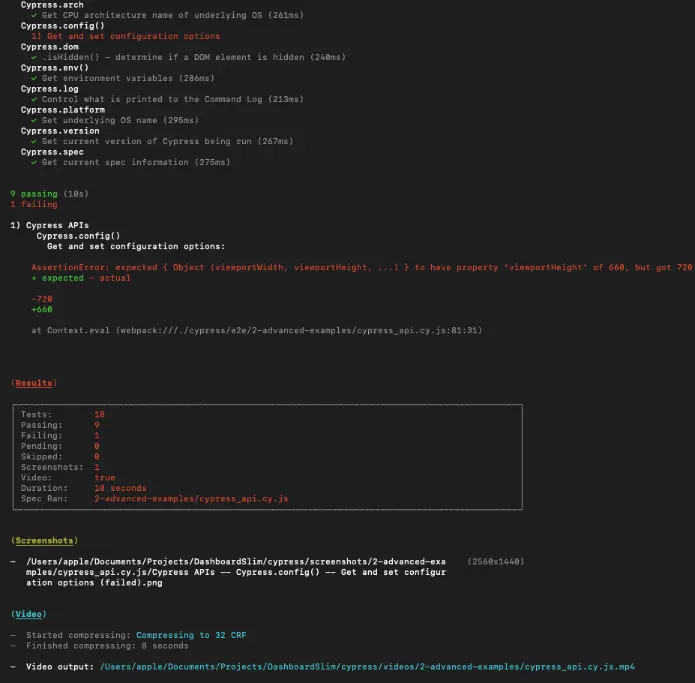
Making a Video/Screenshot of a Failed Test
Cypress continuously records video by default during Cypress run. Video recording can be turned off by updating the cypress.json configuration file.
Automatic Waiting
Testing web apps comes with async events like requests, opening modals, state changes, etc. So we need to wait until the event is finished to perform other actions or do an assertion. One option is to use cy.wait() operator (but it’s not the best one).
When you use commands like cy.get(), cy.contains(), or some other, Cypress, by default, waits 4 seconds before executing them (if needed). This feature is helpful because you don’t need to write wait commands in all async places by yourself.
You can change the defaultCommandTimeout property in the cypress.json file. It can accept milliseconds. However, when you deal with API requests, it’s better to use HTTP interceptors.

You also can wait for multiple requests.

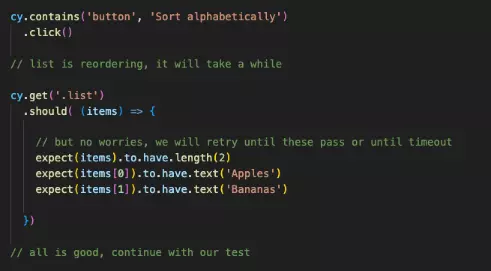
Use .should() command. You can wait for various conditions by using the callback function within the .should() command. Cypress’s built-in retry logic will continuously attempt to execute the function until it passes. For instance, you can wait until all the elements on a page have the correct text before proceeding. This approach allows you to wait for a list to be reordered instead of waiting for a specific duration.
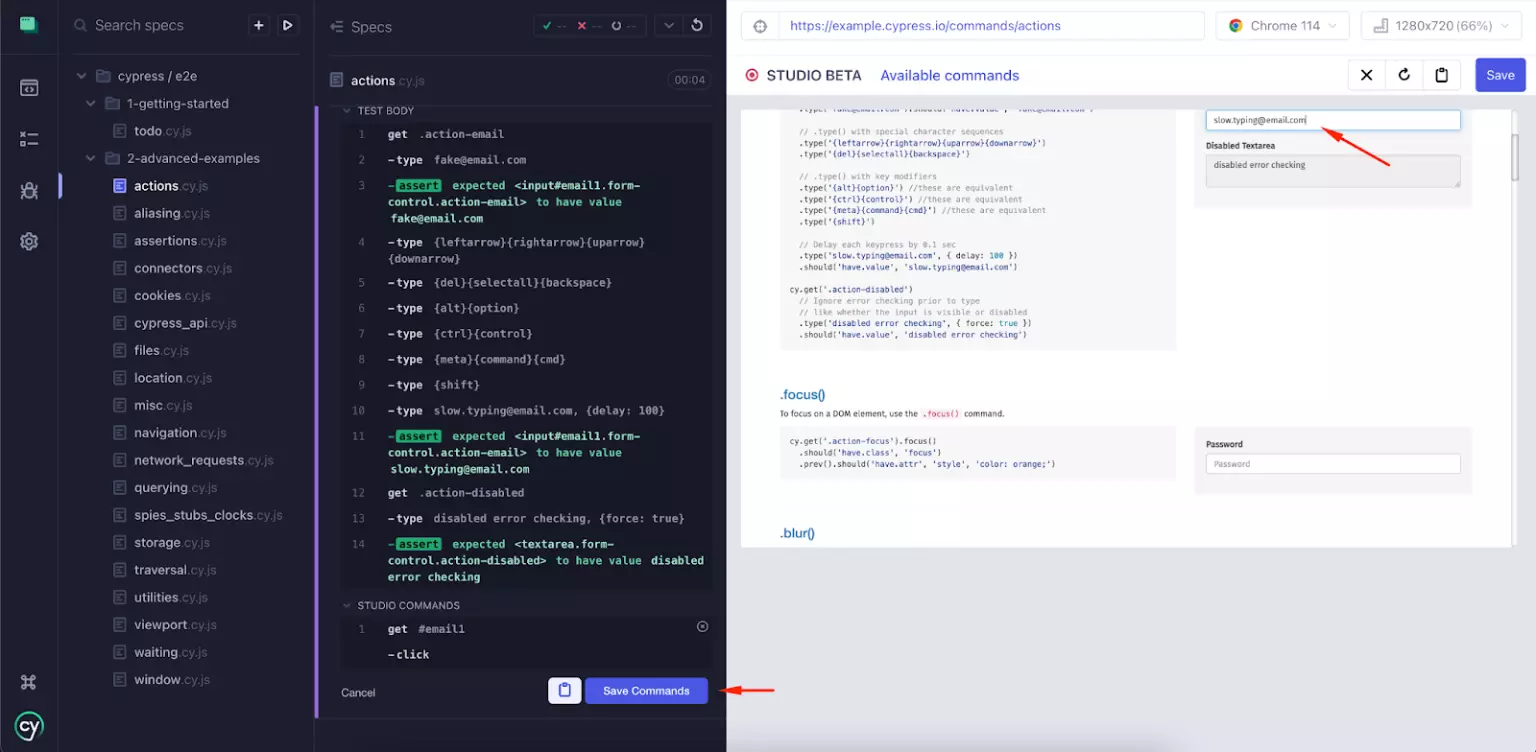
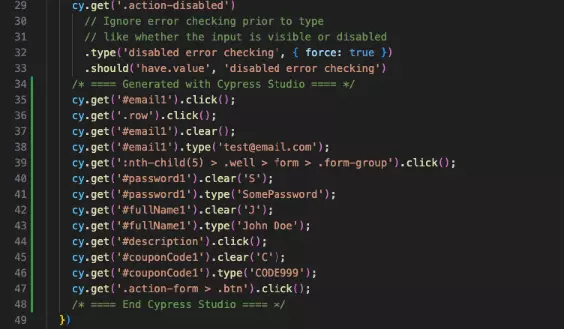
Cypress Studio
Another great feature of Cypress is the ability to record interactions with applications to facilitate testing. These commands are supported by .click(), .type(), .check(), .uncheck(), and .select(). To activate the recording feature, you need to set the parameter experimentalStudio: true in the cypress.js file. Then you’ll see the magic wand button near the test. Press it, and now you can perform actions that will be recorded.
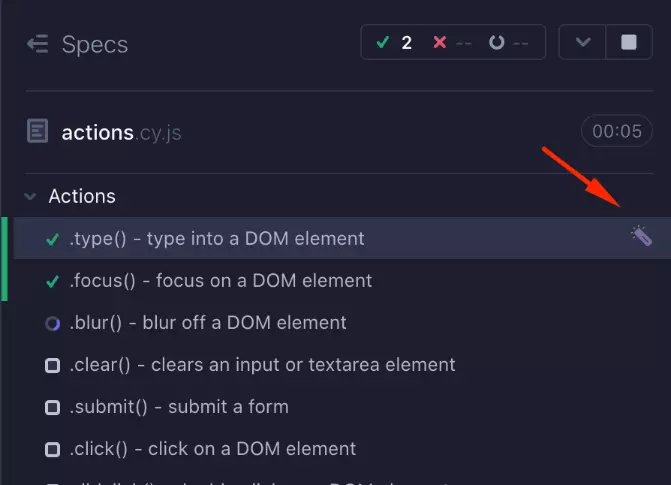
When you finish, press the Save button to save them in the test.
Cypress Deploy Options
There are a few options to host your Cypress tests:
Cypress Cloud that is supported by the Cypress team and comes at a cost.
An open-source project called sorry-cypress, which is free of charge (Docker Image).
To Sum Up
Cypress is a game-changing JS tool that is easy to use and helpful for developers and QA engineers in the E2E testing of modern web applications. It has robust features that make writing tests fun and easy. But as with any other framework, it has a few limitations a developer should be prepared for to reduce potential testing bottlenecks and barriers.
If you are ready to give it a successful try, make sure you have a reliable tool in place and a team to rely on. Good luck!
