Have you ever faced with challenging task of providing service to your users in their native language? If so — then you may be interested in finding a good approach of doing this.
This guide will show you how to add internationalization to your Spring Boot application in just a couple of straightforward steps. And to handle locales in one single place. If you are not a tech person but need a solution for your multi-language app community, here is a shortcut for you – custom software product development services.
Nice to see you here guys! Here we will speak about adding internationalization to your existing Spring Boot project. The question of application internationalization becomes not trivial when you are working on the project that should serve users from different countries with different languages. In this cases you will need to provide your user from China with response message in Chinese, and user from France with message in French, so everyone would feel comfortable with your application. So let’s take a look how to implement this in Spring Boot.
Spring Initializer
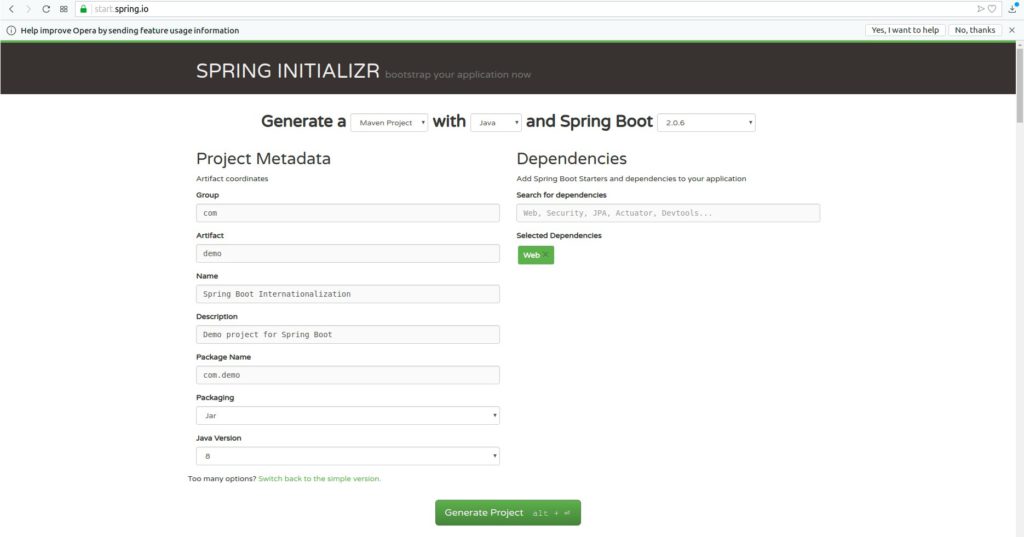
Let’s create project using Spring Initializer that makes project creation much easier.

Then click download project, unzip it and open with your favorite Idea. I’ll use IntelliJ IDEA.
First thing what I’ll create is our CustomLocaleResolver class that will be responsible for defining user’s locale.
@Configuration
public class CustomLocaleResolver
             extends AcceptHeaderLocaleResolver
             implements WebMvcConfigurer {

   List<Locale> LOCALES = Arrays.asList(
         new Locale("en"),
         new Locale("fr"));

   @Override
   public Locale resolveLocale(HttpServletRequest request) {
      String headerLang = request.getHeader("Accept-Language");
      return headerLang == null || headerLang.isEmpty()
            ? Locale.getDefault()
            : Locale.lookup(Locale.LanguageRange.parse(headerLang), LOCALES);
   }

   @Bean
   public ResourceBundleMessageSource messageSource() {
      ResourceBundleMessageSource rs = new ResourceBundleMessageSource();
      rs.setBasename("messages");
      rs.setDefaultEncoding("UTF-8");
      rs.setUseCodeAsDefaultMessage(true);
      return rs;
   }
}
So, here we told that we have 2 locales supported in the project: en and fr. The locale should be passed in the header called “Accept-Language”. So, if the header is present and it is not empty, we will use locale from it, otherwise — we’ll use default locale, which is en.
Creating a Class
Next let’s create our class that will be responsible for choosing right message according to specified locale. I’ll call it Translator, and it will have one single method, that will accept message code that should be translated.
@Component
public class Translator {

   private static ResourceBundleMessageSource messageSource;

   @Autowired
   Translator(ResourceBundleMessageSource messageSource) {
      Translator.messageSource = messageSource;
   }

   public static String toLocale(String msgCode) {
      Locale locale = LocaleContextHolder.getLocale();
      return messageSource.getMessage(msg, null, locale);
   }
}
As you can see the messageSource.getMessage(…) accepts parameter “msg”. But this is not exactly the message that should be translated. It is just message code. For now we don’t have any message codes, so let’s create them.
Under the resources folder, create two files: messages.properties and messages_fr.properties.
Here is the content of messages.properties:
hello=Hello World!
welcome=Welcome to this guide!
And here is content of messages_fr.properties:
hello=Bonjour le Monde!
welcome=Bienvenue dans ce guide!
So, here we already can see our message codes. They are “hello” and “welcome”. And now you can understand what code should we pass to toLocale(String msgCode) method in order to get appropriate message according to user’s locale.
And probably the last step is to create simple controller, let’s name it MainController that will have just one endpoint, that will accept message code, which we’ll pass into the HTTP request as a request parameter.
@RestController
@RequestMapping(value = "/api")
public class MainController {

   @GetMapping()
   public String getMessage(@RequestParam("msg") String msg) {
      return Translator.toLocale(msg);
   }
}
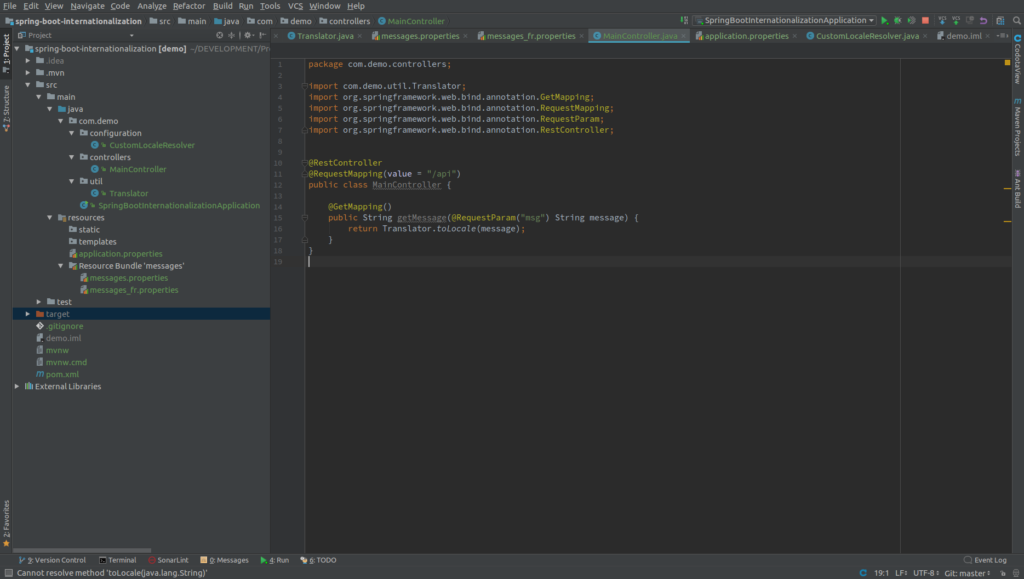
So now, let’s take a look at our project structure.

And make simple requests using CURL:


So as you see, responses are different based on value of “Accept-Language” header passed in the request. This way, we don’t need to check what was passed in the request in each controller method, and then pass it further to service layers. We now can do this in one single place, which is CustomLocaleResolver class.
Conclusion
Thank you for your time. Hope you got interesting stuff for you, and enjoyed the reading. As always you can find code sample on my GitHub account.


